Setting up a basic uBuntu 16.04 Docker host VM

I’ve used this process multiple times to create quick Docker host VMs running on VMware Workstation in my home lab. It is important to note that although I’m using VMware Workstation, the type 2 hypervisor you use here is fairly unimportant. You could just as well use VirtualBox, or Fusion for this purpose.

Download the latest uBuntu 16.04 LTS server ISO from: http://www.ubuntu.com/download/server (I believe 16.04 comes only in 64-bit, but make sure its 64-bit)

Create a new Virtual Machine for your Docker host using your type 2 hypervisor software (Workstation in my case).

Give the VM following hardware/spec:

  • OS – Linux/uBuntu 64bit
  • 1 or 2 vCPUs
  • 512 MB RAM
  • 9GB disk
  • 2 x vNICs (1st is set to the default NAT option and the 2nd should be set to Host-only)

Here is my VM’s setup:

vm-hardware-docker-host

Attach the uBuntu ISO and start the VM up.

Install a standard uBuntu OS using the text based installer, and just be sure to also install OpenSSH server when prompted for features to install. After the install completes, reboot, login with your user account you created during install, run ‘ifconfig’ to check the assigned IP address, and then use your favourite SSH client to connect to that IP. Using a PuTTy session will just make copy/pasting commands into your uBuntu VM easier.

Now you’ll install docker – the package includes both the docker server and client.


Run the commands above in sequence, and after the apt-get install docker-engine at the end, run ‘sudo service docker status’ to check that docker is running. You should see it listed as Active (running)

● docker.service – Docker Application Container Engine
Loaded: loaded (/lib/systemd/system/docker.service; enabled; vendor preset: enabled)
Active: active (running) since Wed 2016-07-06 21:20:39 BST; 2h 0min ago

Run a quick ‘docker info’ command to ensure that you get information back from Docker and that everything looks OK.

docker-info

Installing and registering Balsamiq Mockups for a Terminal Server (Remote Desktop Server) environment


A bit of a specialised how-to here, but this is the process I did to allow this Adobe Air application to run on a Terminal Server (now known as Remote Desktop Session Host Server) environment for multiple users. The issue with just installing it for all users to start with, is that the licensing information that you register does not apply to all users. This is because license information is stored in each single user’s local profile / Documents (therefore is not applicable to all users). Here is the process I did to install the software and allow all users with access to the software to run it in licensed mode. (As well as a quick section on creating a security group to restrict access to the software based on group membership).


1. Install Mockups using terminal services install mode from the command line.

change user /install

MockupsForDesktop.exe -silent -desktopShortcut -programMenu -location "C:\Program files" -allowDownload

– Run the application from the start menu, then exit. Now use the command line to set the server back to execute mode.

change user /execute

2. Navigate to C:\Program Files\Balsamiq Mockups

– Create a new batch file (for example RegisterStartBalsamiqMockups.bat) in this folder and enter the following as content:

"Balsamiq Mockups.exe" register "Your registered company name" yourlonglicensekeynumber

– Save this batch file and close it.

– Now open the Local Profiles Folder for the terminal server, and navigate to \All Users\Start Menu\Programs

– Right click and drag your batch file into your \All Users\Start Menu\Programs folder and select to create a new shortcut.

– Right click your shortcut and change the icon to use the Icon from the Balsamiq Mockups.exe if you wish to make it look better.

– Also change the “Run” parameter to “Minimized” in the shortcut properties window and then OK this.

– Rename the shortcut to something user friendly, then remove the actual Balsamiq Mockups shortcut that the silent installer put in there earlier.


Now login with a normal Terminal Server user, and they should have the new shortcut file available in the start menu. Ensure they use this to start the application. It will register the license key each time they start the application, but it at least provides a way to automatically register the application for any user running the software.

Finally, ensure you set up a security group in Active Directory called “Balsamiq Mockups Users” and add only the users that are licensed for the software to this security group as members. Right-click the executable in C:\Program Files\Balsamiq Mockups for the application, go to properties, security, then remove the “Domain Users” or “All Users” groups from this executable (Effectively preventing them from running it). Add the “Balsamiq Mockups Users” security group in the place of the domain users group, and allow Read and Read & Execute permissions.

Now only the members of this security group (licensed for the software) will be able to run the software.

Hope that helps those of you looking to get this done. While this may not be a very general instruction set or how-to, some of the above principles can be used elsewhere – for example the security group method can be used to restrict access to certain applications within your organization for specific users.


Creating Primary and Secondary Domain Controllers (Windows 2003 Server)

I was creating a new Domain the other day for testing purposes and thought I would document the process as I went along to put a short tutorial up over here.

This is how to create a Primary Domain Controller (Windows Server 2003) as well as a Secondary DC to act as a backup. I will not be covering FSMO roles or changing of FSMO roles in this tutorial however. The how-to assumes that you have two freshly installed Windows 2003 Servers.

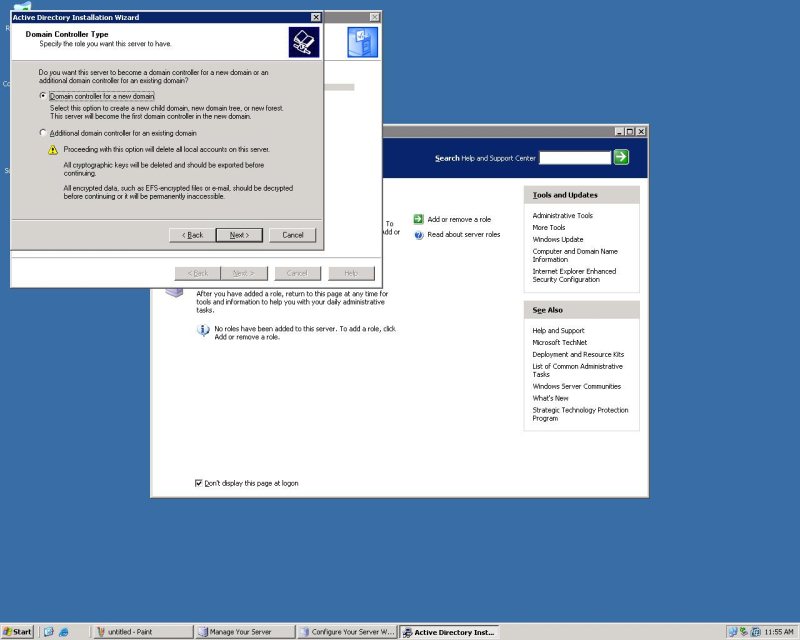
1. Create your first DC. On your first freshly installed Windows 2003 Server machine, go to Start->Run, then type “dcpromo” then hit enter. Alternatively you can go to the “Manage your server” wizard and add a new Role of “Domain Controller (Active Directory)”. After running dcpromo, click Next till you get to the “Domain Controller Type” page. Here we will select “Domain controller for new domain”.

2. Next we select “Domain in a new forest”.

3. You can now enter your full DNS name for the new domain. I used “shogan.local”. Don’t use your web domain here as this is an “internal domain name”. Use something like “yourcompanyname.local”.

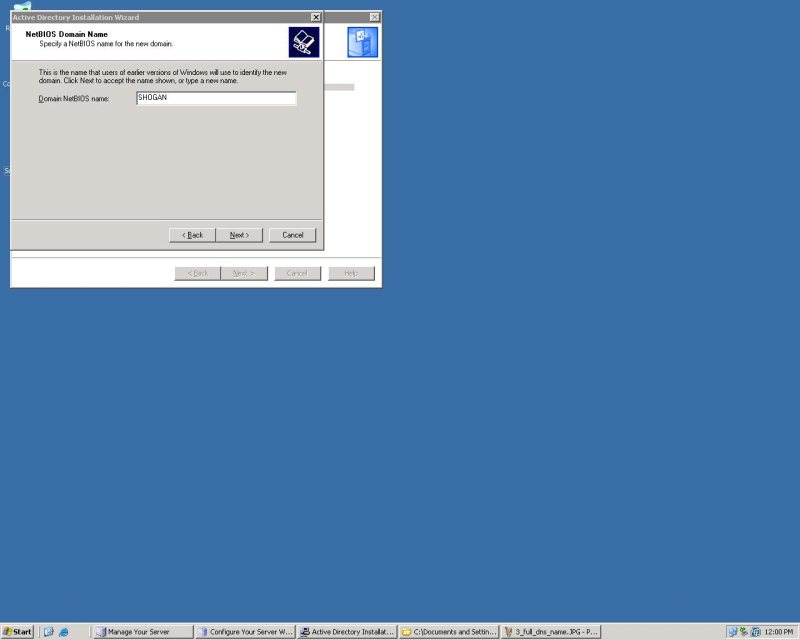
4. For the netbios name, leave as default. It should just be a shortened version of your domain specified in step 3. I believe this to help with compatibility when NT, 95, 98 machines are looking at a Windows 2000 or higher domain.

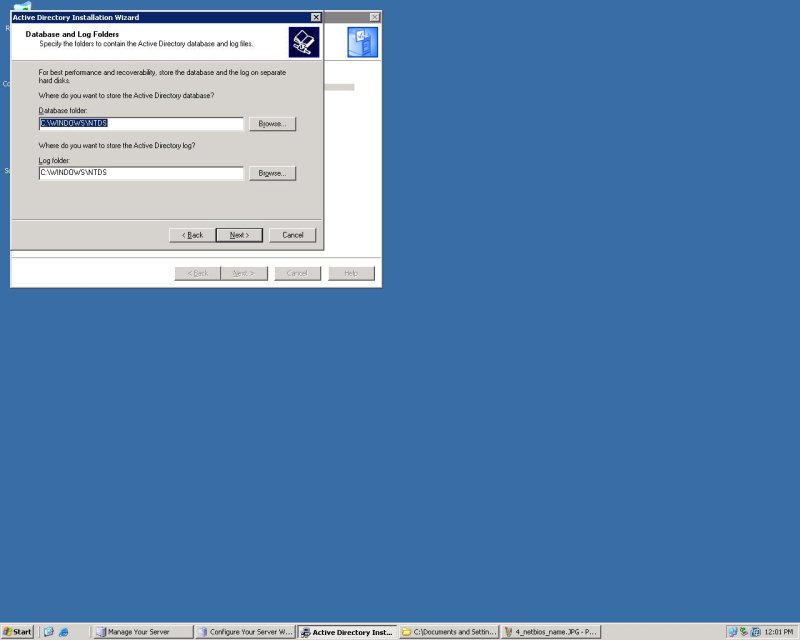
5. Next you can specify the location of your database and log folders. I usually leave mine in their default location.

6. Same for the Shared System Volume folder. I leave mine as default (C:\WINDOWS\SYSVOL).

7. Next the wizard will check to see if you have DNS installed on this machine. If not, select the second option “Install and Configure the DNS server on this computer”. This is the easiest option and the installation will set DNS up for you.

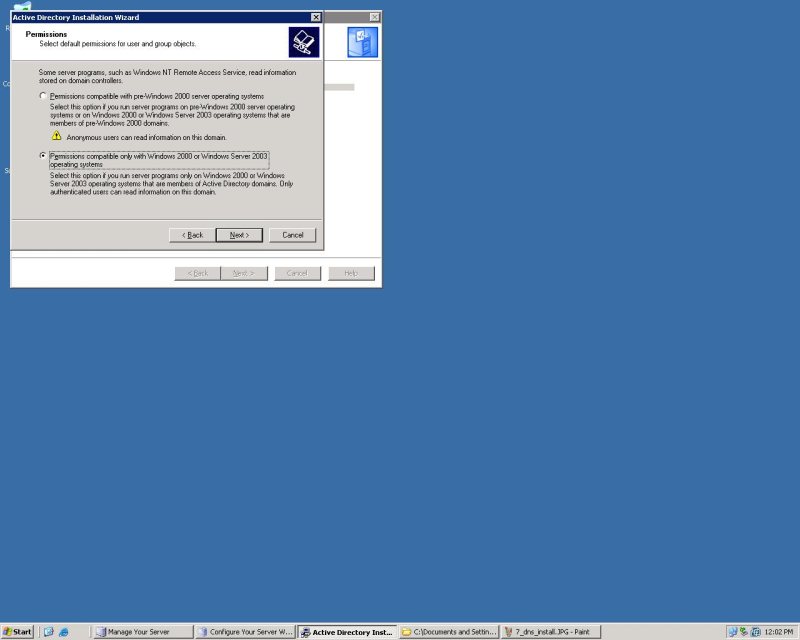
8. The next screen deals with compatibility. I selected the second option here (Windows 2000 and 2003) as I won’t have any other servers below Windows 2000 or 2003 on this particular domain.

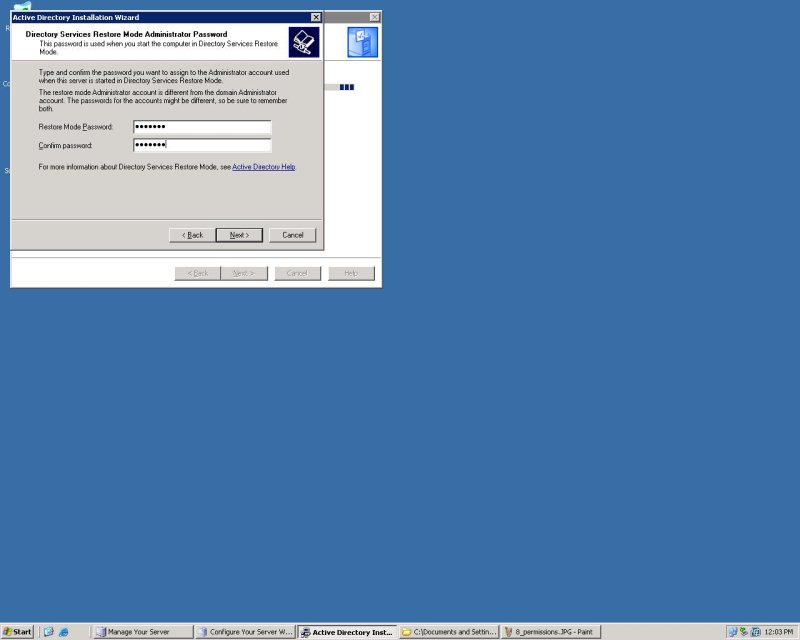
9. Enter your Directory Services restore mode password on the next screen and keep this safe.

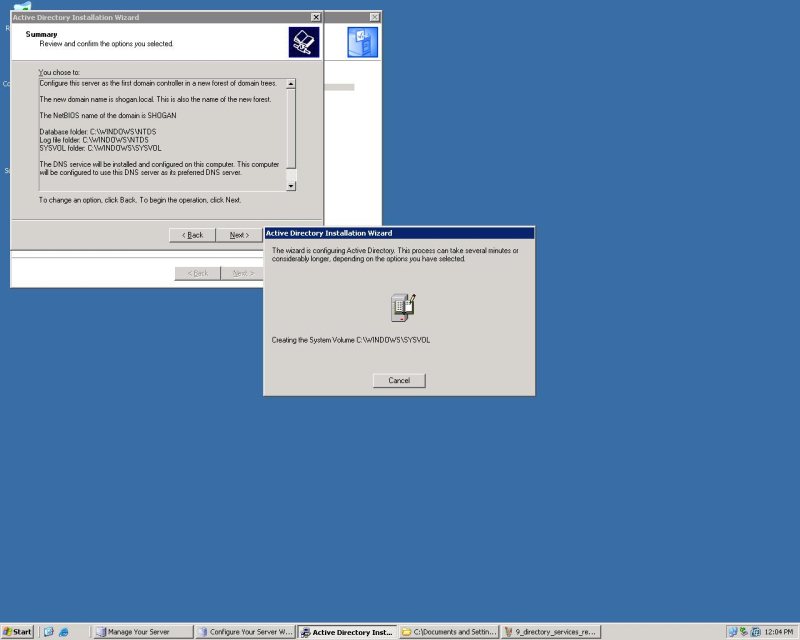
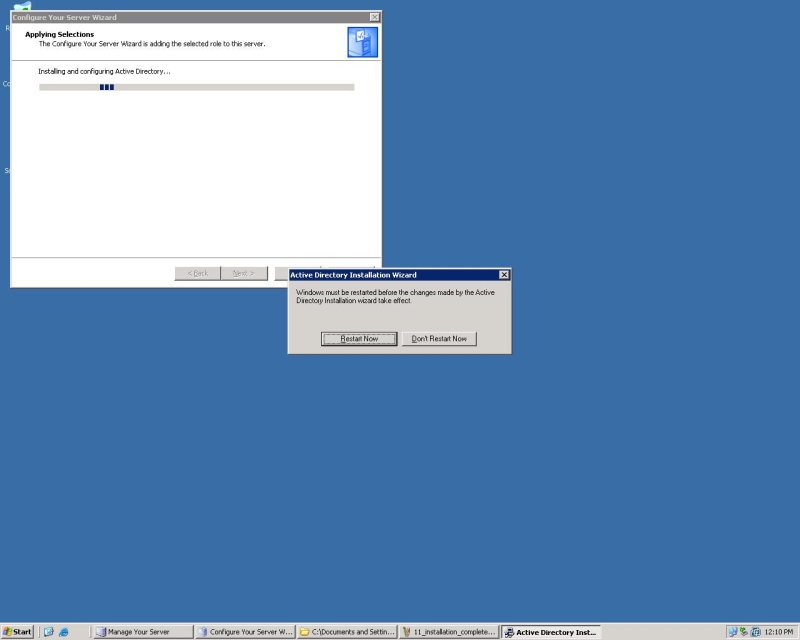
10. Continue the wizard and the installation will begin.

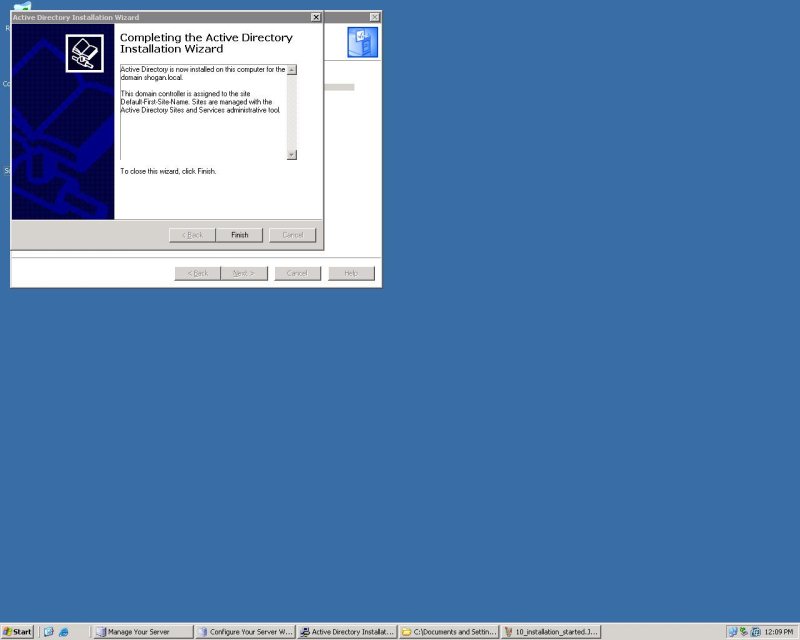
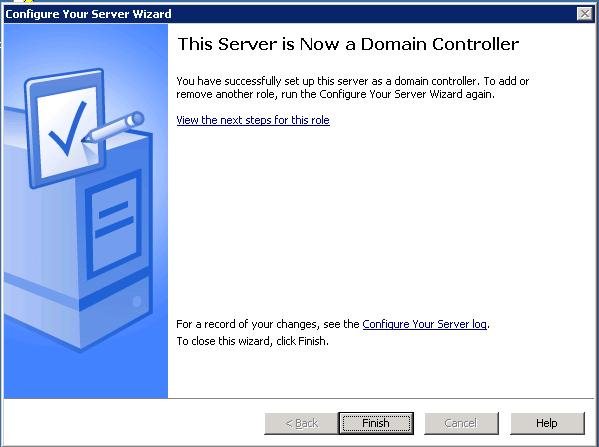
11. Once the Active Directory Installation wizard is complete, click Finish, then restart the server.

12. Once it has restarted, you should get a screen stating “This Server is now a Domain Controller”. Click Finish and you are done with the first DC!

13. Next, I go to the second server with a fresh install of Windows 2003 Server.

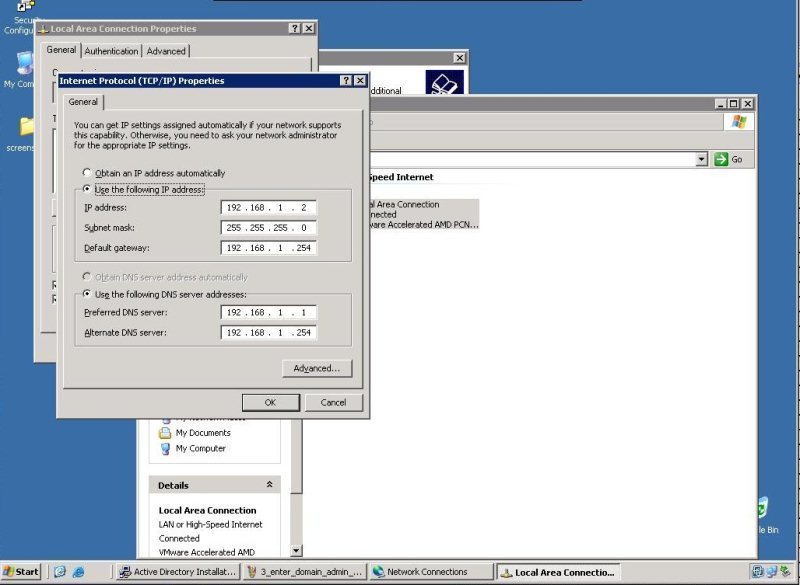
14. Set your IP addresses up. Now that you have a DNS server on the other DC, you can point this Server’s Preferred DNS address to the IP of the Primary DC we just set up. In this case my Primary DC has an IP of 192.168.1.1 and the second DC we are about to set up gets an IP of 192.168.1.2.

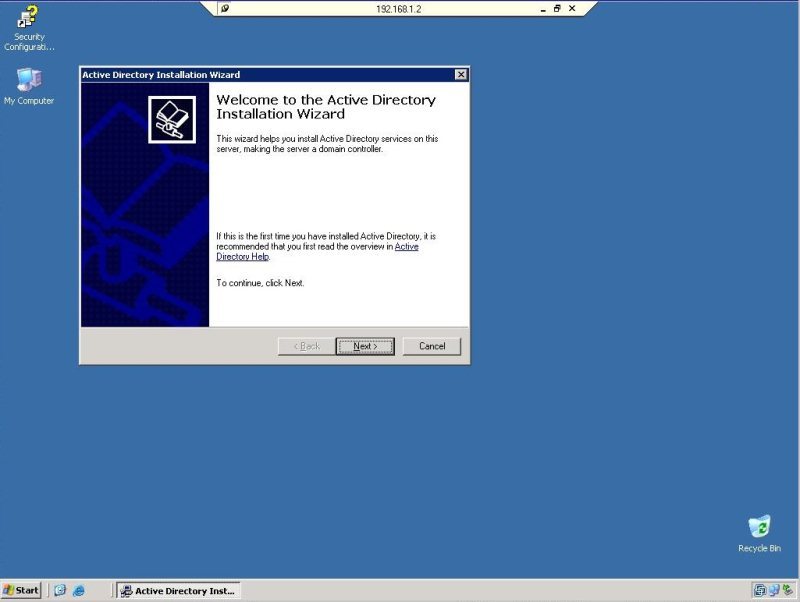
15. Run dcpromo on the new server.

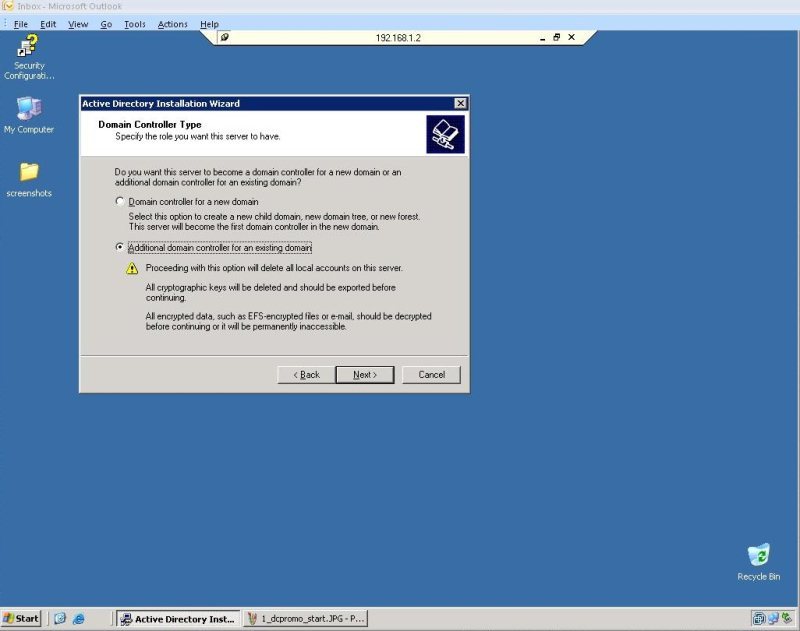
16. This time we are going to choose “Additional Domain Controller for an existing domain” in the Active Directory installation wizard.

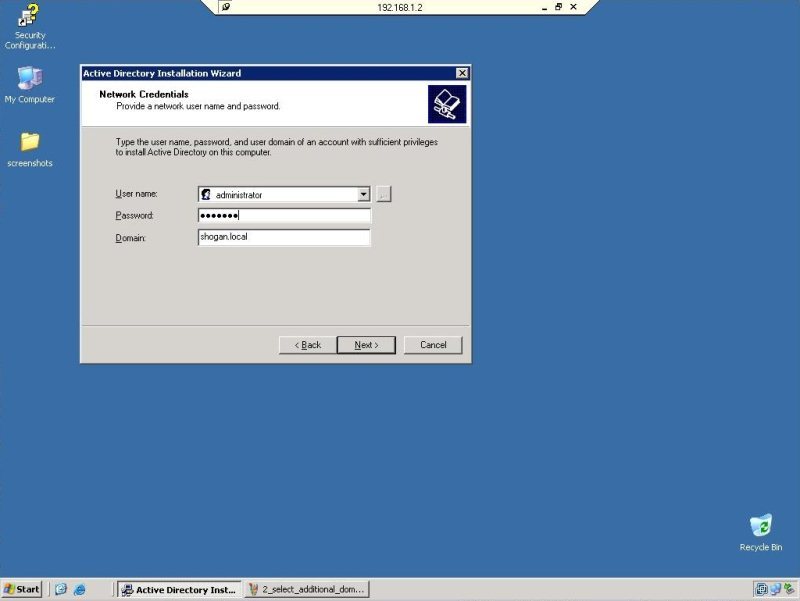
17. The next screen asks you for your “network credentials”. Enter your new domain administrator username and password (Set up from the first DC). This should be “Administrator” and whatever password you specified during the install. Enter your domain name specified in step 3 above. For example I used “shogan.local”.

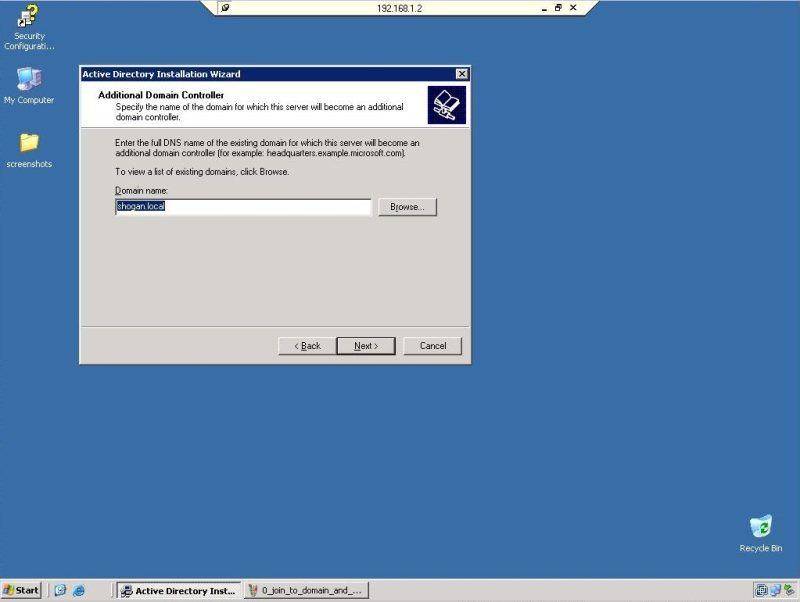
18. Enter the domain name again (shogan.local) in my case on the next screen.

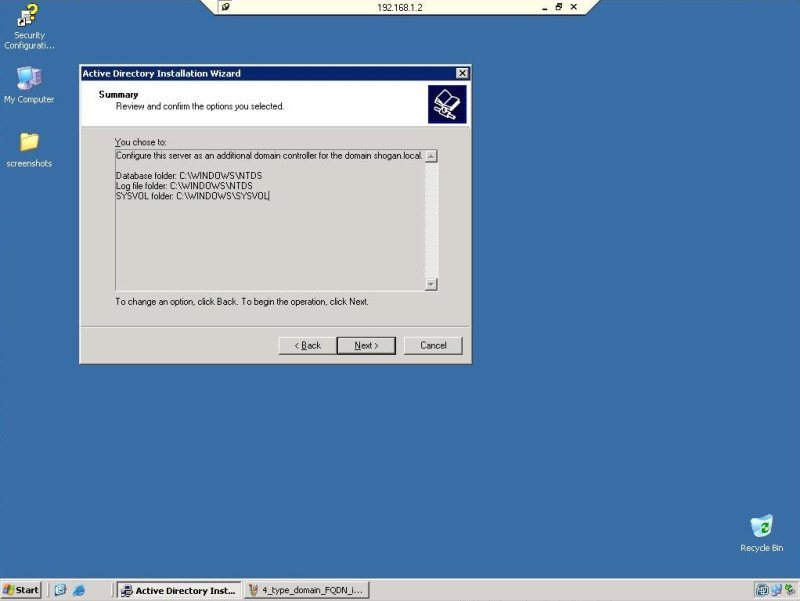
19. Complete the rest of the installation wizard as we did in the steps for the first DC. This just involves specifying log folders etc… I usually leave the rest of the options at their defaults. Once you are done, set up should ask you to restart the server.

20. Restart once complete and login with your domain admin account. You should now have a fully functional secondary DC. Any changes you make in Active directory on either server should now replicate across to the other DC.

Here are the images related to each step of the installation process. Click any thumbnail to bring up the larger version.

Feel free to post any questions or comments in the comments section below.