WSL2 GUI X-Server Using VcXsrv

wsl2 gui desktop

I needed to set up a WSL2 GUI recently on my machine (WSL2 running uBuntu 20.04.1 LTS). I found a guide that runs through the process but found that a few tweaks needed to be made. Specifically, the communication to VcXsrv was being blocked by Windows Firewall.

There were also a couple of extra tweaks needed for audio passthrough using PulseAudio and setting a windowed resolution.

Setting up a WSL2 GUI X-Server in Windows

Start by installing xfce4 and goodies.

sudo apt install xfce4 xfce4-goodies

If you’re running Kali you should use:

sudo apt install kali-desktop-xfce

During the install you’ll be prompted about which display manager to use. This is up to you, though I personally chose lightdm.

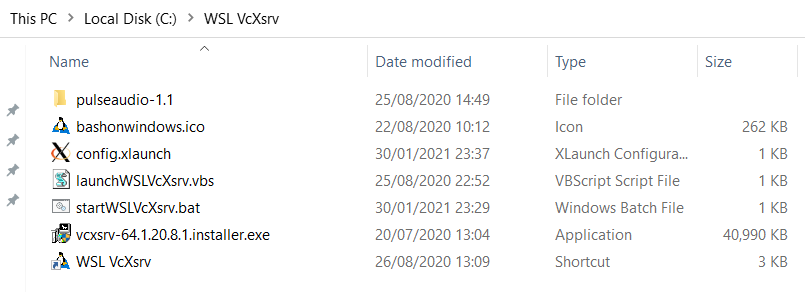
Download this .zip package which contains VcXsrv and PulseAudio along with some configuration and a shortcut to launch.

Extract it to the root of your C:\ drive. You should end up with contents under C:\WSL VcXsrv.

WSL2 GUI vcxsrv package contents

Run the vcxsrv-64.1.20.8.1.installer.exe installer in this folder, choosing defaults for the install.

Once installed, you’ll want to enable High DPI scaling for VcXsrv in Windows.

  • Navigate to C:\Program Files\VcXsrv
  • Right-click xlaunch.exe and go to Compatibility
  • Click Change high DPI settings and choose Override high DPI scaling behavior. Ensure Application is in the dropdown.

Next, edit the startWSLVcXsrv.bat batch file and change the last line that reads ubuntu.exe run to one of:

  • ubuntu2004.exe run in the case you are using uBuntu 20.04 from the Microsoft Store for WSL
  • ubuntu1804.exe run if you are using uBuntu 18.04 from the Microsoft Store for WSL
  • ubuntu.exe run for when you are using standard uBuntu from the Microsoft Store for WSL
  • kali.exe run if you installed Kali-Linux from the Microsoft Store for WSL

Pin the WSL VcXsrv shortcut somewhere convenient like the taskbar.

Opening Windows Firewall for VcXsrv and PulseAudio

Next you need to allow inbound traffic to Windows for VcXsrv and PulseAudio.

Open Windows Defender Firewall with Advanced Security and add two new Inbound Rules as follows:

  • Type: Program
  • Program path: %ProgramFiles%\VcXsrv\vcxsrv.exe for VcXsrv and %SystemDrive%\WSL VcXsrv\pulseaudio-1.1\bin\pulseaudio.exe for PulseAudio
  • Allow the connection
  • Profile: Domain, Private
  • Name: vcxsrv or pulseaudio depending which rule you are adding

I personally added the following to ExtraParams under the XLaunch node of config.xlaunch. This sets windowed mode to 1920×1080 for monitor #1 on my machine.

-screen 0 1920x1080@1

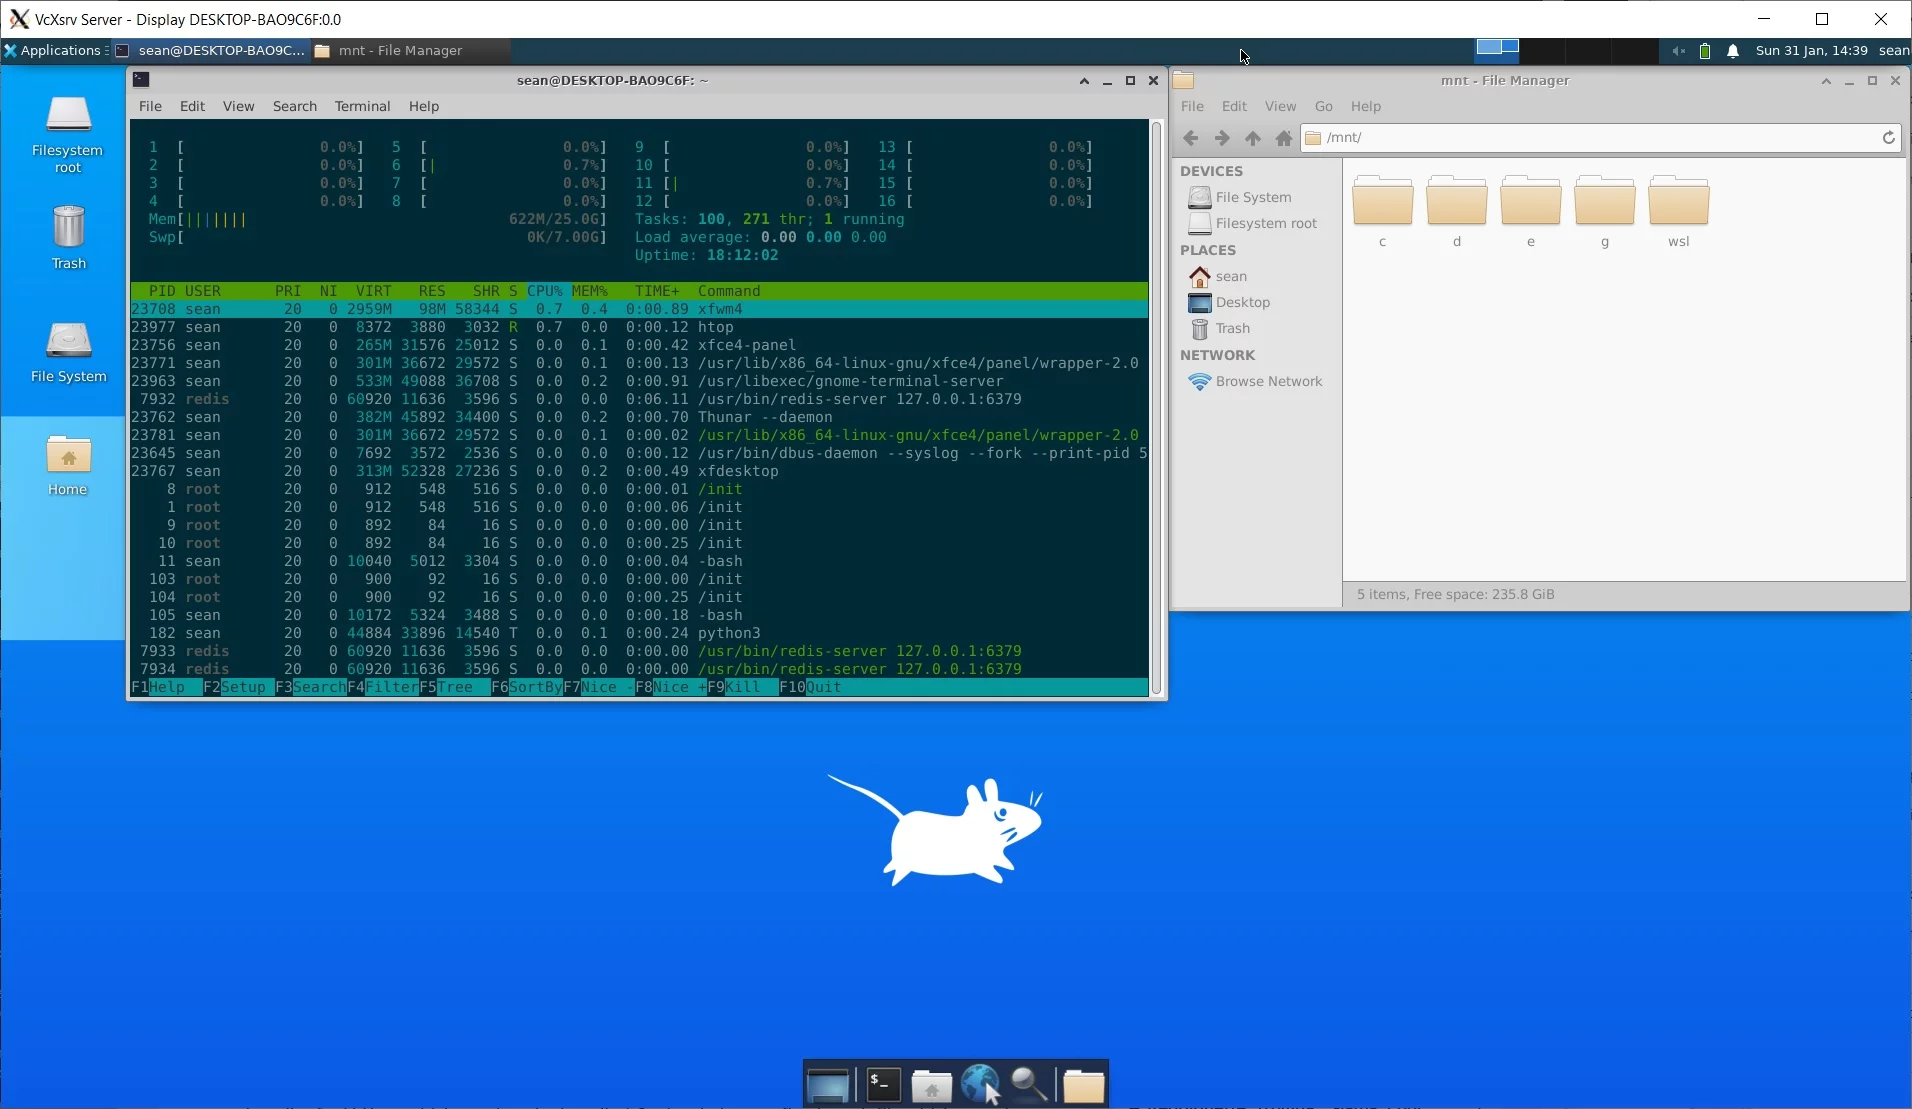
Viewing your WSL2 GUI

With all of that setup out of the way, you should be able to simply launch VcXsrv from the pinned shortcut and everything should work.

Try it out and you should get Desktop up and running for your WSL2 environment.

WSL2 gui example with audio settings open

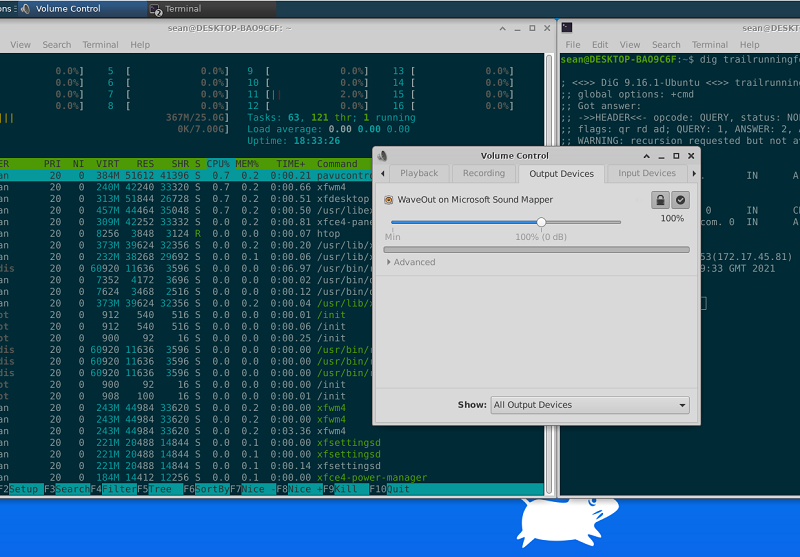
PulseAudio passthrough should also be available if you check your sound / volume settings. Try an audio test using alsa-utils:

sudo apt install alsa-utils
speaker-test

Kudos to this guide on reddit for most of the setup instructions. As mentioned before, I needed to configure my firewall and also added some tweaks for windowed mode.

Troubleshooting

If you find your VcXsrv Server display window is blank when launching, try the following:

  • Double-check your firewall rule is allowing inbound connections for vcxsrv.exe for the domain and private scopes.
  • With the black X-server / display window from VcXsrv still open, launch a WSL shell separately, and run the following to set your DISPLAY environment variable:
export DISPLAY=$(grep -m 1 nameserver /etc/resolv.conf | awk '{print $2}'):0

This takes the IP address of your host machine (conveniently used as a nameserver in your WSL Linux environment for DNS lookups) and sets it as the Display remote location (with :0 for the display number appended).

Now, try to launch a xfce4 session with:

xfce4-session

If all goes to plan, the session should target your machine where VcXsrv Server is running and your display window should come to life with your WSL environment desktop.

Using Placeholder Templates With Xargs In The Pipeline

pipes running along a wall

Using placeholder templates with xargs gives you a lot more power than simply using xargs to append args onto the end of a command.

I previously blogged about how to use xargs to append arguments to another command in the pipeline. This post goes into a bit more detail and shows you a more powerful way of using xargs.

Basic Xargs Example

With a typical, simple xargs command, you might append one argument onto the end of an existing command in the pipeline like this:

echo "this is a basic xargs example" | xargs echo "you said:"

The above command results in the output:

you said: this is a basic xargs example

Placeholder Templates With Xargs Example

Now, here is a simple example of using a placeholder, or template in your command, and passing your argument into that.

echo "this is a basic xargs example" | xargs -I {} echo "you said: {}"

The output is exactly the same as with the basic example. However, you can now use the curly braces placeholder to move the argument placement to anywhere in your command.

You’re no longer constrained to it being on the end of the echo (or whichever command you’re using). You can also do multiple placements of the argument in your command.

For example:

echo "FOO" | xargs -I {} echo "you said: {}. Here is another usage of your sample argument: {}. And here is yet another: {}"

A Slightly More Practical Example

Enough of the simple echo examples though. How about using this for a more practical, real world example?

In the following example, we want to list a bunch of AWS S3 buckets, and then do a summary output of their total size in GiB. We cut out the bucket name using cut from the initial listing that is returned with aws s3 ls.

aws s3 ls | cut -d' ' -f3 | xargs -n1 aws s3 ls --summarize --human-readable --recursive s3://

Using xargs to append the bucket name from the pipeline looks like it would work, as we only need it right at the end of the aws s3 ls command. There is an issue though, xargs would add a space, and we want the bucket name appended to s3:// without a space.

Using The Template or Placeholder

This is where using a placeholder or template with xargs can come in handy.

aws s3 ls | cut -d' ' -f3 | xargs -n1 -I {} aws s3 ls --summarize --human-readable --recursive s3://{}

It’s also worth noting that you can change your template or placeholder token with the -I parameter. It doesn’t have to be {} as in the examples above.

In summary, your usage of xargs can be levelled up by using the -I parameter to leverage placeholder or template tokens.

Select, match and pipe output into another command with jq, grep, and xargs

select-match-and-pipe-output-with-jq-grep-xargs

This is a quick reference post if you’re looking to pipe output into another command on Linux using xargs.

The pipeline is immensley powerful and you can leverage it to act on different stages of your full command to do specific selecting, matching, and manipulation.

Say you are running an executable that outputs a bunch of JSON and you want to select certain a certain subset of this data, pattern match it, and then send that matched data into another command.

This is the perfect use case for a mixture of the jq, grep and xargs commands in the pipeline.

Practical example with xargs

Here is a practical example where you might want to list all your AWS CodePipeline pipelines, match only on certain ones, and then execute (Release Changes) on each of them.

aws codepipeline list-pipelines | jq -r '.pipelines[].name' | grep project-xyz | xargs -n1 aws codepipeline start-pipeline-execution --name

The piped command above does the following:

  • Lists all AWS CodePipelines with the command aws codepipeline list-pipelines
  • Uses jq to ‘raw’ select the name from each pipeline object in the pipelines[] array that the above command outputs
  • Sends each pipeline name into grep to match only those containing the string “project-xyz”
  • Pipes the resulting pipeline names using xargs into the command aws codepipeline start-pipeline-execution --name. The -n1 argument tells xargs to use at most max-args of 1 per command line.

Accessing network equipment via console cable from your ESX / linux server

Ever wondered how you can access your Cisco router, switch, or other network device over console cable from your ESX host / other linux machine? Obviously you’ll need a COM port on the physical hardware to start… Here’s a guide I wrote for SysAdmin-Talk. Have a read if you are interested in finding out how to achieve this. They have some other great articles and how-to’s posted up there. I have already found some extremely useful Exchange how-tos and guides and am looking forward to writing more for SysAdmin Talk!

SysAdmin Talk – Don’t Tear your Hair Out over Access to Cisco Devices

Change iPhone root SSH password

If you have jailbroken your iPhone and have SSH installed it is a very good idea to change your default root password. The default root password for the iPhone 3G is “alpine” many people know this and if you are not careful you could get someone gaining access to your phone over your service providers’ data network or over a local wifi connection.

iphone-ssh

Once SSH is installed and active login to your phone using PuTTY.  Download PuTTy here.

You will just need to specify your phone’s local wifi IP address and SSH as the connection method. When prompted, enter your username as : root and password as : alpine

Once you get a command line, type in the command “passwd” and press enter.

Enter your existing password of alpine, then specify your new root password. Be sure to keep this safe and secure! I found that after changing the root password on my phone I needed to restart it – close putty, then restart your iPhone.