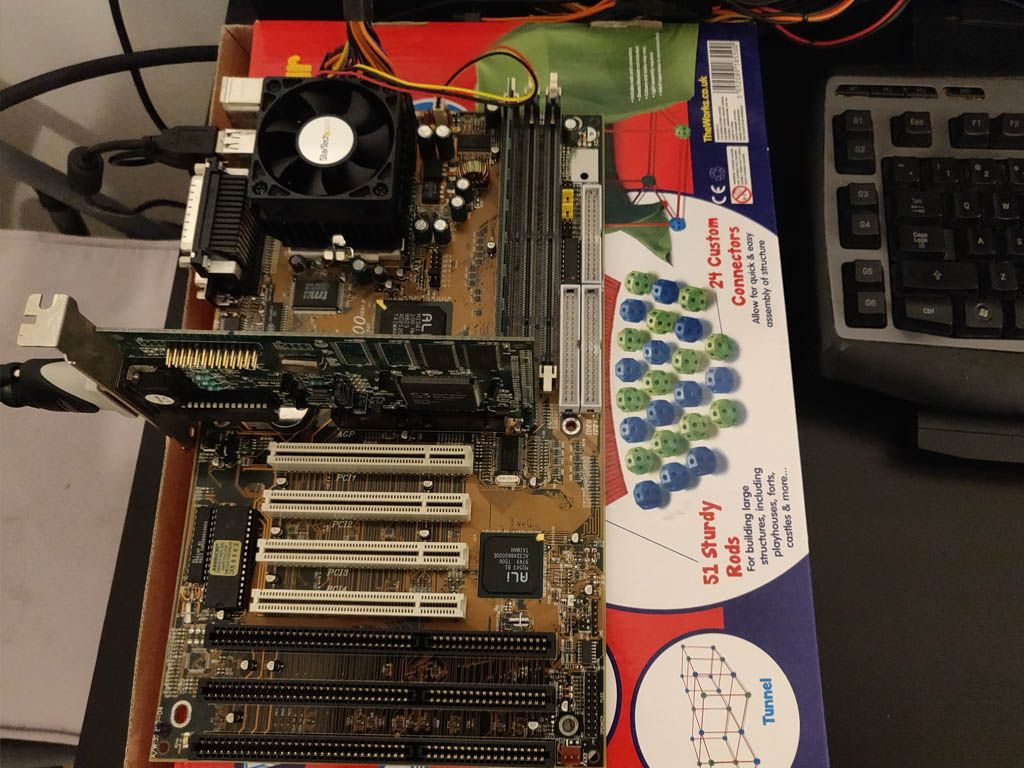
The GeForce 2 MX GPU was a big upgrade milestone for me back in the early 2000s.
I had previously run a 3dfx Voodoo 2 PCI graphics card. Soon though, it was no longer able to cope with the games I was throwing at it. With that, I saved up enough money to shell out for a GeForce 2 MX card.
The MX model was a low end card in the product’s family line, launched later on and surpassed by it’s predecessors the Geforce 2 GTS, Ultra, and Ti. The GeForce 2 generation of GPUs were based on the nvidia NV15 chip (a 180nm process).
The MX variant had two 3D pixel pipelines removed and lower memory bandwidth in order to cut costs. This meant that it was just barely affordable to me as a teenager at the time. To afford the price of my hardware upgrades in my teens I had started trading in used PC hardware, scavenging where I could to build complete systems which I then sold in the local newspaper’s classified ads. The money at the time went into purchasing a brand new GeForce 2 MX AGP graphics card for my personal system.
I still remember quite vividly getting home, installing the card, and firing up a beta version of Counter-Strike. After entering the show fps console command net_graph, my jaw just about hit the floor when I saw the fps counter stuck at 99 fps.
Upgrading the Retro System with a GeForce 2 MX
Fast forward to today and I still find myself craving the nostalgia of those years. What better way to experience it than to run the games on original hardware I used back then?
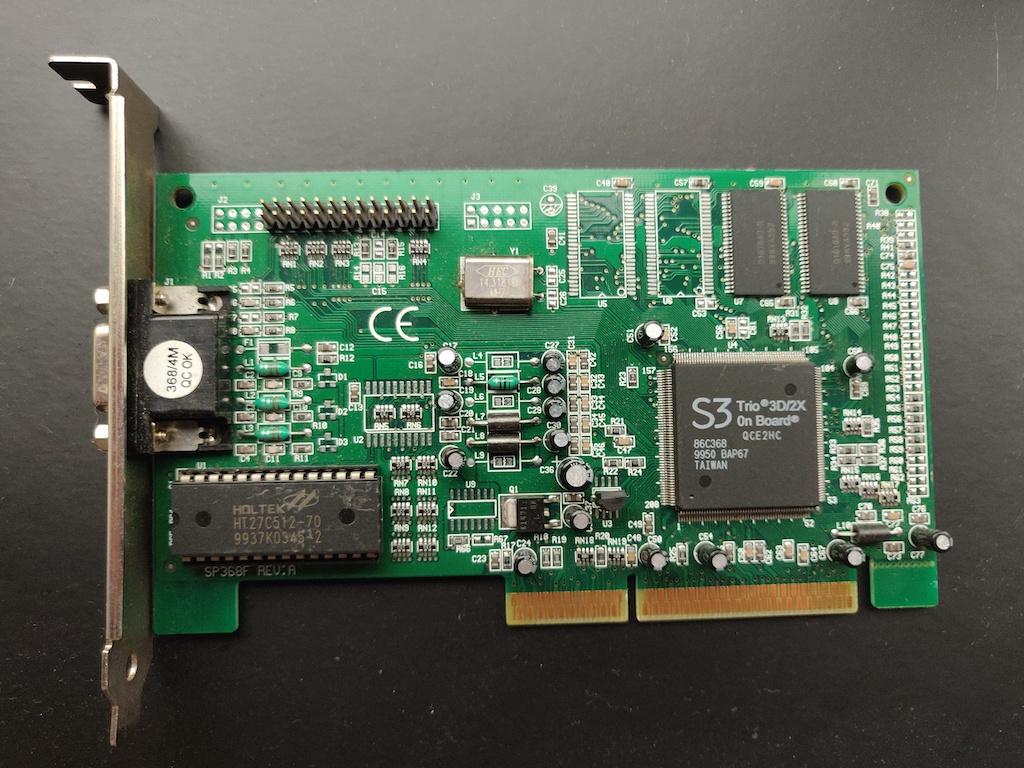
My Retro Gaming PC had a 3dfx Voodoo 2 PCI graphics card paired up with a fairly anaemic S3 Trio 3D/2X AGP card for 2D capability.
So, out with old, and in with the new:
The ‘new’ GeForce 2 MX AGP card ready to be installed
It’s interesting to note how these cards were passively cooled, especially in the case of lower end versions such as the MX. Nowadays the best GPUs are dual or triple slot monsters. They have massive heatsink and fan assemblies (or are water cooled).
The upgrade paid off for retro gaming performance. For the price of £10 on eBay I can now play games like Soldier of Fortune at 1024×768 resolution. Additionally, I can play with all settings bumped up to high. The previous Voodoo 2 card was showing it’s age in these newer games and was not very good at gaming higher than 640×480 or 800×600 at a stretch.
This system is still running Windows 98 SE, and I plan to keep it that way if possible, locking in that ‘era’ of gaming and PC hardware memories. I was lucky to find the nvidia drivers required for this graphics card specifically for Windows 98. If anyone is interested for the latest drivers compatible with Windows 98, you should look for the Forceware 80 version.
My first steps in programming as a child were with QBasic on an older 486 system that only had DOS 6.22 and Windows 3.1. A group of friends and I discovered QBasic (probably via a bunch of old paper manuals that came with our parent’s PCs) and began writing primitive programs that would prompt for input, save the answer in variables and lead the user through a series of questions, printing out answers in return.
For fun, I decided to look into the effort required to write a simple screen saver (remember those) using QBasic. It turns out there is not much effort required at all.
QBasic on a Modern System
The easiest approach is to use DOSBox. I installed it on my Windows 10 machine. From there, I configured it using the DOSBox configuration file to run in a larger sized window. It is as simple as adding this to the .conf file:
windowresolution=1920x1080
output=ddraw
Next, I setup automatic mounting of a “DOS Apps” folder I setup on my D: drive. Locate the [autoexec] section in the DOSBox conf file and add something like this:
mount C D:\Tools\DOS_APPS
C:
cd QB45
qb.exe
This will mount everything under D:\Tools\DOS_APPS to the C:\ drive of your DOSBox machine. It then changes directory to the contained QB45 directory to run the QBasic executable.
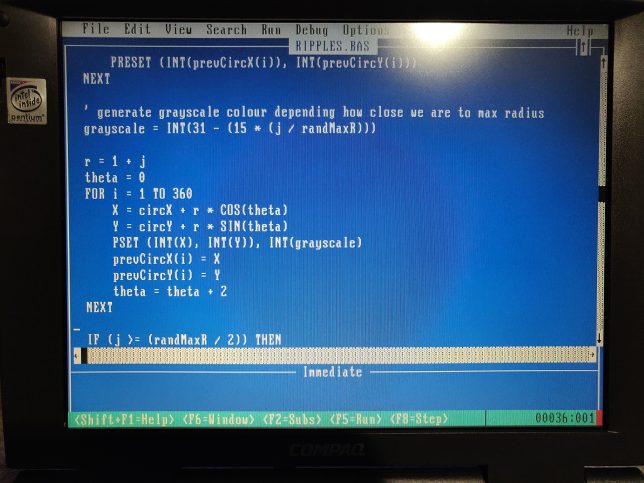
Ripples, The Retro QBasic Screensaver
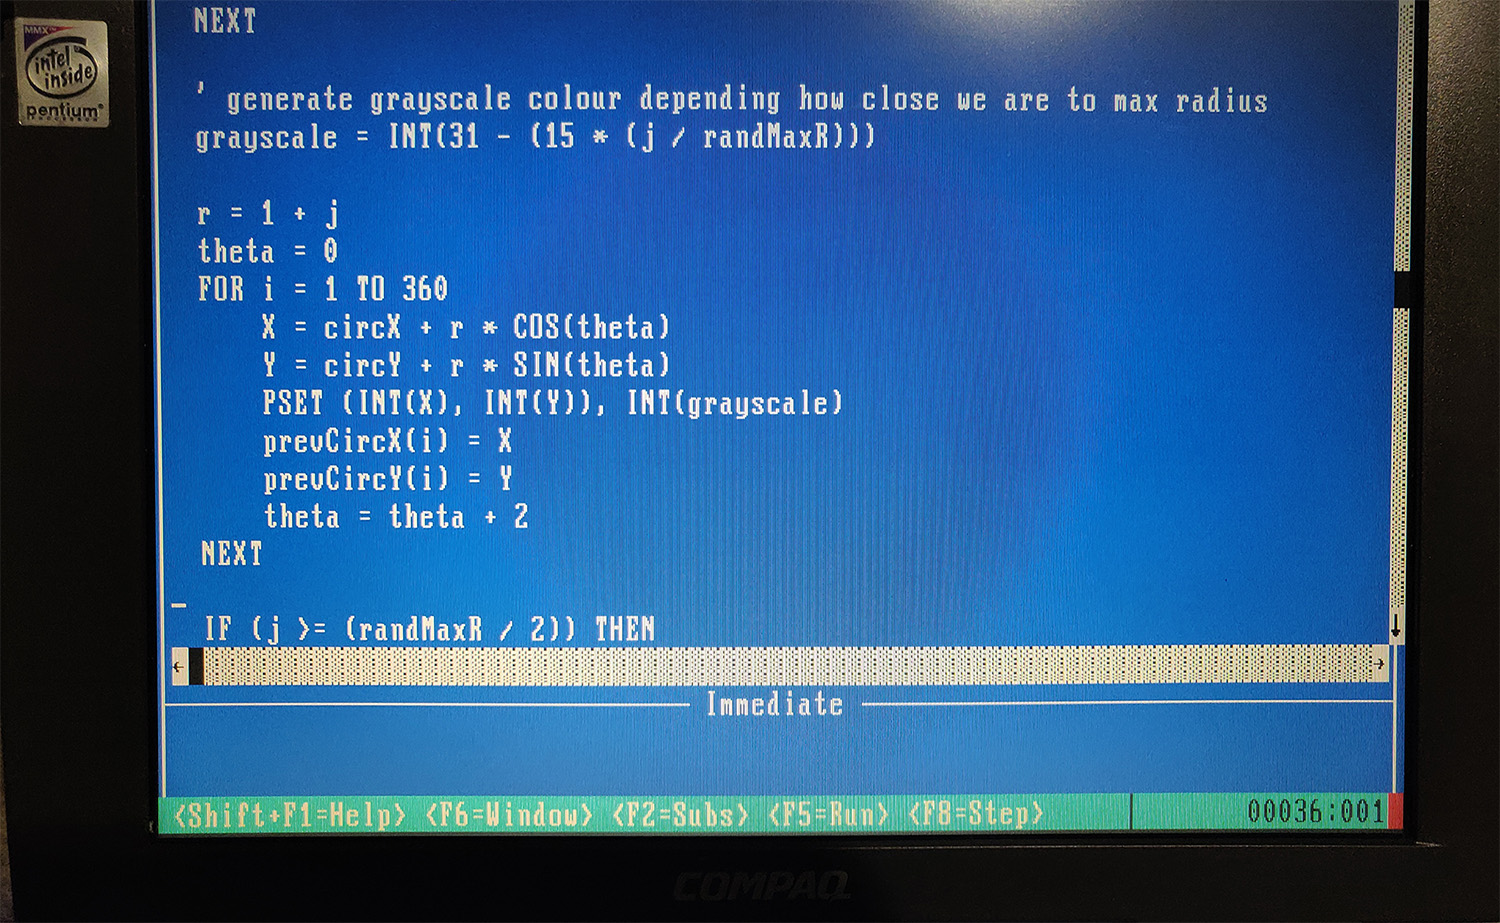
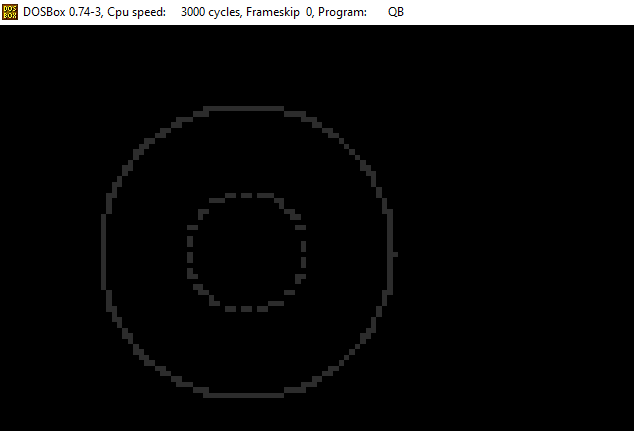
I wrote a simple SCREEN 13 mode (320×200 VGA) screensaver that I named Ripples. It simply draws outer and inner circles which expand and fade out at random locations. I’ve used a basic circle drawing algorithm, and POKE to set values at specific locations in memory. (In SCREEN 13 mode, each pixel is represented by 1 byte).
The reason I didn’t use the much simpler CIRCLE routine, is because I wanted to have multiple circles drawn out (inner loops) and also prevent screen clears after every concentric circle. (Also, the added complexity of the circle creation routine itself was fun to add).
You can take a look at the quickly hacked together source code here. I’m sure there are far more efficient ways of doing some of these things, but I didn’t want to spend too long digging deep into screen drawing. (Maybe using DATA could improve things, or perhaps even writing inline machine code to perform the loops and pixel setting that POKE does).
Running it on an actual Retro System
I copied QBasic and the source code across to my actual retro system (the old Pentium laptop).
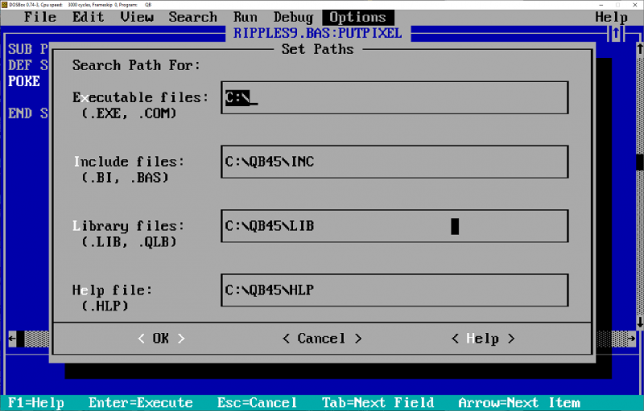
Next I configured QBasic to be able to use a linker to compile an executable. It’s a case of simply ensuring your Paths are set correctly under Options.
I opened and compiled the source, disabling debug symbols to vastly improve speed too. Windows 98 has a DOS mode built-in that can execute DOS applications directly from Windows. QBasic and the program ran perfectly like this. After booting into MS-DOS mode I confirmed that the compiled source ran perfectly there too.
This was a mostly pointless exercise, other than to experience a bit of nostalgia. It certainly was a blast from the past. The experience also helps me to appreciate the modern tooling and IDEs we use today. Having said that though, I did find myself quickly iterating through edits in QBasic using the edit and search options. It wasn’t too bad after all.
In the late ninetees, as a teenager I had the priveledge of owning a second hand Creative Labs 3dfx Voodoo 2 graphics card. It was an upgrade for my own hand-built PC – an AMD K6-2 333mhz system I had painstakingly saved up for and cobbled together.
Nostalgia running high, I recently set about building up a ‘retro’ gaming PC. With roughly the same specification as my original K6-2 machine from the late ninetees, it also features an original 3dfx Voodoo 2 accelerator card.
Unreal Tournament playing on my retro PC with the 3dfx Voodoo 2
The Brief Story of 3dfx Interactive and the Voodoo
A group of colleagues originally working together at SGI decided to break out and create 3dfx Interactive in San Jose, California (1994). This was after an initial failed attempt at selling rather pricey IrisVision boards for PCs.
Their original plan was to create specialist hardware solutions for arcade games, but they changed direction to instead design PC add-on boards. The reason for their pivot came about as a result of a few favourable factors. Namely:
The cost of RAM was low enough to make this a feasible endeavour.
RAM latency was much improved and allowed for ‘high’ clock speeds of up to 50MHz.
3D games were picking up in popularity. Spearheaded initially no doubt by id software with games such as Wolfenstein 3D, DOOM, the market was clearly headed to a point where 3D accelerated graphics would be in demand.
The first design, the SST1 (marketed as the Voodoo 1), targeted the $300-$400 price range for consumer PCs. A variety of OEMs picked up the design and released their own reference design boards, leading to the success of the original Voodoo line-up of 3D accelerator cards.
Enter the Voodoo 2
After the initial success of the Voodoo 1, the 3dfx Voodoo 2 (SST2) was soon born. It had vastly improved specifications over the original SST1 design such as:
100MHz clock rated EDO RAM (running at 90 MHz, 25 ns)
90MHz ASICs
2 x Texture Mapping Units (TMUs)
The fillrate of the Voodoo 2 was around 90 MPixels/s, and frame rates in benchmarks showed a massive uplift, nearly doubling in some cases.
My first (original) 3DFX Voodoo 2 PC Build
My first self-built (from scratch) PC was a bit of a frankenstein build. I had carefully budgeted and selected a motherboard that had onboard everything. Graphics, sound and networking. It would also run an AMD K6-2 CPU – a budget friendly option compared to Intel at that time.
The onboard graphics card shared 8MB of memory from system RAM (of which I only had 32MB total). As far as I recall it was capable of running Direct3D enabled games, albeit hobbling along with crippled frame rates.
Upgrading to a 3dfx Accelerator Card
After enduring this ‘fps hardship’ and learning more about the recently successful 3dfx graphics cards (a friend had a 4MB 3dfx Voodoo ‘1’ card), I found out about a second hand option. It was available through a friend of a friend, and would cost me 500.00 South African Rand (ZAR). This was a lot for a teen back then. I had saved up money, and bargained with my parents to combine my funds with a birthday gift contribution in order to purchase this card.
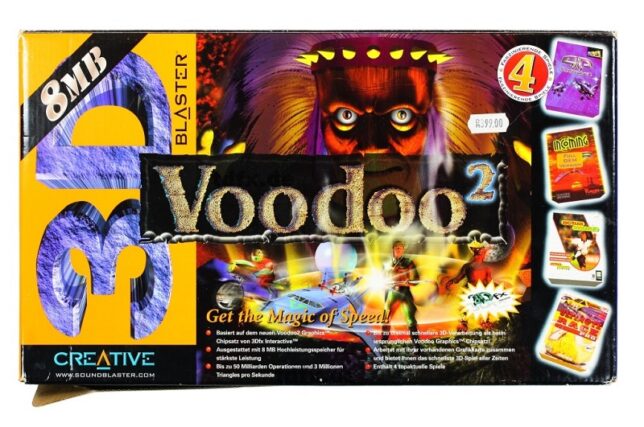
The Creative Labs 3D Blaster Voodoo 2. Mine came in almost identical packaging, but I had the 12MB version.
As I recall, I had to make massive concessions in order to fit the graphics card into my machine.
My motherboard only had 2 PCI slots. Both were horizontally in line with the CPU socket. The board design was probably never intended to house cards longer than the average PCI device at the time.
I had to remove the K6-2’s heatsink I was using and replace it with one from an older 486 machine that I had lying around. The profile of the 486 heatsink was much lower, allowing the 3dfx Voodoo 2 card to slot into a PCI slot, extending over the heatsink.
The problem now was that the 3dfx card’s lower PCB edge was now just about in direct contact with the heatsink. Another issue was that the heatsink was not made for mounting to a Socket 7 board. This forced me to lay my computer’s chassis down on it’s side in order for gravity to keep the heatsink in place!
I had a plan to keep pressure on the heatsink to maintain better contact with the CPU. Using a bit of non-conductive material between the 3dfx card’s PCB and the heatsink, I kept things in place. I also had to permanently angle a large fan blowing into the now open case.
This was the price I would pay to have my budget 3dfx voodoo 2 enabled system.
The Retro 3dfx Voodoo 2 PC Build
Recently after a bout of nostalgia and watching LGR videos, I started trawling eBay for old PC parts. The goal was to almost identically match my original PC build.
After a number of weeks of searching, I found the following parts. The motherboard was the most difficult to find (at a good price). Most Super Socket 7 boards I would find were dead and listed as spare parts.
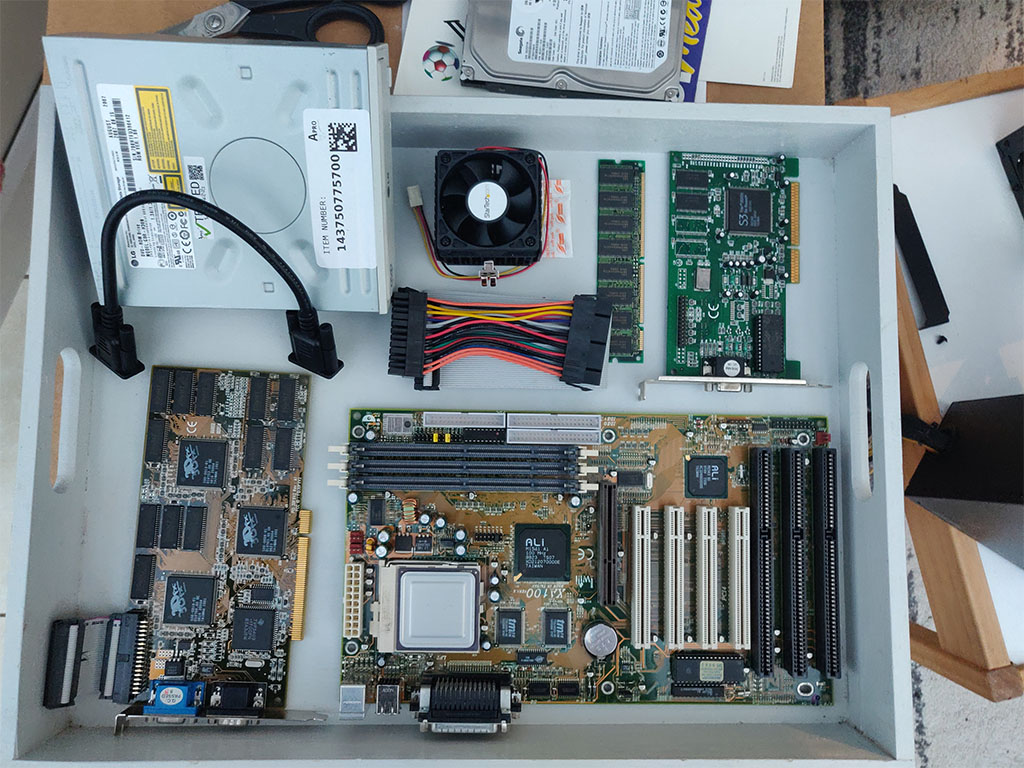
Most of the parts lined up and ready for the build.
Iwill XA100 Aladdin V Super7 Motherboard, an AMD K6-2 300 CPU, and 64MB of PC100 SDRAM (168 pin)
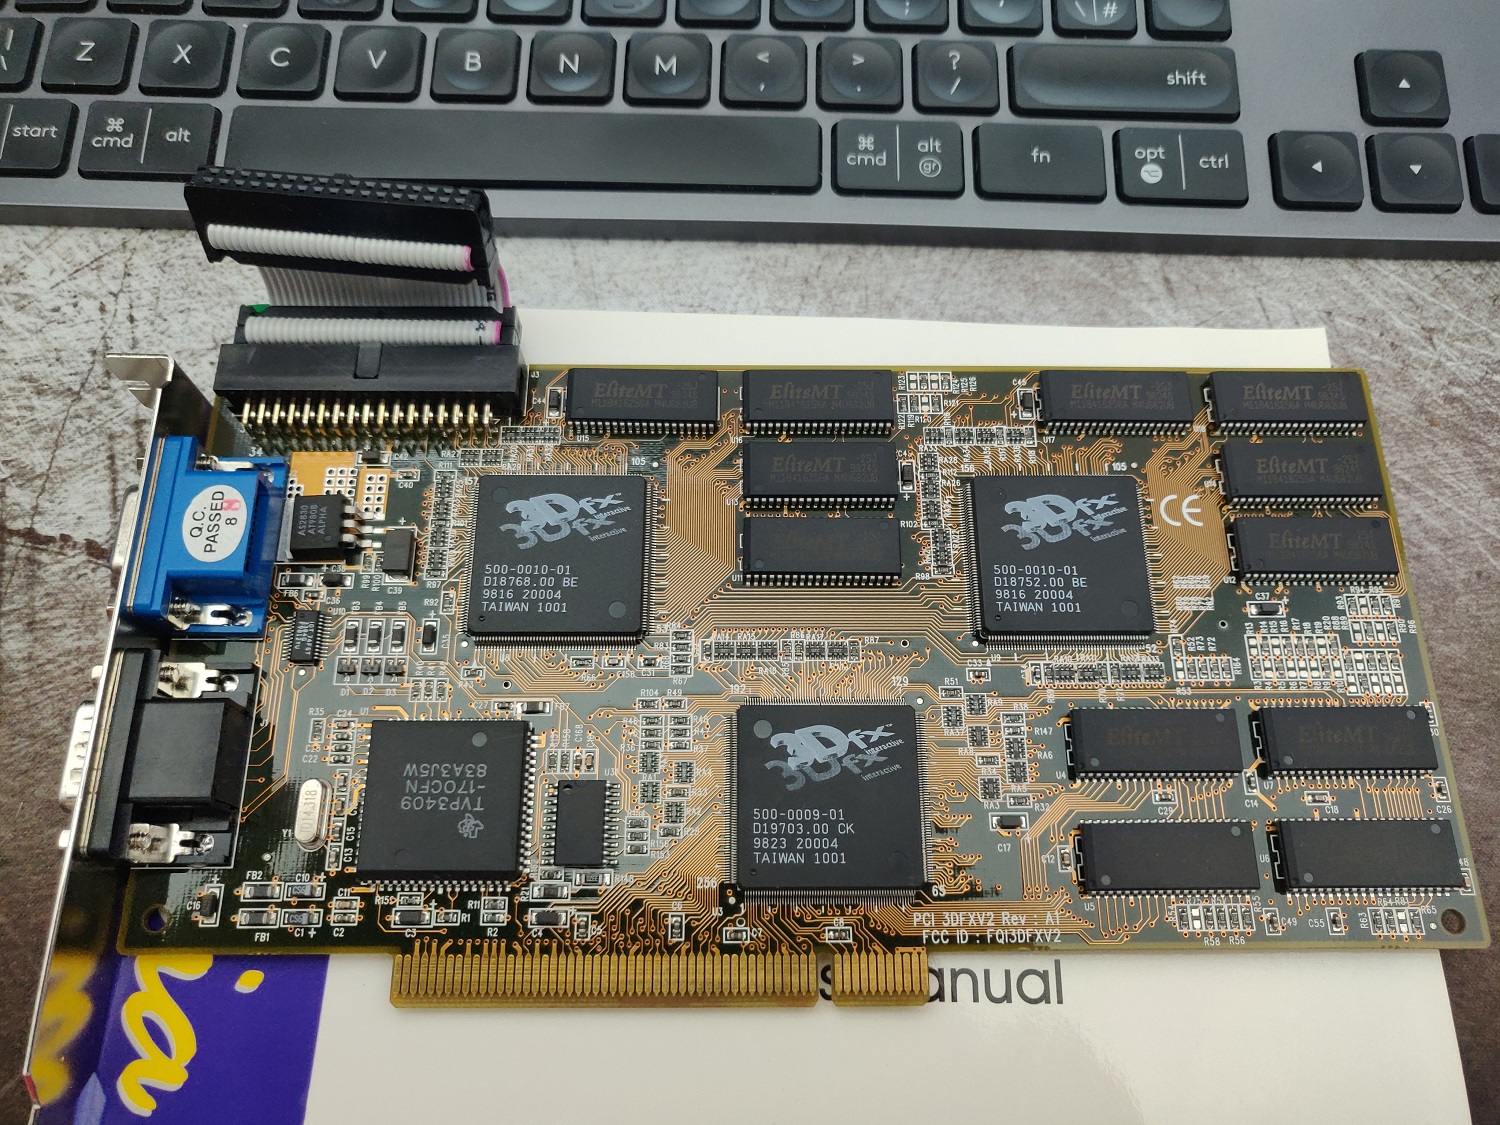
S3 Trio 3D/2X graphics card (the Voodoo only handled 3D, and uses a loopback cable to plug into a ‘2D’ card)
3DFX JoyMedia Apollo 3D fast II 12Mb Video Card PCI Voodoo2 3DFX V2 Rev A1
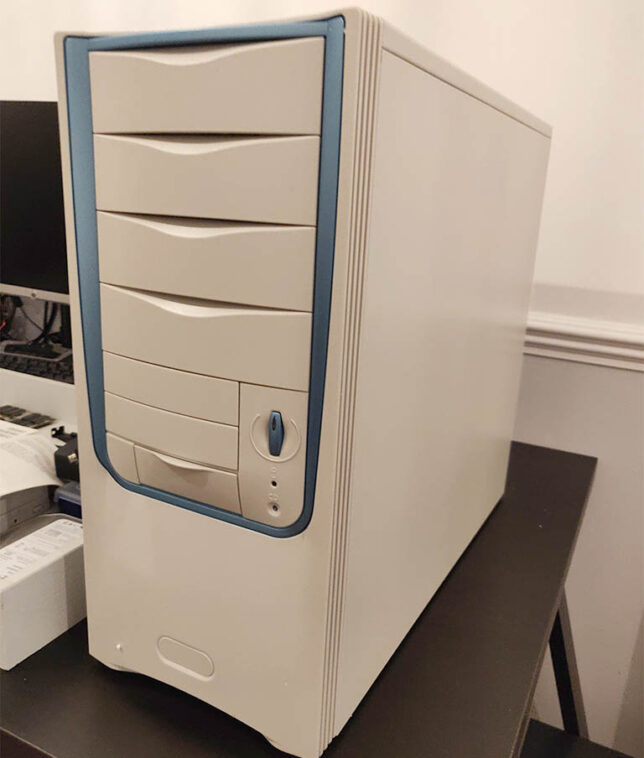
A Retro styled, beige ATX PC Chassis, Computer MIDI Tower Case
Creative Sound Blaster Live 5.1 Digital SB0220 PCI Sound Card
An 80GB IDE HDD, IDE ribbon cable, and an older DVD-R drive.
I used a modern 80 plus certified ATX power supply. It has a power connector with an older 20 pin layout which was perfect to re-use.
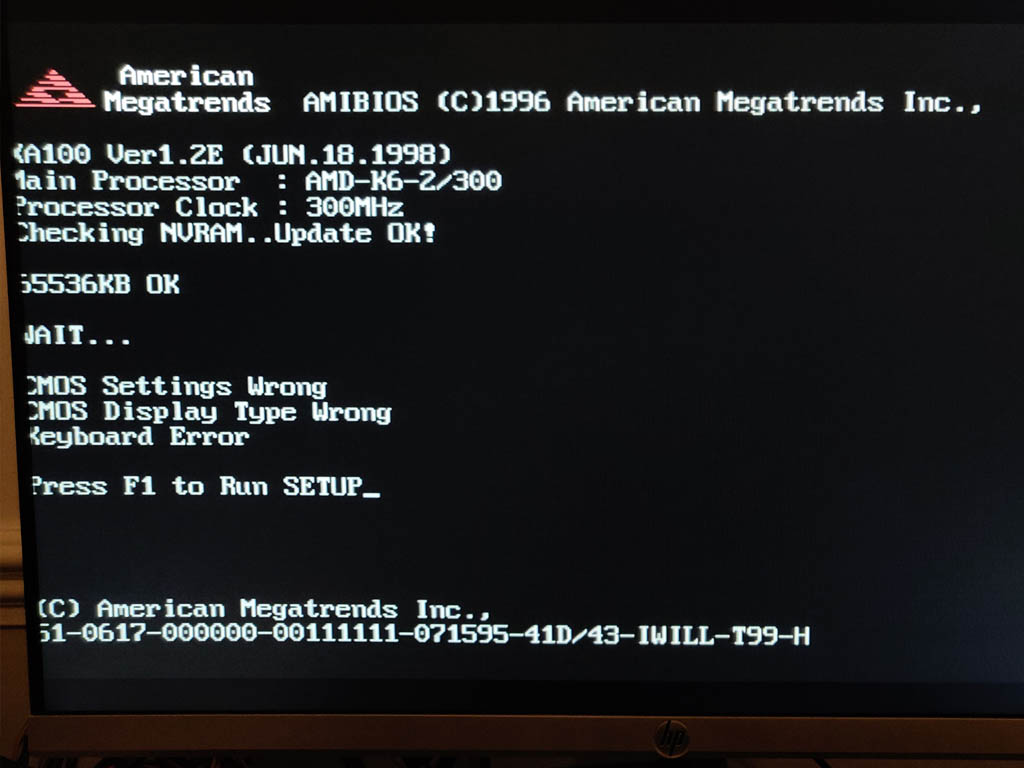
To test the hardware, I powered up the basic components on top of a cardboard box. Generally a good idea and especially so when using older hardware.
‘Bench’ test of the hardwareFirst POST successful, aside from USB keyboard not working (needed legacy option for USB enabled)The ‘retro’ looking MIDI tower chassis I got for the build
Gaming on the Retro PC Build
After digging out a CD burner and an old image of Windows 98 SE, I’ve got an operating system running and have installed drivers along with a bunch of games.
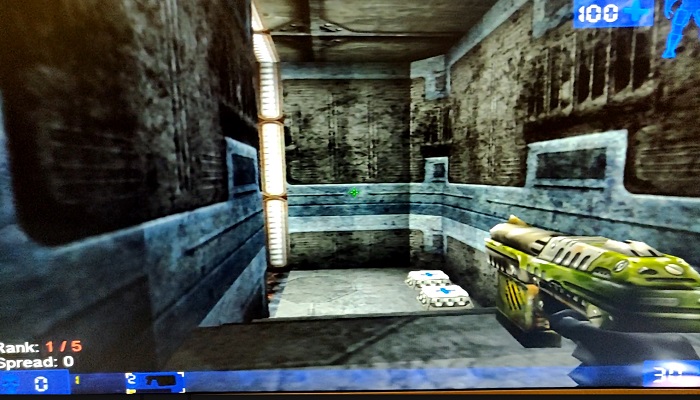
They play just as I remember. I’ve installed Quake, Quake 2, Unreal Tournament, and a few others to keep me busy for now.
Unreal Tournament in Glide 3dfx rendered mode.
The next step is to replace the temporary modern day LCD monitor I’m using right now. A period correct CRT monitor would really complete the build. I remember Samsung SyncMaster CRTs being excellent. My aim is pick one of these up to complete the system.
If you’re nostalgic like me and want to revisit the PC and games hardware of the late 1990s I highly recommend a build like this.
In the mid 1990s at the age of 10 or 11 our family computer got an upgrade. Retaining it’s old beige ATX chassis, the internals were upgraded from a 486 DX2-66, to a Pentium 166 MMX. Quite the jump in processing power!
Unfortunately (for me) my parents were not keen on upgrading DOS and Windows 3.1 to the newly available Windows 98. My uncle, the seasoned computer expert, had convinced my parents that Windows 95 was evil and we wait for the bugs and other issues to be sorted out first. Not a bad software strategy in hindsight though.
DOS gaming on the Pentium
For the first couple of years I had to make do with DOS gaming, even with the ‘unlimted power’ the Pentium 166mhz processor could offer.
Windows 95 and DirectX had finally given a good, common API for game developers to use for game development. Gamers everwhere were starting to reap the rewards of this movement. Unfortunately I would have to wait until our machine got Windows 95.
For the time being games such as Duke Nukem 3D, Quake, and Carmageddon (all DOS compatible at the time) would have to do. Looking back I was quite young to be playing those games, but I knew it was all fantasy and they didn’t negatively affect me.
Windows 95 Upgrade
After a number of years, the system received the long awaited Windows 95 upgrade. Some of the first Windows 95 games I remember being able to play (and binging on) were:
Diablo
StarCraft (yes it was already 1998 by this point!)
POD: Planet of Death (first game to leverage the MMX instruction set as I recall)
Reliving the Pentium Days
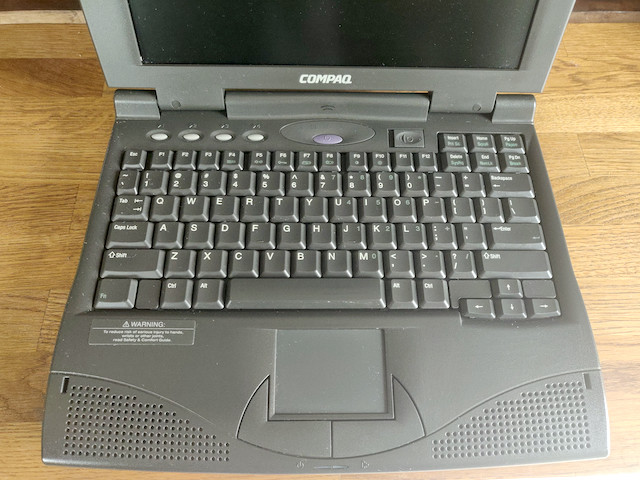
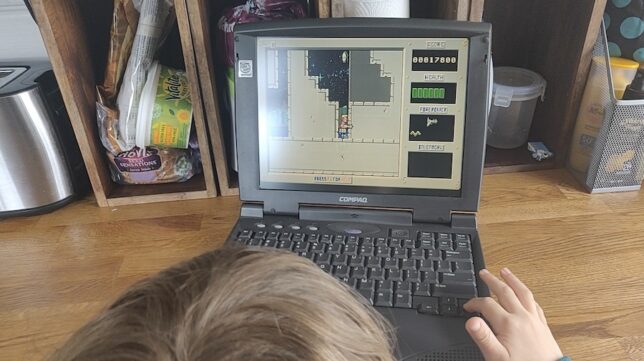
In a moment of nostalgia, I recently picked up an old retro Pentium Compaq Armada 1592DT laptop. With Windows 98 installed, I’ve been enjoying some memories from the mid to late 1990s.
I’ve now got a bunch of DOS and early Windows games installed, including:
Turbo Pascal 7 (reliving my early teens programming memories)
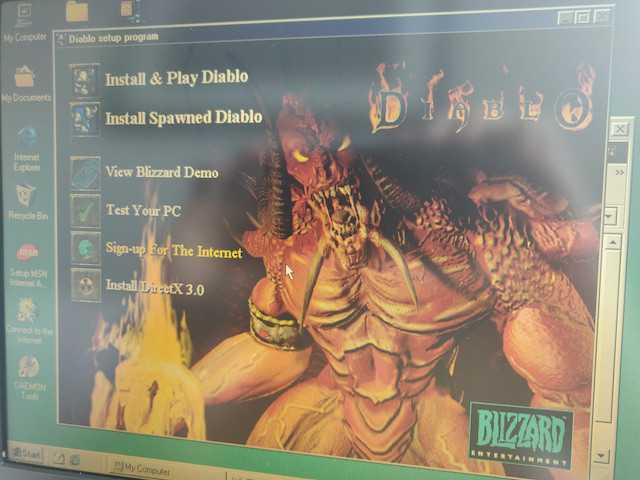
Diablo. I own the boxed orginal, and loved this game. It runs great on this system.
DOOM
Duke Nukem 3D, and a bunch of old Apogee shareware games, like Terminal Velocity, Wacky Wheels, ROTT, Raptor, etc…
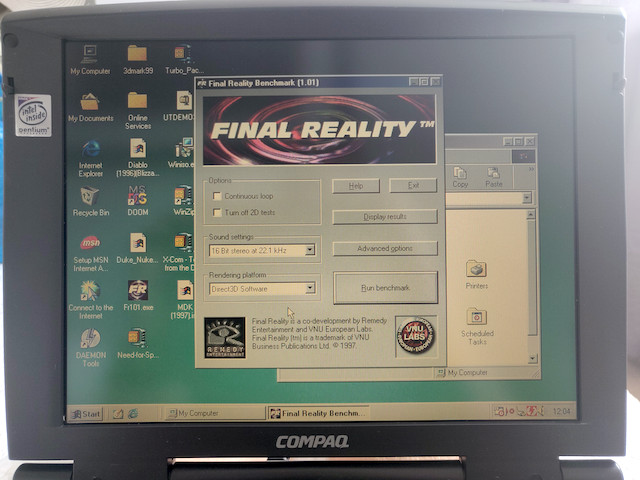
Final Reality benchmark – unfortunately this is too ‘new’ for the machine, and can only render in Direct3D Software Mode at a few frames per second.
Diablo’s Installer – DirectX 3.0. Wow. This must have been one of the first games on Windows 95.
Even my son has shown interest in this aging system. He saw me testing some of the games out, and immediately took to playing Duke Nukem (1).
I’ve found myself getting this system out on quiet evenings to play the odd game here and there, and even tried my hand at writing some Pascal on it.
It may be clunky and extremely slow by today’s standards, but there is something magical about reliving parts of your childhood like this.
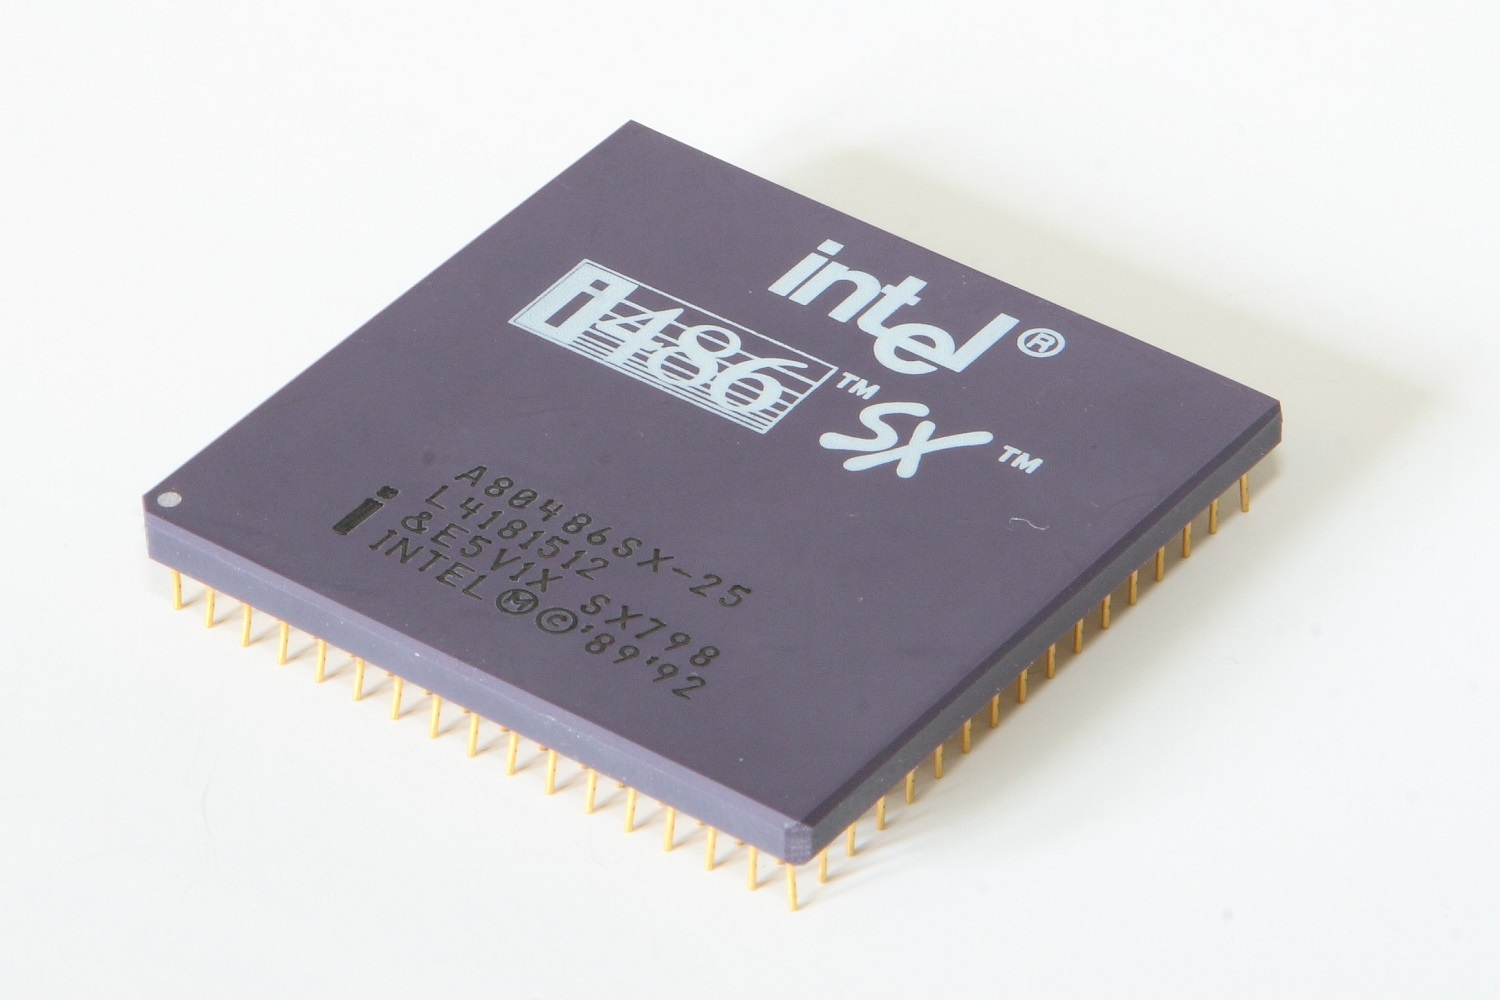
My computer hardware journey started in the mid 1990s, when I was about 10 or 11 years old. It started out with me dismantling and reconfiguring various 486 machines. These were also known as i486 or Intel 80486 systems.
Electronics had always been a big curiosity for me. As a child I liked to open up devices and extract their internals. I would collect PCBs and join them in nonsensical ways, imagining I had invented new and wonderful devices, capable of many great things.
To illustrate my passion for tinkering with electronics, here is a quick story going back to my toddler years: My parents had noticed my love for tools as a toddler and had tried in vain to make them safe for me. According to my father, he once added a solid lump of pratley steel putty to the end of a sharp screwdriver for me. An attempt to make it safe for me to handle. As soon as I saw this, I threw it to the ground in protest. I only wanted real tools. One of the toys I had was an old 5+1⁄4-inch floppy disk drive!
My First 486 Build
Fast forwarding to the mid 1990s, I was far more capable with tools and had begun to scavenge surplus PC hardware. My uncle owned a PC repair shop where I grew up. As far as I recall I managed to scavenge old discarded parts from his collection, as well as other sources. Schools or universities that would throw out old machines as they cycled or upgraded them, cousins or family friends that had no need for old systems, etc…
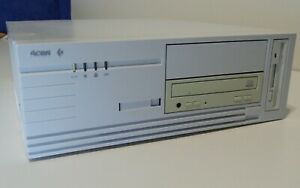
The very first working system that I managed to modify was an Acer branded 486 desktop system. It had a horizontally aligned desktop chassis, one that allowed you to place a CRT monitor on top of.
This isn’t the exact one, but mine looked just like this, minus the CDROM drive.
I remember it had a 486 SX-33 CPU. A rather weakly clocked 486 processor, that didn’t even require a heatsink and fan assembly. The 486 SX processors had their FPU (floating point unit) disabled. I imagine this reduced cost and heat output.
This wasn’t exactly a scratch build, but it allowed me to get my feet wet in the world of computer hardware.
Upgrading the CPU
I swapped out the CPU for a 486 DX2-66, a much faster processor, adding a small aluminium heatsink and fan. The fan was powered by a molex power connector.
Memory and Upgrades
Another upgrade on this particular system that I remember was going from 4MB of RAM (SIMM, or single in-line memory module) to 8MB.
I don’t recall if the memory was the 30 or 72 pin type.
Hard Drive Configuration
Among other upgrades, the hard disk drive got swapped out for a slightly larger one. I think the capacity was somewhere around 400MB.
This upgrade had me reading manuals and learning about the importance of jumper placement. The drives connected with an ATA ribbon cable. It was important that the jumper on the back of the hard drive was configured according to the other devices sharing the same cable.
The jumper could be configured to make a drive device 0 or 1 (also known back then as the master or slave device) when sharing the same ATA cable.
The cables themselves were also rated for different transfer speeds. For example 16 or 33 MB/s, and later cables allows Ultra DMA to be used for speeds above 66 MB/s.
Future 486 Systems and Nostalgia
That Acer machine was a good learning experience for me. Soon after that time, I started building and configuring more 486 systems. I had all sorts from 486 DX2-66 to DX4-100 machines.
I started a little side hustle, where I would pick up old components and build fully configured systems, selling them in the local paper’s classifieds section.
Thinking back, this was seriously impressive for a kid my age. By the late 90s (at age 12 or so) I was earning chunks of cash from selling systems that I had built for next to nothing.
Fixing Old CRT Monitors
One of the big wins for me was when I learned from my uncle how to ‘fix’ blurry CRT monitors.
If opened up, all monitors had analog adjustment dials (potentiometers) that could be turned with a screwdriver to control the flyback. One of these would control focus.
I would gather up old CRT monitors that nobody wanted anymore because they had gone ‘blurry over time’. The fix was simply to adjust the focus potentiometer inside while the monitor was on. Of course this was very dangerous as these old monitors contained high voltage capacitors that remained charged up for a while, even after power was disconnected. However, having learned from an adult, I was very careful about this, and the payoff was being able to make cash from selling full systems with monitor included.
This was an amazing time for me as a kid. I learned how to operate DOS, and further operating systems such as Windows 3.1 and further on, Windows 95.
Computer Knowledge Acquired from my ‘486 era’
Here are some random things I learned in the 1990s during my time tinkering with 486 systems. I guess some of the time was also spent with older 386 machines too.
DOS configuration using the CONFIG.SYS and AUTOEXEC.BAT files
Expanded memory manager configuration with EMM386.
Configuring CDROM device drivers in DOS and setting them up on boot.
Writing simple batch (.BAT) scripts.
Simple QBASIC programming.
A little later on, Turbo Pascal programming basics.
Compression and decompression with tools like ARJ.
Manual sound card configuration by selecting specific addresses and channels.
Networking two machines using serial or parallel cables (COM or LPT), and using laplink software to copy files between.
Gaming and PC use in the 1990s
Not all of my computer time as a kid was spent working with computer hardware. I enjoyed playing games just as much.
Some of my most memorable and favourite DOS games that I enjoyed playing on the first 486 system my parents owned, (and later on the 486 systems I built were):
X-Wing and Tie Fighter
UFO – Enemy Unknown
Ultima VIII: Pagan
Master of Orion (MOO)
Wacky Wheels
Death Rally
Screamer
Cannon Fodder
Strike Commander
Wing Commander
I also fondly remember writing science fiction (short stories) in word processing software in DOS and then printing them out on a dot matrix printer. I would take these to school and share with friends (who would also do the same thing).


