Recently I had to renew expired kubernetes certificates on my home lab cluster after getting locked out from managing it. I wasn’t tracking their age and all of a sudden I found them expired. Kubeadm has a feature to auto-renew certificates during control plane upgrades. Unfortunately I had not done an upgrade on my home cluster in the last year. I realised when issuing a kubectl command to the cluster and receiving an error along the lines of x509: certificate has expired or is not yet valid.
Preparation
To regain access I needed to SSH onto a master node in the cluster and do the following:
Move / backup old certificate and kubeadm config files:
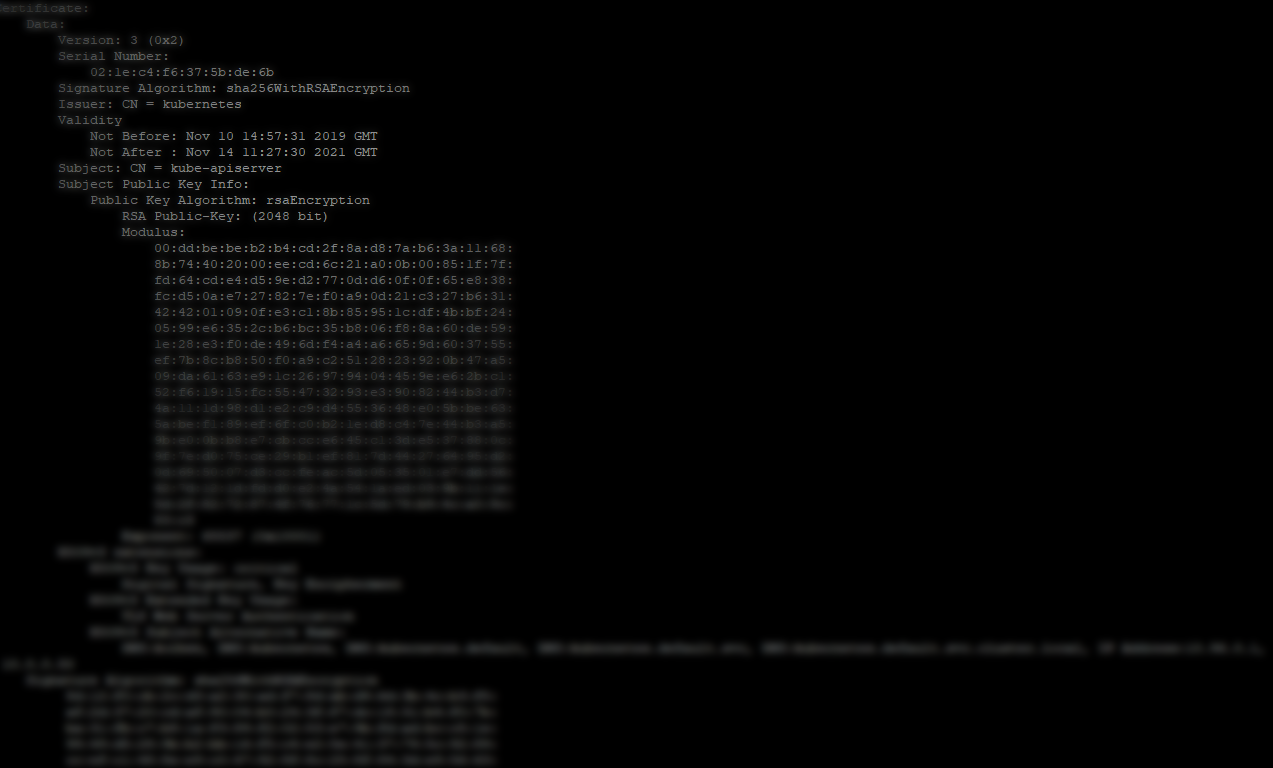
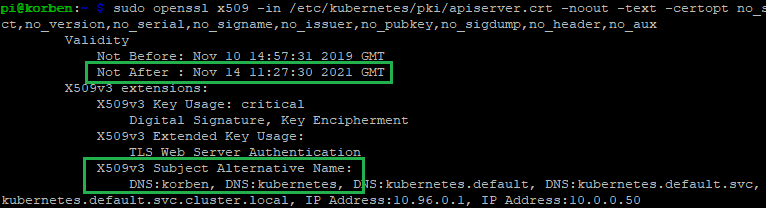
Inspect the generated certificates under /etc/kubernetes/pki to make sure they are generated correctly. E.g. expiry dates a year in the future, etc… For example, checking the new kube api server certificate details:
If your kube services have stopped on the master (kubelet etc) as a result of expired certificates and having tried to restart services recently (as was my case), reboot the master node at this point. All services that were failing to start because of expired certificates should now start correctly.
Reconnect and check everything is working as expected:
Once you start using your Raspberry Pi cluster for workloads with persistence, you’re probably going to want to implement a decent Kubernetes backup strategy.
I have been using my Raspberry Pi Cluster for a number of workloads with persistence requirements, from WordPress sites with MySQL databases, to Minecraft servers.
This post will detail how to get a basic install of Velero up and running on an ARM based Raspberry Pi Kubernetes cluster that uses NFS volume mounts for container persistence.
In other words, a solution that will allow you to backup both your Kubernetes resource states, and the storage that those resources are mounting and reading/writing from and to.
First though, I’ll revisit how I have been backing up my Pi cluster up until recently.
A Simple and Naive Backup Approach
One way of dealing with backups is a fairly brute force, copy data off and upload to another location method. I’ve been using this for a while now, but wanted a more Kubernetes-native method as an extra backup.
I have had a cronjob that does a mysql dump of all databases and then gzips and uploads this to BackBlaze B2 object storage.
Another cronjob handles compression and upload of a variety of different NFS volumes that pods mount. This cronjob runs in a BSD jail on my FreeNAS storage server, where the same Kubernetes NFS storage is mounted to.
Kubernetes Backup of State and Volumes with Velero
Velero is nice in the way that it is pluggable. You can use different plugins and adapters to talk to different types of storage services.
It works well enough to backup your pod storage if you’re running Kubernetes on a platform that where that storage runs too. For example, if you’re running Kubernetes on AWS and using EBS persistent volumes. Another example would be VMware with vSAN storage.
But in this post we’re dealing with Kubernetes on Raspberry Pi using NFS shared storage. If you haven’t yet setup shared storage, here is a guide to setting up NFS storage on Raspberry Pi Kubernetes.
We’ll assume you’re also wanting to backup your state and pod volume storage to AWS S3. You can quite easily modify some of the commands and use S3 API compatible storage instead though. E.g. minio.
Install Velero
On a management machine (where you’re setup with kubectl and your cluster context), download Velero and make it executable. I’m using a Raspberry Pi here, so I’ve downloaded the ARM version.
Create a dedicated IAM user for velero to use. You’ll also setup your parameters for S3 bucket and region, and add permissions to your IAM user for the target S3 bucket. Remember to change to use the AWS region of your preference.
Now you’re ready to install Velero into your cluster. Apply the magic incantation:
There are a few things going on here that are different to the standard / example install commands in the documentation…
The plugins parameter specifies the ARM version of the Velero AWS plugin. I found that the install command and the usual velero-plugin-for-aws selection tries to pull down the wrong docker image (for x86 architecture). Here we specify we want the ARM version from the main branch.
Use Restic Integration. This enables the Restic open source integration for persistent volume backup. This is the magic that allows us to backup our NFS mounted volumes. Also handy if you happen to be using other file storage types like EFS, AzureFile, or local mounted.
Disable volume snapshots. We’re on a Pi cluster with NFS storage, so we don’t want to use volume snapshots at all for backup.
After the Velero install completes, you should get some output to indicate success.
Velero is installed! ⛵ Use 'kubectl logs deployment/velero -n velero' to view the status.
You should also see your pods in the velero namespace up and running for Velero and Restic.
kubectl -n velero get pods
NAME                     READY   STATUS    RESTARTS   AGE
restic-589rm             1/1     Running   0          7m29s
restic-g6swc             1/1     Running   0          7m29s
velero-555695d95-dbzmd   1/1     Running   0          7m29s
If you see pod initialization errors, then double check you didn’t specify the normal velero plugin for AWS that would have caused the incorrect docker image architecture to be used.
With that complete, you’re ready to run your first backup.
Initiating a Manual Backup
Request a backup with the velero backup command. In the example below I’ll target my demo namespace. I’ll get volume backups for everything in this namespace that uses supported persistent volumes with the --default-volumes-to-restic flag.
If you don’t specify that flag, all backups will be opted-out by default for volume backups. That is, you opt-in to restic volume backups with this flag.
You can request backup state and details using the velero backup describe command.
velero backup describe demo-backup --details
It’s worth running a backup of a test namespace with some test workloads. Then simulate failure by deleting everything, followed by a velero restore.
This should prove the backup process works 100% and the DR strategy to be sound.
Don’t forget to do ocassional test DR scenarios to exercise your deployed backup solution!
Conclusion
It’s a good idea to backup your Kubernetes cluster once you start running services with persistence. Even if it is just for personal use.
A quick and dirty approach is to script out the export and backup of Kubernetes resources and mounted container storage. In the long run however, you’ll save time and get a more fully featured solution by using tools that are specifically designed for this use case.
I recently blogged about a small game I made that interfaces with any Kubernetes cluster and allows you to enter cluster nodes and destroy live, running pods.
I mentioned I would make the source available if there was any interest, so here it is.
After a little bit of code clean-up, and removing my 2D Shooter Bullet and Weapon System and 2D Neon Grid asset code from the game, the source is now available. These modules are game development modules/assets that I sell on the Unity Asset Store, and as such could not include in the source here. The fancy grid/background effect is therefore missing in this version.
I’ve also added an initial Windows build in the releases section, which is ready to go. Just unzip, run and enter your kube context/namespace details to get going.
If you decide to compile from source yourself, just make sure you have Unity 2019.4 or later installed and you should be good to go. I’ve not yet tested on macOS or Linux, but
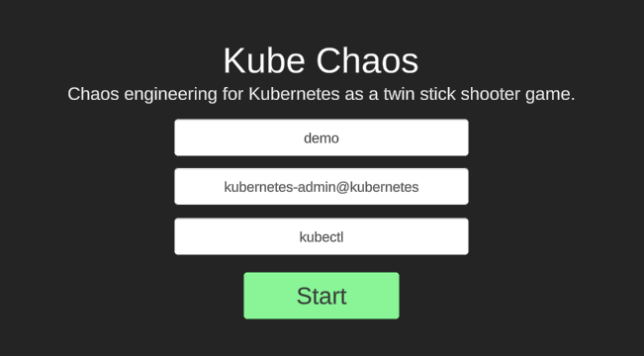
I enjoy game development as a hobby on the side. I also enjoy working with container schedulers like Kubernetes. Over the weekend I decided to create a Kubernetes game, combining those two thoughts.
In the game you enter and explore nodes in your cluster, and can destroy your very own live, running pods. Hide prod away!
The game is put together using my engine of choice, Unity. With Unity you code using C#.
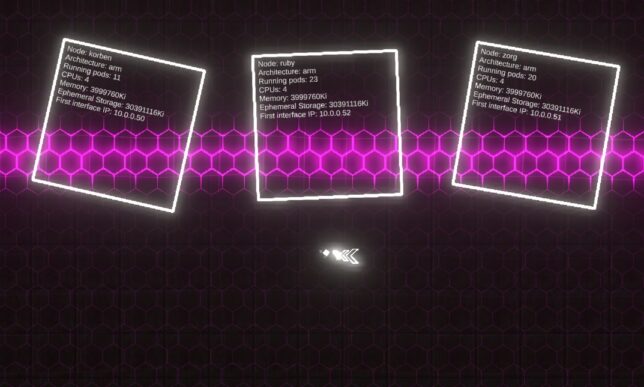
3 x Nodes represented in-game from my Raspberry Pi Kubernetes cluster. Can you spot the naming convention from one of my favourite movies?
Game Logic
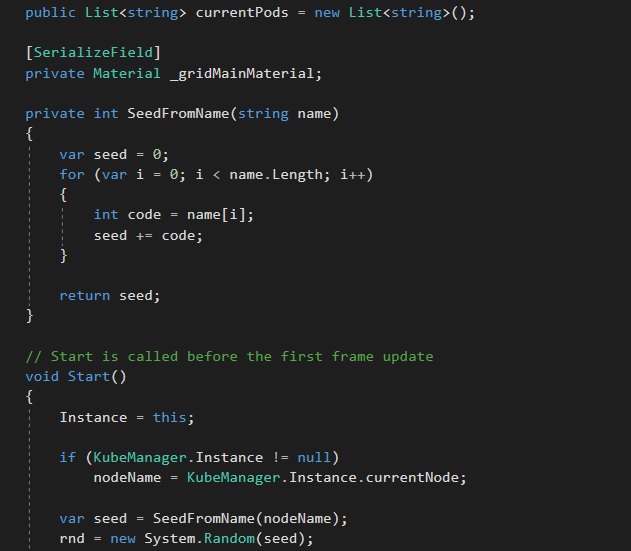
The game logic was simple to put together. I have a couple of modular systems I’ve already developed (and actually sell on the Unity Asset Store), so those made the movement and shooting logic, as well as background grid effects a breeze.
Movement is implemented in a simple ‘twin-stick’ controller Script (a Unity concept, which is a class implementing Monobehaviour).
Other game logic is mostly contained in the bullet pattern module. I have some more Scripts that arrange and control the Kubernetes entities as well as their labels.
The interaction with Kubernetes itself is fairly hacked together. I wanted to put the game together as quickly as possible as I only worked on it over a couple of weekend evenings.
Let the hacky code flow…
Unity is a bit behind in .NET Framework version support and .NET Core was out of the question. This meant using the Kubernetes csharp client was not going to happen easily (directly in Unity that is). It would have been my first choice otherwise.
With that in mind, I skipped over to a hacky solution of invocating the kubectl client directly from within the game.
The game code executes kubectlcommands on threads separate to the main game loop and returns the results formatted accordingly, back to the game’s main thread. I used System.Diagnostics.Process for this.
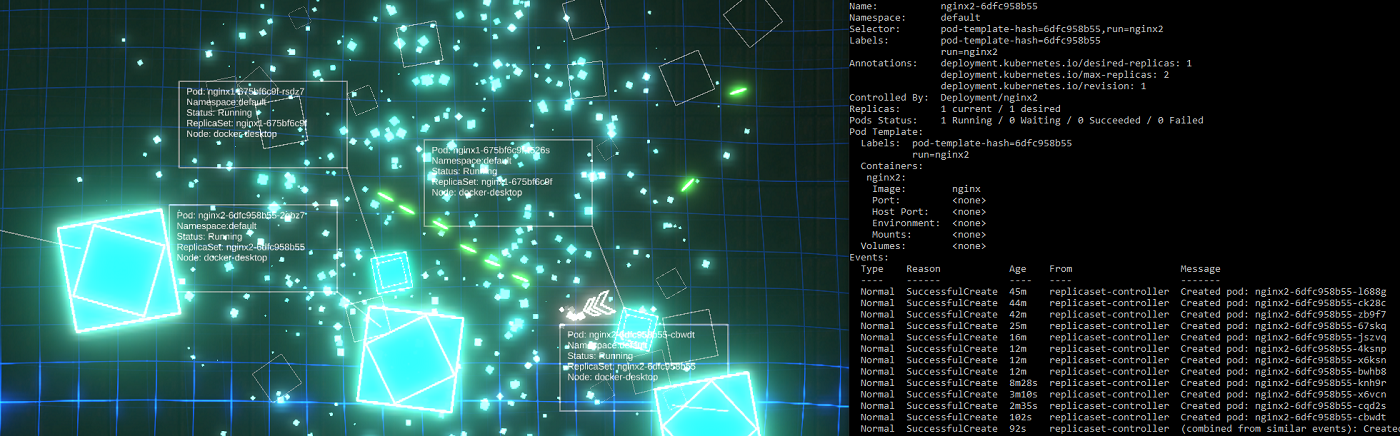
From there, game entities are instantiated and populated with info and labels. (E.g. the nodes and the pods).
Pods have health
Pods are given health (hit points) and they simply bounce around after spawning in. You can chase after and shoot them, at which point a kubectl destroy pod command is actually sent to the Kube API via kubectl!
The game world
You enter the world in a ‘node’ view, where you can see all of your cluster’s nodes. From there you can approach nodes to have them slide open a ‘door’. Entering the door transports you ‘into’ the node, where you can start destroying pods at will.
For obvious reasons I limit the pods that are destroyable to a special ‘demo’ namespace.
Putting together the demo pods
I use a great little tool called arkade in my Kubernetes Pi cluster.
arkade makes it really simple to install apps into your cluster. Great for quick POCs and demos.
Arkade offers a small library of useful and well thought out apps that are simple to install. The CLI provides strongly-typed flags to install these apps (or any helm charts) in short, one-line operations.
It also handles the logic around figuring out which platform you’re running on, and pulling down the correct images for that platform (if supported). Super useful when you’re on ARM as you are with the Raspberry Pi.
Straight from the GitHub page, this is how simple it is to setup:
# Note: you can also run without `sudo` and move the binary yourself
curl -sLS https://dl.get-arkade.dev | sudo sh

arkade --help
ark --help  # a handy alias

# Windows users with Git Bash
curl -sLS https://dl.get-arkade.dev | sh
I then went about installing a bunch of apps and charts with arkade. For example:
arkade install loki --namespace demo
Hooking the game up to my Kube Cluster
With the demo namespace complete, and the application pods running, I needed to get my Windows machine running the game talking to my Pi Cluster (on another local network).
I have a Pi ‘router’ setup that is perfectly positioned for this. All that is required is to run a kube proxy on this, listening on 0.0.0.0 and accepting all hosts.
I setup a local kube config pointing to the router’s local IP address on the interface facing my Windows machine’s network, and switched context to that configuration.
From there, the game’s kubectl commands get sent to this context and traverse the proxy to hit the kube API.
Destroying pods sure does exercise those ReplicaSets!
ReplicaSets spinning up new pods as quickly as they’re destroyed in-game!
Source
If there is any interest, I would be happy to publish the (hacky) source for the main game logic and basic logic that sends the kubectl processes off to other threads.
OpenFaaS is an open source project that provides a scalable platform to easily deploy event-driven functions and microservices.
It has great support to run on ARM hardware, which makes it an excellent fit for the Raspberry Pi. It’s worth mentioning that it is of course designed to run across a multitude of different platforms other than the Pi.
Getting Started
You’ll work with a couple of different CLI tools that I chose for the speed at which they can get you up and running:
arkade – a golang based CLI tool for quick and easy one liner installs for various apps / software for Kubernetes
There are other options like Helm or standard YAML files for Kubernetes that you could also use. Find more information about these here.
I have a general purpose admin and routing dedicated Pi in my Raspberry Pi stack that I use for doing admin tasks in my cluster. This made for a great bastion host that I could use to run the following commands:
Install arkade
# Important! Before running these scripts, always inspect the remote content first, especially as they're piped into sh with 'sudo'

# MacOS or Linux
curl -SLsf https://dl.get-arkade.dev/ | sudo sh

# Windows using Bash (e.g. WSL or Git Bash)
curl -SLsf https://dl.get-arkade.dev/ | sh
Install faas-cli
# Important! Before running these scripts, always inspect the remote content first, especially as they're piped into sh with 'sudo'

# MacOS
brew install faas-cli

# Using curl
curl -sL https://cli.openfaas.com | sudo sh
Deploying OpenFaaS
Using arkade, deploy OpenFaaS with:
arkade install openfaas
If you followed my previous articles in this series to set your cluster up, then you’ll have a LoadBalancer service type available via MetalLB. However, in my case (with the above command), I did not deploy a LoadBalancer service, as I already use a single Ingress Controller for external traffic coming into my cluster.
The assumption is that you have an Ingress Controller setup for the remainder of the steps. However, you can get by without one, accessing OpenFaaS by the external gateway NodePortservice instead.
The arkade install will output a command to get your password. By default OpenFaaS comes with Basic Authentication. You’ll fetch the admin password you can use to access the system with Basic Auth next.
Grab the generated admin password and login with faas-cli:
OpenFaaS will have deployed with two Gateway services in the openfaas namespace.
gateway (ClusterIP)
gateway-external (NodePort)
Instead of relying on the NodePort service, I chose to create an Ingress Rule to send traffic from my cluster’s Ingress Controller to OpenFaaS’ ClusterIP service (gateway).
You’ll want SSL so setup a K8s secret to hold your certificate details for the hostname you choose for your Ingress Rule. Here is a template you can use for your OpenFaaS ingress:
You should now be able to access the OpenFaaS UI with something like https://openfaas.foo.bar/ui/
Creating your own Functions
Life is far more fun on the CLI, so get started with some basics with first:
faas-cli store list --platform armhf – show some basic functions available for armhf (Pi)
faas-cli store deploy figlet --platform armhf – deploy the figlet function that converts text to ASCII representations of that text
echo "hai" | faas-cli invoke figlet – pipe the text ‘hai’ into the faas-cli invoke command to invoke the figlet function and get it to generate the equivalent in ASCII text.
Now, create your own function using one of the many templates available. You’ll be using the incubator template for python3 HTTP. This includes a newer function watchdog (more about that below), which gives more control over the HTTP / event lifecycle in your functions.
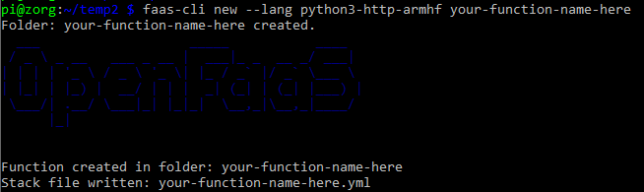
Grab the python3 HTTP template for armhf and create a new function with it:
# Grab incubator templates for Python, including Python HTTP. Will figure out it needs the armhf ones based on your architecture!

faas template pull https://github.com/openfaas-incubator/python-flask-template
faas-cli new --lang python3-http-armhf your-function-name-here
Success – a new, python3 HTTP function ready to go
A basic file structure gets scaffolded out. It contains a YAML file with configuration about your function. E.g.
The YAML informs building and deploying of your function.
A folder with your function handler code is also created alongside the YAML. For python it contains handler.py and requirements.txt (for python library requirements)
def handle(event, context):
    # TODO implement
    return {
        "statusCode": 200,
        "body": "Hello from OpenFaaS!"
    }
As you used the newer function templates with the latest OF Watchdog, you get full access to the event and context in your handler without any extra work. Nice!
Build and Deploy your Custom Function
Run the faas up command to build and publish your function. This will do a docker build / tag / push to a registry of your choice and then deploy the function to OpenFaaS. Update your your-function-name-here.yml file to specify your desired docker registry/repo/tag, and OpenFaas gateway address first though.
faas up -f your-function-name-here.yml
Now you’re good to go. Execute your function by doing a GET request to the function URL, using faas invoke, or by using the OpenFaaS UI!
Creating your own OpenFaaS Docker images
You can convert most Docker images to run on OpenFaaS by adding the function watchdog to your image. This is a very small HTTP server written in Golang.
It becomes the entrypoint which forwards HTTP requests to your target process via STDIN or HTTP. The response goes back to the requester by STDOUT or HTTP.
Hopefully this gave you a good base to get started with OpenFaaS. We covered everything from deployment and configuration, to creating your own custom functions and images. Have fun experimenting!