Kubernetes Backup on Raspberry Pi

storage server in data center rack

Once you start using your Raspberry Pi cluster for workloads with persistence, you’re probably going to want to implement a decent Kubernetes backup strategy.

I have been using my Raspberry Pi Cluster for a number of workloads with persistence requirements, from WordPress sites with MySQL databases, to Minecraft servers.

This post will detail how to get a basic install of Velero up and running on an ARM based Raspberry Pi Kubernetes cluster that uses NFS volume mounts for container persistence.

In other words, a solution that will allow you to backup both your Kubernetes resource states, and the storage that those resources are mounting and reading/writing from and to.

First though, I’ll revisit how I have been backing up my Pi cluster up until recently.

A Simple and Naive Backup Approach

One way of dealing with backups is a fairly brute force, copy data off and upload to another location method. I’ve been using this for a while now, but wanted a more Kubernetes-native method as an extra backup.

I have had a cronjob that does a mysql dump of all databases and then gzips and uploads this to BackBlaze B2 object storage.

Another cronjob handles compression and upload of a variety of different NFS volumes that pods mount. This cronjob runs in a BSD jail on my FreeNAS storage server, where the same Kubernetes NFS storage is mounted to.

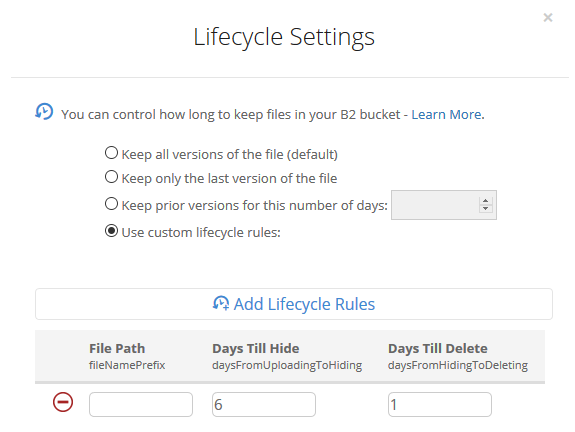
You can see the details of how I do this in my Cheap S3 Cloud Backup with BackBlaze B2 post.

Kubernetes Backup of State and Volumes with Velero

Velero is nice in the way that it is pluggable. You can use different plugins and adapters to talk to different types of storage services.

It works well enough to backup your pod storage if you’re running Kubernetes on a platform that where that storage runs too. For example, if you’re running Kubernetes on AWS and using EBS persistent volumes. Another example would be VMware with vSAN storage.

But in this post we’re dealing with Kubernetes on Raspberry Pi using NFS shared storage. If you haven’t yet setup shared storage, here is a guide to setting up NFS storage on Raspberry Pi Kubernetes.

We’ll assume you’re also wanting to backup your state and pod volume storage to AWS S3. You can quite easily modify some of the commands and use S3 API compatible storage instead though. E.g. minio.

Install Velero

On a management machine (where you’re setup with kubectl and your cluster context), download Velero and make it executable. I’m using a Raspberry Pi here, so I’ve downloaded the ARM version.

curl -L -O https://github.com/vmware-tanzu/velero/releases/download/v1.5.1/velero-v1.5.1-linux-arm.tar.gz
tar -xvf velero-v1.5.1-linux-arm.tar.gz
sudo mv velero-v1.5.1-linux-arm/velero /usr/local/bin/velero
sudo chmod +x /usr/local/bin/velero

Create a dedicated IAM user for velero to use. You’ll also setup your parameters for S3 bucket and region, and add permissions to your IAM user for the target S3 bucket. Remember to change to use the AWS region of your preference.

Now you’re ready to install Velero into your cluster. Apply the magic incantation:

velero install --provider aws --plugins velero/velero-plugin-for-aws-arm:main --bucket $BUCKET --backup-location-config region=$REGION --secret-file ./credentials-velero --use-restic --use-volume-snapshots=false

There are a few things going on here that are different to the standard / example install commands in the documentation…

  • The plugins parameter specifies the ARM version of the Velero AWS plugin. I found that the install command and the usual velero-plugin-for-aws selection tries to pull down the wrong docker image (for x86 architecture). Here we specify we want the ARM version from the main branch.
  • Use Restic Integration. This enables the Restic open source integration for persistent volume backup. This is the magic that allows us to backup our NFS mounted volumes. Also handy if you happen to be using other file storage types like EFS, AzureFile, or local mounted.
  • Disable volume snapshots. We’re on a Pi cluster with NFS storage, so we don’t want to use volume snapshots at all for backup.

After the Velero install completes, you should get some output to indicate success.

Velero is installed! ⛵ Use 'kubectl logs deployment/velero -n velero' to view the status.

You should also see your pods in the velero namespace up and running for Velero and Restic.

kubectl -n velero get pods
NAME                     READY   STATUS    RESTARTS   AGE
restic-589rm             1/1     Running   0          7m29s
restic-g6swc             1/1     Running   0          7m29s
velero-555695d95-dbzmd   1/1     Running   0          7m29s

If you see pod initialization errors, then double check you didn’t specify the normal velero plugin for AWS that would have caused the incorrect docker image architecture to be used.

With that complete, you’re ready to run your first backup.

Initiating a Manual Backup

Request a backup with the velero backup command. In the example below I’ll target my demo namespace. I’ll get volume backups for everything in this namespace that uses supported persistent volumes with the --default-volumes-to-restic flag.

If you don’t specify that flag, all backups will be opted-out by default for volume backups. That is, you opt-in to restic volume backups with this flag.

velero backup create demo-backup --include-namespaces=demo --default-volumes-to-restic

You can request backup state and details using the velero backup describe command.

velero backup describe demo-backup --details

It’s worth running a backup of a test namespace with some test workloads. Then simulate failure by deleting everything, followed by a velero restore.

This should prove the backup process works 100% and the DR strategy to be sound.

Don’t forget to do ocassional test DR scenarios to exercise your deployed backup solution!

Conclusion

It’s a good idea to backup your Kubernetes cluster once you start running services with persistence. Even if it is just for personal use.

A quick and dirty approach is to script out the export and backup of Kubernetes resources and mounted container storage. In the long run however, you’ll save time and get a more fully featured solution by using tools that are specifically designed for this use case.

Cheap S3 Cloud Backup with BackBlaze B2

white and blue fiber optic cables in a FC storage switch

I’ve been constantly evolving my cloud backup strategies to find the ultimate cheap S3 cloud backup solution.

The reason for sticking to “S3” is because there are tons of cloud provided storage service implementations of the S3 API. Sticking to this means that one can generally use the same backup/restore scripts for just about any service.

The S3 client tooling available can of course be leveraged everywhere too (s3cmd, aws s3, etc…).

BackBlaze B2 gives you 10GB of storage free for a start. If you don’t have too much to backup you could get creative with lifecycle policies and stick within the 10GB free limit.

a lifecycle policy to delete objects older than 7 days.

Current Backup Solution

This is the current solution I’ve setup.

I have a bunch of files on a FreeNAS storage server that I need to backup daily and send to the cloud.

I’ve setup a private BackBlaze B2 bucket and applied a lifecycle policy that removes any files older than 7 days. (See example screenshot above).

I leveraged a FreeBSD jail to install my S3 client (s3cmd) tooling, and mount my storage to that jail. You can follow the steps below if you would like to setup something similar:

Step-by-step setup guide

Create a new jail.

Enable VNET, DHCP, and Auto-start. Mount the FreeNAS storage path you’re interested in backing up as read-only to the jail.

The first step in a clean/base jail is to get s3cmd compiled and installed, as well as gpg for encryption support. You can use portsnap to get everything downloaded and ready for compilation.

portsnap fetch
portsnap extract # skip this if you've already run extract before
portsnap update

cd /usr/ports/net/py-s3cmd/
make -DBATCH install clean
# Note -DBATCH will take all the defaults for the compile process and prevent tons of pop-up dialogs asking to choose. If you don't want defaults then leave this bit off.

# make install gpg for encryption support
cd /usr/ports/security/gnupg/ && make -DBATCH install clean

The compile and install process takes a number of minutes. Once complete, you should be able to run s3cmd –configure to set up your defaults.

For BackBlaze you’ll need to configure s3cmd to use a specific endpoint for your region. Here is a page that describes the settings you’ll need in addition to your access / secret key.

After gpg was compiled and installed you should find it under the path /usr/local/bin/gpg, so you can use this for your s3cmd configuration too.

Double check s3cmd and gpg are installed with simple version checks.

gpg --version
s3cmd --version
quick version checks of gpg and s3cmd

A simple backup shell script

Here is a quick and easy shell script to demonstrate compressing a directory path and all of it’s contents, then uploading it to a bucket with s3cmd.

DATESTAMP=$(date "+%Y-%m-%d")
TIMESTAMP=$(date "+%Y-%m-%d-%H-%M-%S")

tar --exclude='./some-optional-stuff-to-exclude' -zcvf "/root/$TIMESTAMP-backup.tgz" .
s3cmd put "$TIMESTAMP-backup.tgz" "s3://your-bucket-name-goes-here/$DATESTAMP/$TIMESTAMP-backup.tgz"

Scheduling the backup script is an easy task with crontab. Run crontab -e and then set up your desired schedule. For example, daily at 25 minutes past 1 in the morning:

25 1 * * * /root/backup-script.sh

My home S3 backup evolution

I’ve gone from using Amazon S3, to Digital Ocean Spaces, to where I am now with BackBlaze B2. BackBlaze is definitely the cheapest option I’ve found so far.

Amazon S3 is overkill for simple home cloud backup solutions (in my opinion). You can change to use infrequent access or even glacier tiered storage to get the pricing down, but you’re still not going to beat BackBlaze on pure storage pricing.

Digital Ocean Spaces was nice for a short while, but they have an annoying minimum charge of $5 per month just to use Spaces. This rules it out for me as I was hunting for the absolute cheapest option.

BackBlaze currently has very cheap storage costs for B2. Just $0.005 per GB and only $0.01 per GB of download (only really needed if you want to restore some backup files of course).

Concluding

You can of course get more technical and coerce a willing friend/family member to host a private S3 compatible storage service for you like Minio, but I doubt many would want to go to that level of effort.

So, if you’re looking for a cheap S3 cloud backup solution with minimal maintenance overhead, definitely consider the above.

This is post #4 in my effort towards 100DaysToOffload.

Another update! ESXi Host Backup & Restore GUI Utility (PowerCLI based) updated to 1.3

The other weekend I managed to get some spare time to do another update to my ESXi 5.0 / 5.1 Host Backup & Restore GUI utility, this time it has been updated to version 1.3. I didn’t post up the changes as it was done by special request from one of my blog readers (thanks Flavio!) However, after receiving more comments with a few others having a similiar issue to what Flavio had, I thought I should definitely post the updated version here, which should hopefully solve the issues some people are seeing.


The changes are based on feedback received in the comments I have received about the utility relating to exceptions received when users in some circumstances try to backup their host configurations. Specifically the exception message “Exception caught: Get-VMHost VMHost with name ‘xxx’ was not found using the specified filter(s).

You can check the utility out over on it’s page here.

Updates (17-02-2013) – version 1.3:

  • Hosts are retrieved using a new method (for both backup and restore options)


ESXi Host Backup & Restore GUI Utility (PowerCLI based) updated to 1.2

A quick post today to just mention that I have updated my ESXi 5.0 / 5.1 Host Backup & Restore GUI utility to version 1.2.


There are a couple of improvements in 1.2 based on feedback received in the comments I have received about the utility. The main improvement introduces a function in the script which backs the GUI to check that ESX hosts are valid before attempting to backup or restore these. You can check the utility out over on it’s page here.


Updates (29-12-2012) – version 1.2:

  • Added ESX/ESXi host validation into utility – will now test that the host is valid and either connected or in maintenance mode before attempting backup or restore (See the script’s new “Check-VMHost” function for those interested)
  • Minor UI improvements


ESXi 5 Host Backup & Restore GUI Utility updated to 1.1

This little host backup utility I created back in February 2012 has been receiving quite a bit of attention, and has already managed to get over 2000 downloads.


Someone recently asked the other day if it was possible to restore a configuration file to a new host (i.e. new hardware). With version 1.0 of my utility, this was not possible due to mismatches that the PowerCLI cmdlet finds (i.e. MAC addresses on NICs etc… on the new hardware when compared to the existing backup). However, the Set-VMHostFirmware cmdlet allows the use of a -Force paramter, so I set about updating the utility to allow for this.


Here is a quick list of changes in version 1.1

  • Allows restore to new hardware (tick the “Force restore to new hardware” checkbox). Please note that I have only very briefly tested this on virtualised ESXi hosts – it works, but I am not sure how networking configurations are applied to NICs and differing physical NIC orders – so it is best to test this thoroughly in a dev/test environment before using anywhere else!
  • Tested against single ESXi hosts as opposed to connecting to vCenter first.
  • Updated labels to neaten up a bit – connection box now shows that you can connect to single hosts or vCenter
  • Tested on ESXi 5.1


You can download version 1.1 from the same page as before: ESXi 5 Host Backup & Restore GUI Utility