Cheap S3 Cloud Backup with BackBlaze B2

white and blue fiber optic cables in a FC storage switch

I’ve been constantly evolving my cloud backup strategies to find the ultimate cheap S3 cloud backup solution.

The reason for sticking to “S3” is because there are tons of cloud provided storage service implementations of the S3 API. Sticking to this means that one can generally use the same backup/restore scripts for just about any service.

The S3 client tooling available can of course be leveraged everywhere too (s3cmd, aws s3, etc…).

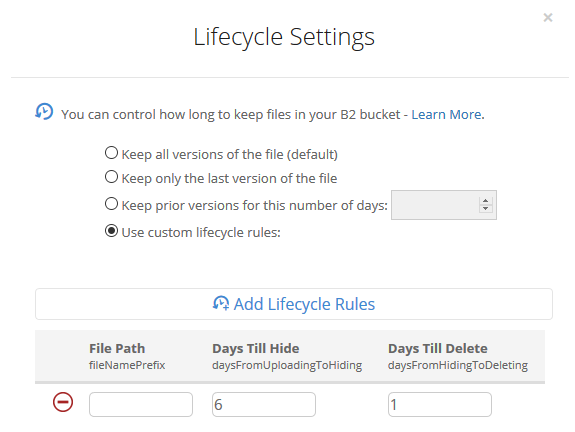
BackBlaze B2 gives you 10GB of storage free for a start. If you don’t have too much to backup you could get creative with lifecycle policies and stick within the 10GB free limit.

a lifecycle policy to delete objects older than 7 days.

Current Backup Solution

This is the current solution I’ve setup.

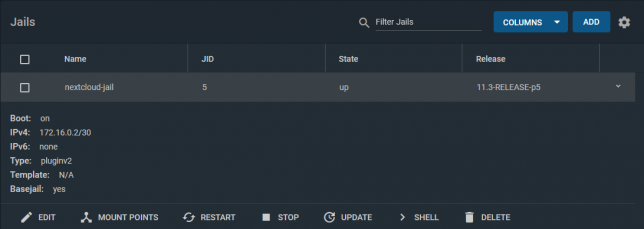
I have a bunch of files on a FreeNAS storage server that I need to backup daily and send to the cloud.

I’ve setup a private BackBlaze B2 bucket and applied a lifecycle policy that removes any files older than 7 days. (See example screenshot above).

I leveraged a FreeBSD jail to install my S3 client (s3cmd) tooling, and mount my storage to that jail. You can follow the steps below if you would like to setup something similar:

Step-by-step setup guide

Create a new jail.

Enable VNET, DHCP, and Auto-start. Mount the FreeNAS storage path you’re interested in backing up as read-only to the jail.

The first step in a clean/base jail is to get s3cmd compiled and installed, as well as gpg for encryption support. You can use portsnap to get everything downloaded and ready for compilation.

portsnap fetch
portsnap extract # skip this if you've already run extract before
portsnap update

cd /usr/ports/net/py-s3cmd/
make -DBATCH install clean
# Note -DBATCH will take all the defaults for the compile process and prevent tons of pop-up dialogs asking to choose. If you don't want defaults then leave this bit off.

# make install gpg for encryption support
cd /usr/ports/security/gnupg/ && make -DBATCH install clean

The compile and install process takes a number of minutes. Once complete, you should be able to run s3cmd –configure to set up your defaults.

For BackBlaze you’ll need to configure s3cmd to use a specific endpoint for your region. Here is a page that describes the settings you’ll need in addition to your access / secret key.

After gpg was compiled and installed you should find it under the path /usr/local/bin/gpg, so you can use this for your s3cmd configuration too.

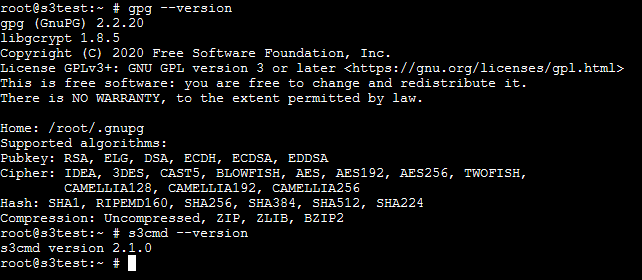
Double check s3cmd and gpg are installed with simple version checks.

gpg --version
s3cmd --version
quick version checks of gpg and s3cmd

A simple backup shell script

Here is a quick and easy shell script to demonstrate compressing a directory path and all of it’s contents, then uploading it to a bucket with s3cmd.

DATESTAMP=$(date "+%Y-%m-%d")
TIMESTAMP=$(date "+%Y-%m-%d-%H-%M-%S")

tar --exclude='./some-optional-stuff-to-exclude' -zcvf "/root/$TIMESTAMP-backup.tgz" .
s3cmd put "$TIMESTAMP-backup.tgz" "s3://your-bucket-name-goes-here/$DATESTAMP/$TIMESTAMP-backup.tgz"

Scheduling the backup script is an easy task with crontab. Run crontab -e and then set up your desired schedule. For example, daily at 25 minutes past 1 in the morning:

25 1 * * * /root/backup-script.sh

My home S3 backup evolution

I’ve gone from using Amazon S3, to Digital Ocean Spaces, to where I am now with BackBlaze B2. BackBlaze is definitely the cheapest option I’ve found so far.

Amazon S3 is overkill for simple home cloud backup solutions (in my opinion). You can change to use infrequent access or even glacier tiered storage to get the pricing down, but you’re still not going to beat BackBlaze on pure storage pricing.

Digital Ocean Spaces was nice for a short while, but they have an annoying minimum charge of $5 per month just to use Spaces. This rules it out for me as I was hunting for the absolute cheapest option.

BackBlaze currently has very cheap storage costs for B2. Just $0.005 per GB and only $0.01 per GB of download (only really needed if you want to restore some backup files of course).

Concluding

You can of course get more technical and coerce a willing friend/family member to host a private S3 compatible storage service for you like Minio, but I doubt many would want to go to that level of effort.

So, if you’re looking for a cheap S3 cloud backup solution with minimal maintenance overhead, definitely consider the above.

This is post #4 in my effort towards 100DaysToOffload.

Install and configure Nextcloud plugin on FreeNAS with SSL

Install and configure Nextcloud plugin on FreeNAS with SSL

The FreeNAS Nextcloud plugin installation works great with automatic configuration thanks to a recent pull request. But, you don’t get SSL enabled by default. This is critical, especially for a system exposed to the internet.

In this post you’ll see how to:

  • Install the Nextcloud plugin in a FreeNAS BSD jail
  • Add an extra NAT port for SSL to the jail
  • Configure NGINX inside the jail by adding a customised configuration with SSL enabled
  • Apply a free SSL certificate using Lets Encrypt and DNS-01 challenge validation
  • Look at some options for setting up home networking for public access

Start off by Installing the Nextcloud Plugin in a jail. Choose NAT for networking mode. It defaults to port 8282:80 (http).

the Nextcloud jail in the FreeNAS UI

Stop the jail once it’s running and edit it. Add another NAT rule to point 8443 to 443 for SSL.

the extra port 8443 - 443 NAT rule to add

The reason for selecting port 8443 for Nextcloud is because the FreeNAS web UI listens on port 443 for SSL too.

An alternative could be to use DHCP instead of NAT for the jail. I chose NAT for my setup as I prefer using one internal IP address for everything I run on the FreeNAS server.

Shell into the Nextcloud jail, and rename the default nginx configuration.

mv /usr/local/etc/nginx/conf.d/nextcloud.conf /usr/local/etc/nginx/conf.d/nextcloud.conf.old

NGINX will load all .conf files in this directory. Hence the reason you’ll create a new configuration for your SSL setup here.

ee /usr/local/etc/nginx/conf.d/nextcloud-ssl.conf

Populate it with the contents of the gist below, but replace server_name, ssl_certificate, and ssl_certificate_key with your own hostname.

Generate a free SSL certificate with Lets Encrypt

To configure the Nextcloud plugin on FreeNAS with SSL you don’t need to break the bank on SSL certificate costs from traditional CAs. Lets Encrypt it free, but you’ll need to renew your certificate every three months.

DNS-01 challenge certificate generation for Lets Encrypt is a great way to get SSL certificates without a public web server.

It entails creating a TXT/SPF record on the domain you own, with a value set to a code that certbot gives you during the certbot request process.

Install certbot if you don’t already have it installed. On a debian based system:

sudo apt-get install certbot

Request a certificate for your desired hostname using certbot with dns as the preferred challenge.

sudo certbot -d yournextcloud.example.net --manual --preferred-challenges dns certonly

Follow the prompts until you receive a code to setup your own TXT record with. Go to your DNS provider control panel and create it with the code you’re given as the value.

After creating the record, finish the certificate request. Lets Encrypt will confirm the DNS TXT record and issue you a certificate. You’ll get a chain file called fullchain.pem, along with a private key file called privkey.pem.

Upload the SSL certificate files to Nextcloud

Upload both to your Nextcloud Jail. Use SCP to copy them up, renaming them as follows:

  • /etc/ssl/nginx/yournextcloud.example.net.crt (certificate chain file)
  • /etc/ssl/nginx/yournextcloud.example.net.key (private key file)

Rename them as per your chosen hostname to keep things organised, and so that they match your nextcloud-ssl.conf file entries.

Port forwarding / NAT setup

This is the part that comes down to your own network setup. I use a double NAT setup, so I NAT traffic from my external router interface, through to another internal router.

From my internal router, I port forward / NAT from the internal router interface through to my FreeNAS box on port 8443.

From there, the Nextcloud jail does NAT to take the TCP traffic from 8443 to 443 inside the jail (where NGINX is listening on 443).

This is how my NAT and port forwarding chain looks:

Public_IP:29123 (WAN interface) -> Internal_IP:29123 (Internal router LAN interface) -> Internal_IP:8443 (FreeNAS LAN interface) -> Internal_IP:443 (Nextcloud Jail)

If you’re lucky enough to have a static IP address then you can point your DNS host record to your static IP. Otherwise you’ll neee to use some form of dynamic DNS service.

At this point you should have everything in place.

Final steps

Using a shell in the Nextcloud jail, restart nginx with service nginx restart. If all goes well you’ll see nginx started in the output of that command.

If not, you’re likely to have an NGINX configuration syntax error.

The logs are usually good about pinpointing these, so read them to see where you might have missed something obvious in the nextcloud-ssl.conf file. Adjust any errors and restart again.

The default credentials that for Nextcloud are in the home directory of the jail (/root). To retrieve them:

cat /root/ncuser
cat /root/ncpassword

Test logging in, and get started with personalising your Nextcloud system and adding some users.

Now you can enjoy the Nextcloud plugin on FreeNAS with SSL enabled.