SSM and socat Port Forwarding to Access Private VPC Resources

AWS System Manager Session Manager added the port forwarding feature, announced in this blog post back in 2019. In this post I’ll show you how to leverage SSM and socat port forwarding to access systems in a private subnet that don’t have the SSM agent installed.

You’ll use an SSM agent enabled EC2 instance as an initial target for the ssm port forward session. On this instance, you’ll run socat as a relay for the incoming TCP session to the other instance that does not have the SSM agent.

What is socat?

To quote the official man page, socat (SOcket CAT) is a multipurpose relay. It is a command line tool that establishes two bidirectional byte streams and transfers data between them.

You can use it to connect all sorts of channels. For example:

  • files
  • pipes
  • devices
  • sockets, such as TCP, UDP, IPv4, etc
  • SSL sockets
  • programs

SSM and socat Port Forwarding Example

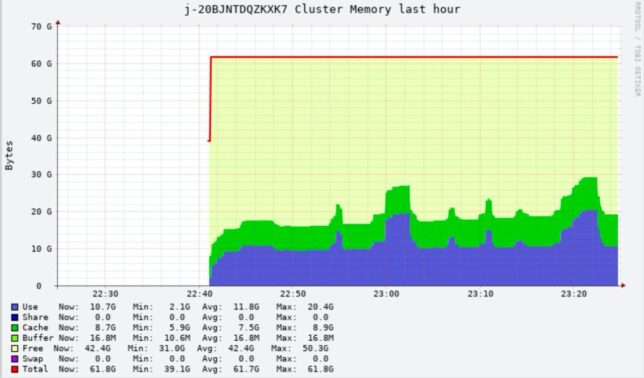
In my example I have an AWS EMR (Elastic Map Reduce) master node running a web dashboard for ganglia in a private VPC subnet.

I don’t want to add a bastion host / jump box or provide SSH access from the public net.

SSM would provide a nice way for me to connect a remote session, or port forward using IAM authentication and negating the need for any ingress security group rules, but only if I had the SSM agent available on this instance.

Seeing as though the EMR master node is not SSM agent enabled, and I can’t use SSM port forwarding directly to this instance, we could use an interim machine with SSM as a jump box.

Example Configuration

Here is how I configured port forwarding in my use case to access ganglia on a private instance EMR node.

  • The EC2 instance with SSM agent must have an IAM policy attached that allows the relevant ssm access. The blog post linked above has instructions. In a nutshell though, most standard Amazon AMIs include the ssm agent. Your EC2 instance profile should include the required actions too. The AmazonSSMManagedInstanceCore managed policy includes these.
  • Install socat on the SSM agent enabled interim machine the private subnet. For this I connected an SSM session to get shell access and ran sudo yum install -y socat
  • Now I needed to open a source channel for the SSM port forward aws cli command to connect, and connect that source to the destination of the EMR master node running ganglia.
socat TCP4-LISTEN:8080,fork,reuseaddr TCP4:10.0.4.149:80

The command listens on port 8080, and forwards TCP to the EMR node, 10.0.4.149 on port 80. Importantly, the command uses fork and reuseaddr to allow multiple connections.

  • Next is to use the AWS CLI ssm start-session command to start a port forwarding session to the interim instance with the SSM agent running. Grab the Instance ID for the EC2 machine and:
aws ssm start-session --target {your-instance-id-here} --document-name AWS-StartPortForwardingSession --parameters '{"portNumber":["8080"],"localPortnumber":["8089"]}'
ssm and socat port forwarding in action

If you setup socat correctly to listen on port 8080, then the connection should be opened and accepted.

Now you can simply open a web browser locally and direct it to http://localhost:8089/ganglia to access ganglia on the remote EMR master node.

Accessing EMR cluster memory stats via the remote port forwarded session.

Closing

AWS SSM is a useful tool to get access to instances in a secure, audited fashion without needing to open up risky SSH access or other remote ports to the public internet.

When constrained and needing a jump across to an instance without the SSM agent you can leverage tools to help. Socat is one such tool that can facilitate this within the private network.

Networking – Learning about TCP/IP

So today I was asked a question about TCP/IP. Specifically, about how a TCP connection is established. Networking is something I definitely do not spend enough time on (and have I have never really gone into the nitty gritty as to how it works either). I understand all the basics and what I need to get around for my job, as well as some more advanced or bespoke bits that I have learnt / done on the fly as and when required, but think that I do need to learn more about how the underlying technology works.

As a start to this, I am writing this quick post to answer this question. (See first line of this post). I did know that some kind of handshake needed to be done to establish the initial connection (that part is obvious), but the specific answer is quoted below (source: Wikipedia).

Question: How is a TCP connection first established?

Connection establishment
To establish a connection, TCP uses a three-way handshake. Before a client attempts to connect with a server, the server must first bind to a port to open it up for connections: this is called a passive open. Once the passive open is established, a client may initiate an active open. To establish a connection, the three-way (or 3-step) handshake occurs:
The active open is performed by the client sending a SYN to the server. It sets the segment’s sequence number to a random value A.
In response, the server replies with a SYN-ACK. The acknowledgment number is set to one more than the received sequence number (A + 1), and the sequence number that the server chooses for the packet is another random number, B.
Finally, the client sends an ACK back to the server. The sequence number is set to the received acknowledgement value i.e. A + 1, and the acknowledgement number is set to one more than the received sequence number i.e. B + 1.
At this point, both the client and server have received an acknowledgment of the connection.

I have got a Cisco for beginners book sitting on the bookshelf here, so I think as soon as my current personal projects and VCP training are finished, I’ll get back to reading that! I also hope to post more on Networking in the future as I come to terms with the fundamentals.

Modify your NIC MTU size setting in Windows Registry

A quick and easy blog post today on how to modify your NIC MTU (Maximum Transmission Unit) size setting in the Windows Registry.

By default your MTU won’t be defined in registry. Microsoft state that (Link):

The MTU is usually determined by negotiating with the lower-level driver. However, this value may be overridden.

To change your MTU setting in Windows Server 2003 or 2008 use the following steps:

  • Open regedit as an administrator account on the server in question.
  • Navigate to HKLM\System\CurrentControlSet\services\Tcpip\Parameters\Interfaces\[Choose the interface in question] (Do this by checking the correct IP address is in the settings under this key for the adapter you are configuring)
  • Once you are in the correct key for your interface, right-click and select new DWORD value (32 bit).
  • Call it MTU
  • Give this a decimal value equal to the setting you would like your MTU to be (measured in bytes).

For more information about Maximum Transmission Unit sizes, have a look at the official Wikipedia article.

Here is a screenshot of an MTU setting I made on this server using 1400 bytes as an example. This would obviously be tuned to whatever amount you are wanting to use for your NIC and specific application settings.

How to restart a slave FortiGate firewall in an HA cluster

Here’s a quick how-to on restarting a specific member of a High Availability FortiGate hardware firewall cluster. I have only tested this on a cluster of FG60 units, but am quite sure the steps would be similar for a cluster of FG100s, FG310s etc…

get-ha-status

First of all you may or may not want to set up some monitoring going to your various WAN connections on the HA cluster. Restarting the slave unit should not have any effect on these connections in theory as your master unit is the one handling all the work. The slave is merely there to take over should things go pear shaped on the master unit. When the slave restarts you can watch your ping statistics or other connections just to ensure everything stays up whilst it reboots.

1. Start by logging in to the web interface of your firewall cluster. https://ipaddress

2. Specify a custom port number if you have the management GUI on a custom port for example https://ipaddress:555

3. Login and look for “HA status” under the status area – this should be the default page that loads. It should show as “Active-passive” if this is the mode your HA cluster is in. Click the [Configure] link next to this.

4. This will give you an overview of your HA cluster – you can view which unit is the Master and which is the slave. This step is optional and just gives you a nice overview of how things are looking at the moment. Click “View HA statistics” near the top right if you would like to view each unit’s CPU/Memory usage and other statistics.

5. Return to the “Status” home page of your firewall GUI. Click in the “CLI Console” black window area to get to your console. (Optionally, you could also just SSH in if you have this enabled).

6. Type the following command to bring up your HA cluster details: get system ha status

7. This will show which firewall is master and slave in the cluster e.g.

Master:129 FG60-1 FWF60Bxxxxxxxx65 1
Slave :125 FG60-2 FWF60Bxxxxxxxx06 0

Look for the number right at the end and note this down. In the above example the Slave unit has the number “0” . Note this down.

8. Next enter the following command: execute ha manage x

Where “x” is the number noted down in step number 7.

This will change your management console to this particular firewall unit. i.e. the slave unit in our case. You should notice your command line change to reflect the name of the newly selected HA member.

9. Enter the following command to reboot the slave: execute reboot

10. Press “Y” to confirm and reboot the slave.

Monitor your ping / connection statistics to ensure everything looks fine. Give it a minute or so to boot up again, then return to your HA statistics page to ensure everything looks good.

That is all there is to it.