WSL2 GUI X-Server Using VcXsrv

wsl2 gui desktop

I needed to set up a WSL2 GUI recently on my machine (WSL2 running uBuntu 20.04.1 LTS). I found a guide that runs through the process but found that a few tweaks needed to be made. Specifically, the communication to VcXsrv was being blocked by Windows Firewall.

There were also a couple of extra tweaks needed for audio passthrough using PulseAudio and setting a windowed resolution.

Setting up a WSL2 GUI X-Server in Windows

Start by installing xfce4 and goodies.

sudo apt install xfce4 xfce4-goodies

If you’re running Kali you should use:

sudo apt install kali-desktop-xfce

During the install you’ll be prompted about which display manager to use. This is up to you, though I personally chose lightdm.

Download this .zip package which contains VcXsrv and PulseAudio along with some configuration and a shortcut to launch.

Extract it to the root of your C:\ drive. You should end up with contents under C:\WSL VcXsrv.
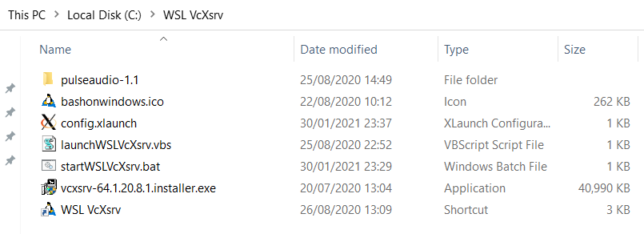
WSL2 GUI vcxsrv package contents

Run the vcxsrv-64.1.20.8.1.installer.exe installer in this folder, choosing defaults for the install.

Once installed, you’ll want to enable High DPI scaling for VcXsrv in Windows.

  • Navigate to C:\Program Files\VcXsrv
  • Right-click xlaunch.exe and go to Compatibility
  • Click Change high DPI settings and choose Override high DPI scaling behavior. Ensure Application is in the dropdown.

Next, edit the startWSLVcXsrv.bat batch file and change the last line that reads ubuntu.exe run to one of:

  • ubuntu2004.exe run in the case you are using uBuntu 20.04 from the Microsoft Store for WSL
  • ubuntu1804.exe run if you are using uBuntu 18.04 from the Microsoft Store for WSL
  • ubuntu.exe run for when you are using standard uBuntu from the Microsoft Store for WSL
  • kali.exe run if you installed Kali-Linux from the Microsoft Store for WSL

Pin the WSL VcXsrv shortcut somewhere convenient like the taskbar.

Opening Windows Firewall for VcXsrv and PulseAudio

Next you need to allow inbound traffic to Windows for VcXsrv and PulseAudio.

Open Windows Defender Firewall with Advanced Security and add two new Inbound Rules as follows:

  • Type: Program
  • Program path: %ProgramFiles%\VcXsrv\vcxsrv.exe for VcXsrv and %SystemDrive%\WSL VcXsrv\pulseaudio-1.1\bin\pulseaudio.exe for PulseAudio
  • Allow the connection
  • Profile: Domain, Private
  • Name: vcxsrv or pulseaudio depending which rule you are adding

I personally added the following to ExtraParams under the XLaunch node of config.xlaunch. This sets windowed mode to 1920×1080 for monitor #1 on my machine.

-screen 0 1920x1080@1

Viewing your WSL2 GUI

With all of that setup out of the way, you should be able to simply launch VcXsrv from the pinned shortcut and everything should work.

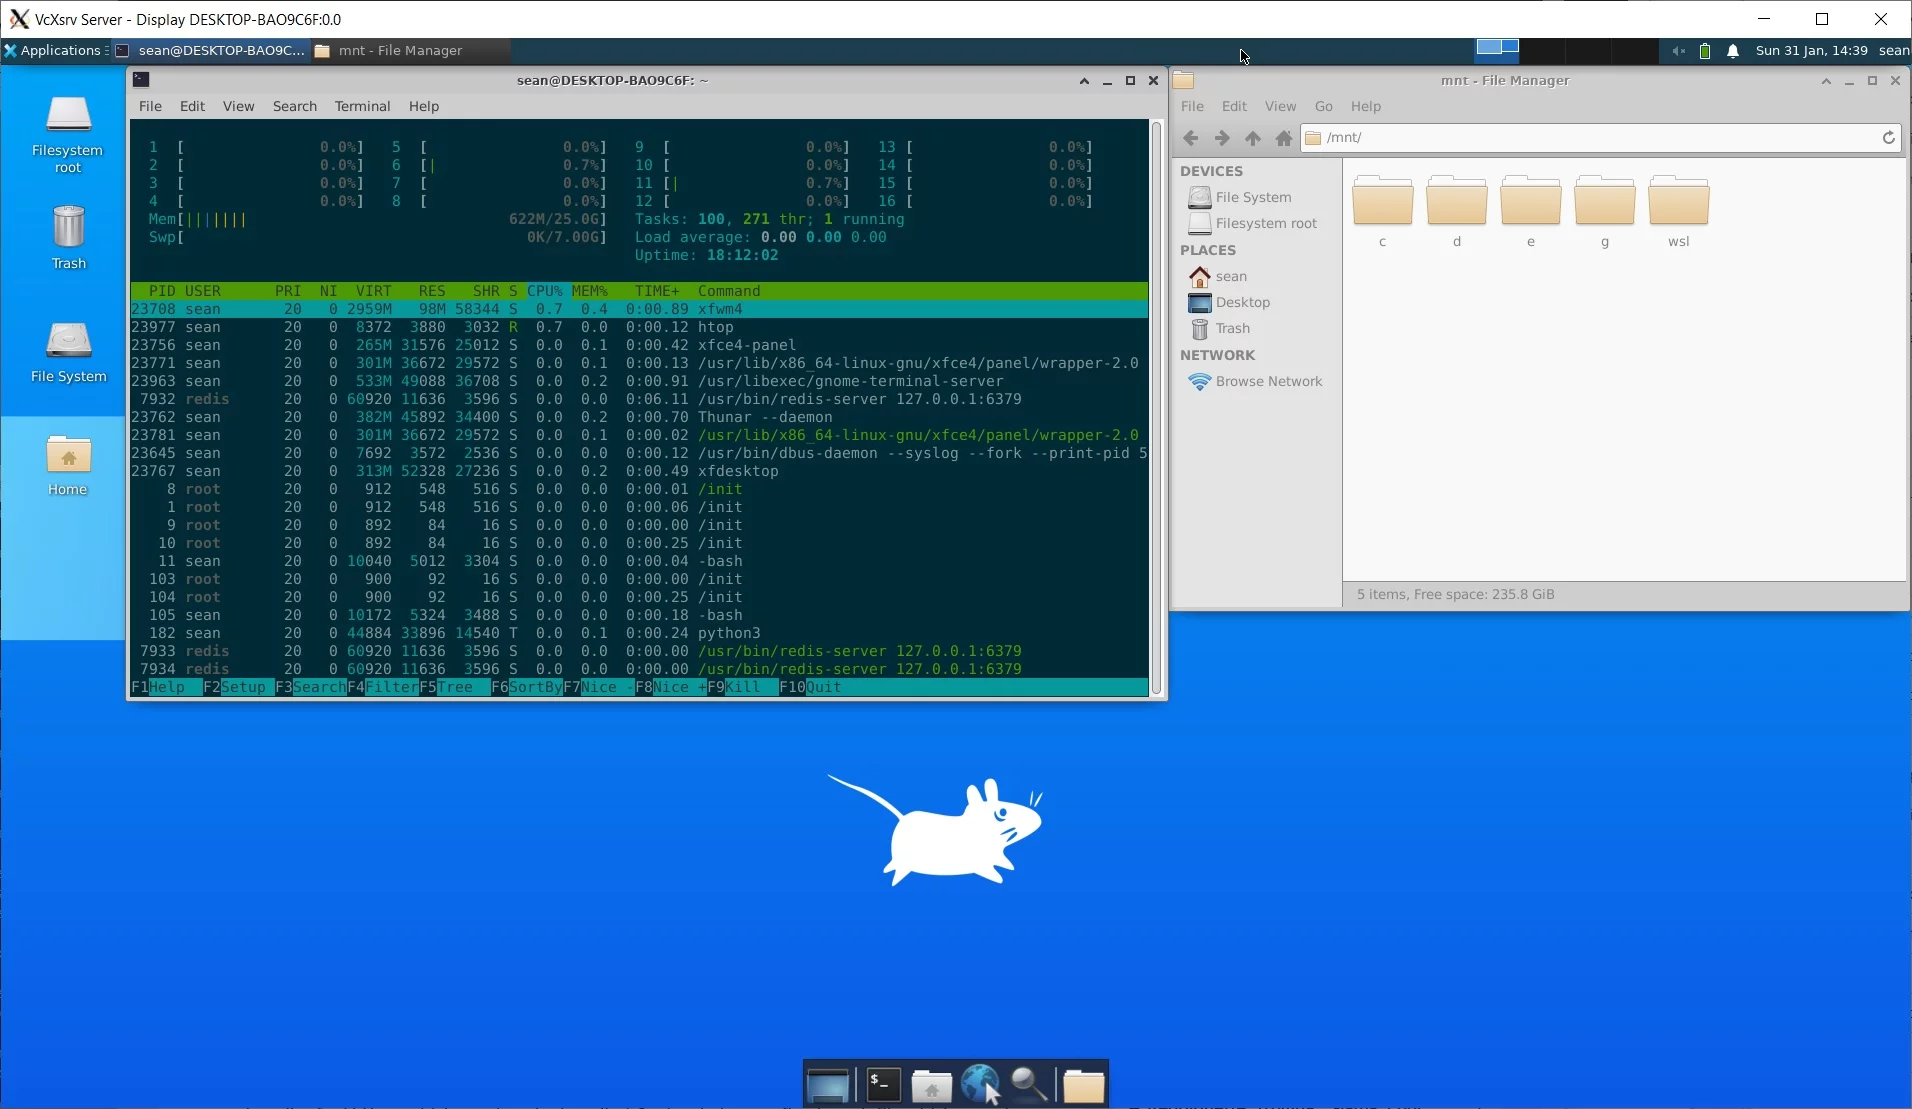
Try it out and you should get Desktop up and running for your WSL2 environment.
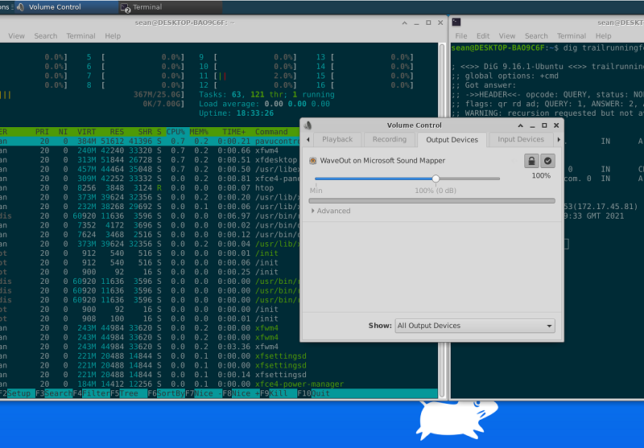
WSL2 gui example with audio settings open

PulseAudio passthrough should also be available if you check your sound / volume settings. Try an audio test using alsa-utils:

sudo apt install alsa-utils
speaker-test

Kudos to this guide on reddit for most of the setup instructions. As mentioned before, I needed to configure my firewall and also added some tweaks for windowed mode.

Troubleshooting

If you find your VcXsrv Server display window is blank when launching, try the following:

  • Double-check your firewall rule is allowing inbound connections for vcxsrv.exe for the domain and private scopes.
  • With the black X-server / display window from VcXsrv still open, launch a WSL shell separately, and run the following to set your DISPLAY environment variable:
export DISPLAY=$(grep -m 1 nameserver /etc/resolv.conf | awk '{print $2}'):0

This takes the IP address of your host machine (conveniently used as a nameserver in your WSL Linux environment for DNS lookups) and sets it as the Display remote location (with :0 for the display number appended).

Now, try to launch a xfce4 session with:

xfce4-session

If all goes to plan, the session should target your machine where VcXsrv Server is running and your display window should come to life with your WSL environment desktop.
Another update! ESXi Host Backup & Restore GUI Utility (PowerCLI based) updated to 1.3

The other weekend I managed to get some spare time to do another update to my ESXi 5.0 / 5.1 Host Backup & Restore GUI utility, this time it has been updated to version 1.3. I didn’t post up the changes as it was done by special request from one of my blog readers (thanks Flavio!) However, after receiving more comments with a few others having a similiar issue to what Flavio had, I thought I should definitely post the updated version here, which should hopefully solve the issues some people are seeing.


The changes are based on feedback received in the comments I have received about the utility relating to exceptions received when users in some circumstances try to backup their host configurations. Specifically the exception message “Exception caught: Get-VMHost VMHost with name ‘xxx’ was not found using the specified filter(s).

You can check the utility out over on it’s page here.

Updates (17-02-2013) – version 1.3:

  • Hosts are retrieved using a new method (for both backup and restore options)


ESXi Host Backup & Restore GUI Utility (PowerCLI based) updated to 1.2

A quick post today to just mention that I have updated my ESXi 5.0 / 5.1 Host Backup & Restore GUI utility to version 1.2.


There are a couple of improvements in 1.2 based on feedback received in the comments I have received about the utility. The main improvement introduces a function in the script which backs the GUI to check that ESX hosts are valid before attempting to backup or restore these. You can check the utility out over on it’s page here.


Updates (29-12-2012) – version 1.2:

  • Added ESX/ESXi host validation into utility – will now test that the host is valid and either connected or in maintenance mode before attempting backup or restore (See the script’s new “Check-VMHost” function for those interested)
  • Minor UI improvements


ESXi 5.0 / ESXi 5.1 Host Backup & Restore GUI Utility (PowerCLI based)


This is a little bit of  a fun project I have been working on in bits of spare time I find. It is all written in PowerCLI 5.0 / 5.1 / PowerShell and the GUI was laid out using Primal Forms Community Edition.


Updates (17-02-2013) – version 1.3:

  • Hosts are retrieved using a new method (for both backup and restore options)

Updates (29-12-2012) – version 1.2:

  • Added ESX/ESXi host validation into utility – will now test that the host is valid and either connected or in maintenance mode before attempting backup or restore (See the script’s new “Check-VMHost” function for those interested)
  • Minor UI improvements

Updates (29-10-2012) – version 1.1:

  • This utility has been tested on ESXi 5.1 Hosts and confirmed to be able to successfully create a backup archive file of these.
  • Be sure your DNS is working correctly on the system you run the Backup utility on – it relies on DNS to find your ESXi hosts as they are named in the dropdown when you select the host to backup. (See comments for troubleshooting)
  • Restore to new hardware (force restore) option added
  • Fixed labels and connection box label description


What it is essentially, is a GUI that allows you to Backup ESXi 5.0 or ESXi 5.1 hosts to a destination of your choice on a local drive. It also allows you to restore ESXi Host configuration bundle backups taken, to other Hosts. I had other plans to integrate cloud storage options in (Amazon S3) as a backup target, but I thought that this doesn’t really offer anything valuable and I would just keep it relatively simple for now – therefore I have disabled this functionality. The PowerCLI script is fairly long – and I know there are plenty improvements I could make to better it and shorten the code, but for now it does the job. I have added various catches for exceptions / errors so you should get visual feedback if you have entered an invalid path, or username for example.


Anyway, hopefully this proves useful to some! As always, take care using the backup / restore functionality of this utility. The restore functionality works by first putting the ESXi host into Maintenance mode (if it isn’t already in this mode) and then applying a backup bundle to the host (Restore). The Host will reboot immediately following this. The Backup and Restore is implemented using Get-VMHostFirmware and Set-VMHostFirmware cmdlets so you can read the help descriptions for an idea on how exactly these work. The Host Backup Bundles are stored in a path of your choice and when restoring from a path the cmdlet works by looking for a bundle filename that matches the name of your ESXi host selected to restore to. Note that the file browser module I have implemented here (used to select paths) is a modification of the work done by Ravikanth Chaganti on his PowerShell Help Browser GUI. I simply adapted his code to list the contents of local drives in a tree view instead of PowerShell Help cmdlets. The only limitation here is that I have not implemented code to browse further than one level into the root of each drive. If you can provide this modification yourself, please feel free to contribute in the comments! I have just not spent the extra time to do this myself yet.


Here are a couple of quick screenshots of the Utility / GUI:


ESXi 5.0 Host Backup & Restore GUI Utility & Path Browser


Current version (1.3):

(Version 1.3) [download id=”25″]


Previous versions:

(Version 1.2) [download id=”21″]

(Version 1.1) [download id=”20″]

(Version 1.0) [download id=”9″]


Enjoy!