WSL2 GUI X-Server Using VcXsrv

wsl2 gui desktop

I needed to set up a WSL2 GUI recently on my machine (WSL2 running uBuntu 20.04.1 LTS). I found a guide that runs through the process but found that a few tweaks needed to be made. Specifically, the communication to VcXsrv was being blocked by Windows Firewall.

There were also a couple of extra tweaks needed for audio passthrough using PulseAudio and setting a windowed resolution.

Setting up a WSL2 GUI X-Server in Windows

Start by installing xfce4 and goodies.

sudo apt install xfce4 xfce4-goodies

If you’re running Kali you should use:

sudo apt install kali-desktop-xfce

During the install you’ll be prompted about which display manager to use. This is up to you, though I personally chose lightdm.

Download this .zip package which contains VcXsrv and PulseAudio along with some configuration and a shortcut to launch.

Extract it to the root of your C:\ drive. You should end up with contents under C:\WSL VcXsrv.
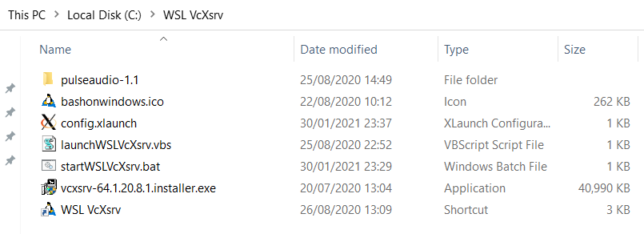
WSL2 GUI vcxsrv package contents

Run the vcxsrv-64.1.20.8.1.installer.exe installer in this folder, choosing defaults for the install.

Once installed, you’ll want to enable High DPI scaling for VcXsrv in Windows.

  • Navigate to C:\Program Files\VcXsrv
  • Right-click xlaunch.exe and go to Compatibility
  • Click Change high DPI settings and choose Override high DPI scaling behavior. Ensure Application is in the dropdown.

Next, edit the startWSLVcXsrv.bat batch file and change the last line that reads ubuntu.exe run to one of:

  • ubuntu2004.exe run in the case you are using uBuntu 20.04 from the Microsoft Store for WSL
  • ubuntu1804.exe run if you are using uBuntu 18.04 from the Microsoft Store for WSL
  • ubuntu.exe run for when you are using standard uBuntu from the Microsoft Store for WSL
  • kali.exe run if you installed Kali-Linux from the Microsoft Store for WSL

Pin the WSL VcXsrv shortcut somewhere convenient like the taskbar.

Opening Windows Firewall for VcXsrv and PulseAudio

Next you need to allow inbound traffic to Windows for VcXsrv and PulseAudio.

Open Windows Defender Firewall with Advanced Security and add two new Inbound Rules as follows:

  • Type: Program
  • Program path: %ProgramFiles%\VcXsrv\vcxsrv.exe for VcXsrv and %SystemDrive%\WSL VcXsrv\pulseaudio-1.1\bin\pulseaudio.exe for PulseAudio
  • Allow the connection
  • Profile: Domain, Private
  • Name: vcxsrv or pulseaudio depending which rule you are adding

I personally added the following to ExtraParams under the XLaunch node of config.xlaunch. This sets windowed mode to 1920×1080 for monitor #1 on my machine.

-screen 0 1920x1080@1

Viewing your WSL2 GUI

With all of that setup out of the way, you should be able to simply launch VcXsrv from the pinned shortcut and everything should work.

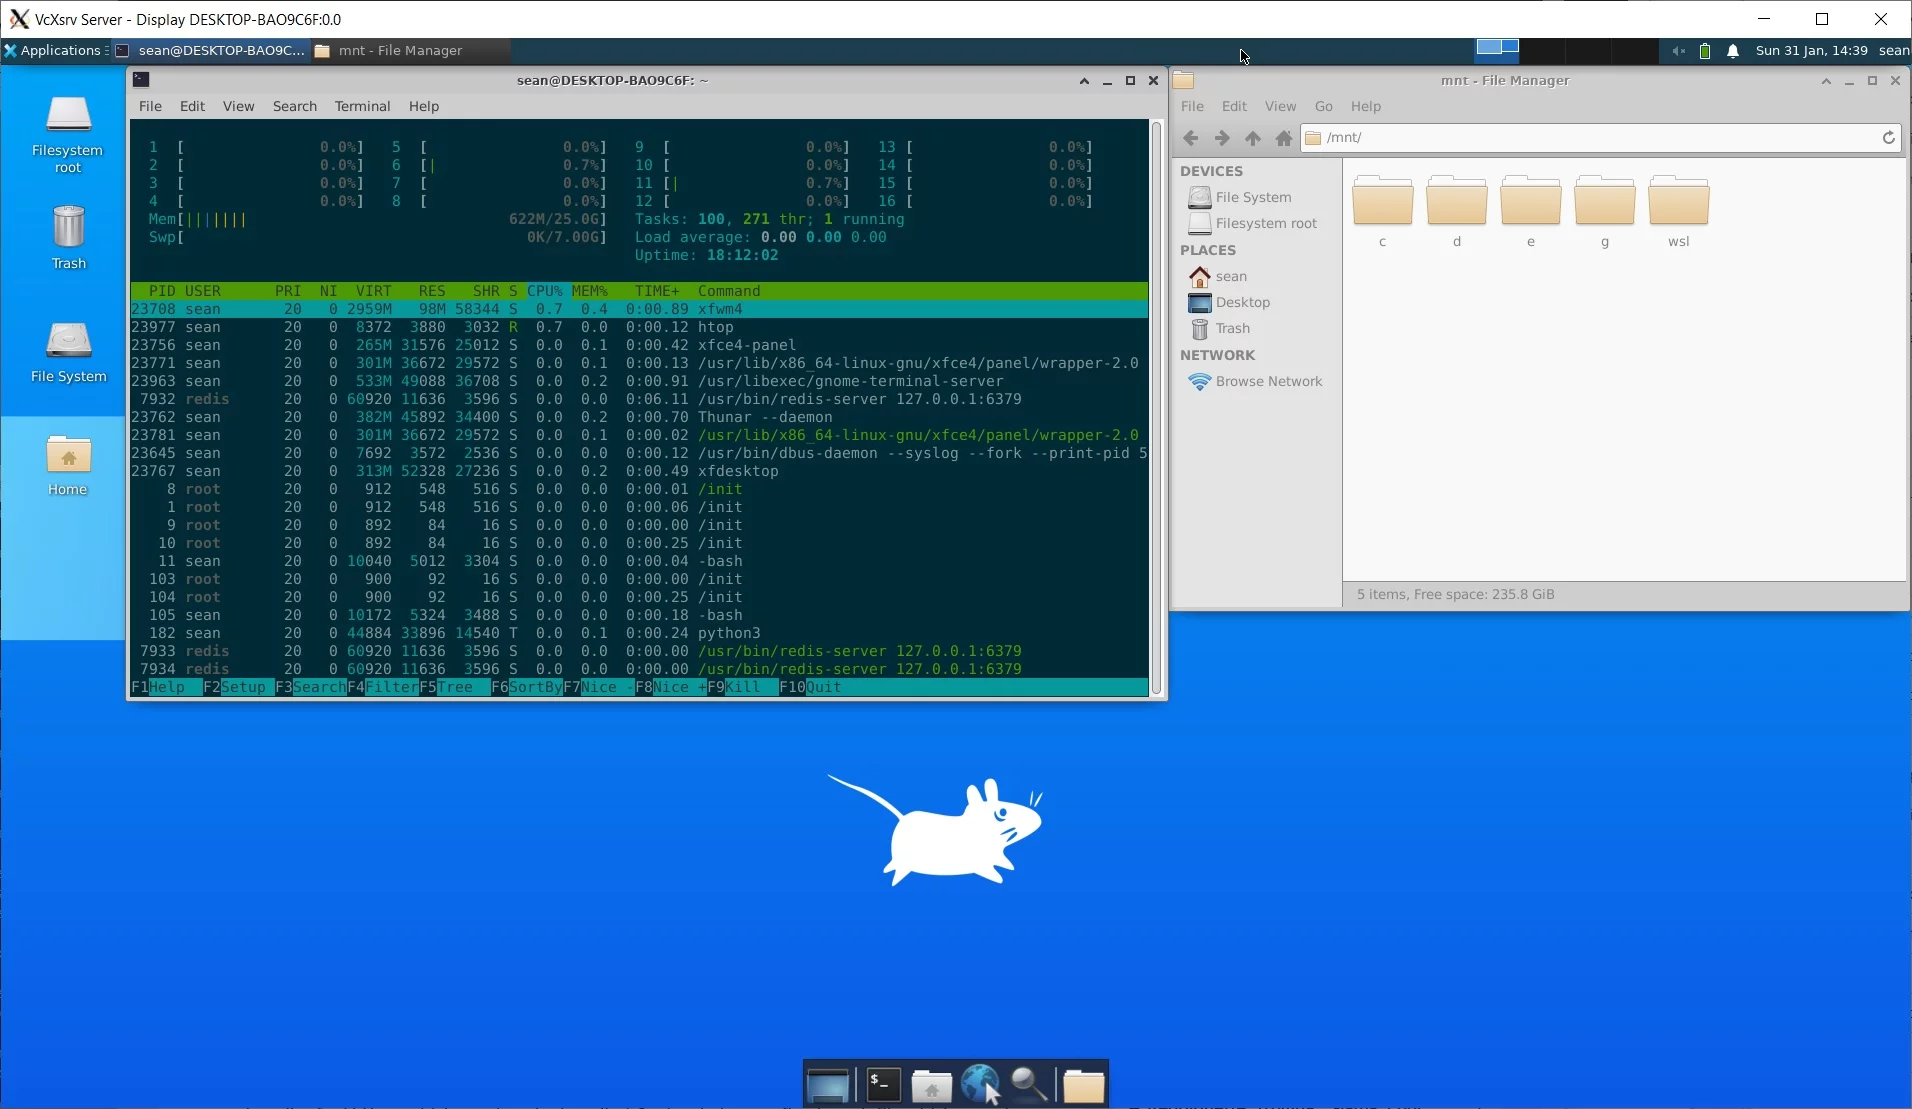
Try it out and you should get Desktop up and running for your WSL2 environment.
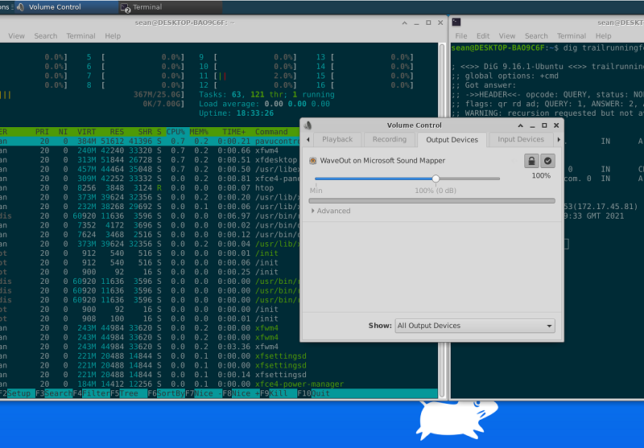
WSL2 gui example with audio settings open

PulseAudio passthrough should also be available if you check your sound / volume settings. Try an audio test using alsa-utils:

sudo apt install alsa-utils
speaker-test

Kudos to this guide on reddit for most of the setup instructions. As mentioned before, I needed to configure my firewall and also added some tweaks for windowed mode.

Troubleshooting

If you find your VcXsrv Server display window is blank when launching, try the following:

  • Double-check your firewall rule is allowing inbound connections for vcxsrv.exe for the domain and private scopes.
  • With the black X-server / display window from VcXsrv still open, launch a WSL shell separately, and run the following to set your DISPLAY environment variable:
export DISPLAY=$(grep -m 1 nameserver /etc/resolv.conf | awk '{print $2}'):0

This takes the IP address of your host machine (conveniently used as a nameserver in your WSL Linux environment for DNS lookups) and sets it as the Display remote location (with :0 for the display number appended).

Now, try to launch a xfce4 session with:

xfce4-session

If all goes to plan, the session should target your machine where VcXsrv Server is running and your display window should come to life with your WSL environment desktop.
Setting up a basic uBuntu 16.04 Docker host VM

I’ve used this process multiple times to create quick Docker host VMs running on VMware Workstation in my home lab. It is important to note that although I’m using VMware Workstation, the type 2 hypervisor you use here is fairly unimportant. You could just as well use VirtualBox, or Fusion for this purpose.

Download the latest uBuntu 16.04 LTS server ISO from: http://www.ubuntu.com/download/server (I believe 16.04 comes only in 64-bit, but make sure its 64-bit)

Create a new Virtual Machine for your Docker host using your type 2 hypervisor software (Workstation in my case).

Give the VM following hardware/spec:

  • OS – Linux/uBuntu 64bit
  • 1 or 2 vCPUs
  • 512 MB RAM
  • 9GB disk
  • 2 x vNICs (1st is set to the default NAT option and the 2nd should be set to Host-only)

Here is my VM’s setup:

vm-hardware-docker-host

Attach the uBuntu ISO and start the VM up.

Install a standard uBuntu OS using the text based installer, and just be sure to also install OpenSSH server when prompted for features to install. After the install completes, reboot, login with your user account you created during install, run ‘ifconfig’ to check the assigned IP address, and then use your favourite SSH client to connect to that IP. Using a PuTTy session will just make copy/pasting commands into your uBuntu VM easier.

Now you’ll install docker – the package includes both the docker server and client.


Run the commands above in sequence, and after the apt-get install docker-engine at the end, run ‘sudo service docker status’ to check that docker is running. You should see it listed as Active (running)

● docker.service – Docker Application Container Engine
Loaded: loaded (/lib/systemd/system/docker.service; enabled; vendor preset: enabled)
Active: active (running) since Wed 2016-07-06 21:20:39 BST; 2h 0min ago

Run a quick ‘docker info’ command to ensure that you get information back from Docker and that everything looks OK.

docker-info

Proftpd FTP server initialization problem using uBuntu

identify-ftp-process

I had been battling with this particular issue for a while on my virtual machine running uBuntu 8.04 Hardy Heron. Basically it was a straight through install of 8.04, after which I installed lampp for PHP, mySQL, and FTP services so that I could host a couple of websites on this virtual machine.

At first everything was running 100% I hadn’t changed the default FTP server configuration that appeared to be working out of the box from the base install. Then one day I decided I wanted to play around with some settings and ended up somehow removing my FTP server – not entirely though as something was continuing to hold port 21 up and not allow me to use any other FTP server that used port 21.

What I did was I configured proftpd which seems to have come along with my install of lampp (Also known as xampp). I configured my users, IP address and all other details, but I was still getting problems when trying to connect via FTP from another PC on the local network.

Trying to start proftpd from the command line sudo /etc/init.d/proftpd start would result in the service appearing to start, but it wouldn’t actually be running. I confirmed this by opening the gproftpd GUI from System – Administration – GPROFTPD. The status at the top right of the GUI would say “Deactivated”

A very helpful user on the ubuntu forums also showed me a useful debug command that helped me identify my problem.

From the terminal, type:

sudo proftpd -nd6

This apparently starts proftpd in debug level 6.

It gives you a bunch of diagnostic information, and on the last line I spotted my problem:

Failed binding to ::, port 21: Address already in use

So, something else was already using port 21. Obviously my old FTP server’s remnants somewhere. Now to figure out what was using it.

sudo netstat -anp --tcp --udp | grep LISTEN

From that command, I found a line with :21 in it (indicating port 21) and at the end of the line, I found the process name and process ID number. The process in my case was inetd.

Now I went to see what the inetd.conf file had in it in terms of configuration:

sudo nano /etc/inetd.conf

This loads the nano text editor and displays the contents of the file. I had :

ftp stream tcp nowait root /usr/sbin/tcpd /usr/sbin/in.ftpd

I made a copy of this inetd.conf file as a backup, and then deleted that entire line, as that was obviously what was holding port 21. Ctrl-X exits the editor, and I chose to press “Y” to save changes.

Now I needed to kill and restart the inetd process. I used :

sudo killall -HUP inetd

This kills the process, and allows inetd to restart and reload the inetd.conf file.

I went back to my proftpd.conf file and ensured it was setup to use port 21 for FTP connections, then restarted the proftpd service with :

sudo /etc/init.d/proftpd stop
sudo /etc/init.d/proftpd start

Then finally I went back to my other PC, and retried the FTP connection using FileZilla FTP client, and finally got connected! I hope this helps anyone with similar issues, as I had to use multiple sources to try and figure out what was causing this and where.