3dfx Voodoo – A Brief History and a Retro PC Build

3dfx voodoo 2 3d accelerator card

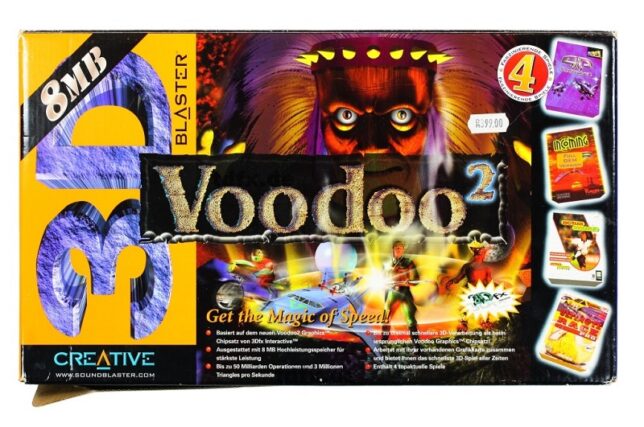
In the late ninetees, as a teenager I had the priveledge of owning a second hand Creative Labs 3dfx Voodoo 2 graphics card. It was an upgrade for my own hand-built PC – an AMD K6-2 333mhz system I had painstakingly saved up for and cobbled together.

Nostalgia running high, I recently set about building up a ‘retro’ gaming PC. With roughly the same specification as my original K6-2 machine from the late ninetees, it also features an original 3dfx Voodoo 2 accelerator card.

Unreal Tournament playing on my retro PC with the 3dfx Voodoo 2

The Brief Story of 3dfx Interactive and the Voodoo

A group of colleagues originally working together at SGI decided to break out and create 3dfx Interactive in San Jose, California (1994). This was after an initial failed attempt at selling rather pricey IrisVision boards for PCs.

Their original plan was to create specialist hardware solutions for arcade games, but they changed direction to instead design PC add-on boards. The reason for their pivot came about as a result of a few favourable factors. Namely:

  • The cost of RAM was low enough to make this a feasible endeavour.
  • RAM latency was much improved and allowed for ‘high’ clock speeds of up to 50MHz.
  • 3D games were picking up in popularity. Spearheaded initially no doubt by id software with games such as Wolfenstein 3D, DOOM, the market was clearly headed to a point where 3D accelerated graphics would be in demand.

The first design, the SST1 (marketed as the Voodoo 1), targeted the $300-$400 price range for consumer PCs. A variety of OEMs picked up the design and released their own reference design boards, leading to the success of the original Voodoo line-up of 3D accelerator cards.

Enter the Voodoo 2

After the initial success of the Voodoo 1, the 3dfx Voodoo 2 (SST2) was soon born. It had vastly improved specifications over the original SST1 design such as:

  • 100MHz clock rated EDO RAM (running at 90 MHz, 25 ns)
  • 90MHz ASICs
  • 2 x Texture Mapping Units (TMUs)

The fillrate of the Voodoo 2 was around 90 MPixels/s, and frame rates in benchmarks showed a massive uplift, nearly doubling in some cases.

My first (original) 3DFX Voodoo 2 PC Build

My first self-built (from scratch) PC was a bit of a frankenstein build. I had carefully budgeted and selected a motherboard that had onboard everything. Graphics, sound and networking. It would also run an AMD K6-2 CPU – a budget friendly option compared to Intel at that time.

The onboard graphics card shared 8MB of memory from system RAM (of which I only had 32MB total). As far as I recall it was capable of running Direct3D enabled games, albeit hobbling along with crippled frame rates.

Upgrading to a 3dfx Accelerator Card

After enduring this ‘fps hardship’ and learning more about the recently successful 3dfx graphics cards (a friend had a 4MB 3dfx Voodoo ‘1’ card), I found out about a second hand option. It was available through a friend of a friend, and would cost me 500.00 South African Rand (ZAR). This was a lot for a teen back then. I had saved up money, and bargained with my parents to combine my funds with a birthday gift contribution in order to purchase this card.

The Creative Labs 3D Blaster Voodoo 2. Mine came in almost identical packaging, but I had the 12MB version.

As I recall, I had to make massive concessions in order to fit the graphics card into my machine.

My motherboard only had 2 PCI slots. Both were horizontally in line with the CPU socket. The board design was probably never intended to house cards longer than the average PCI device at the time.

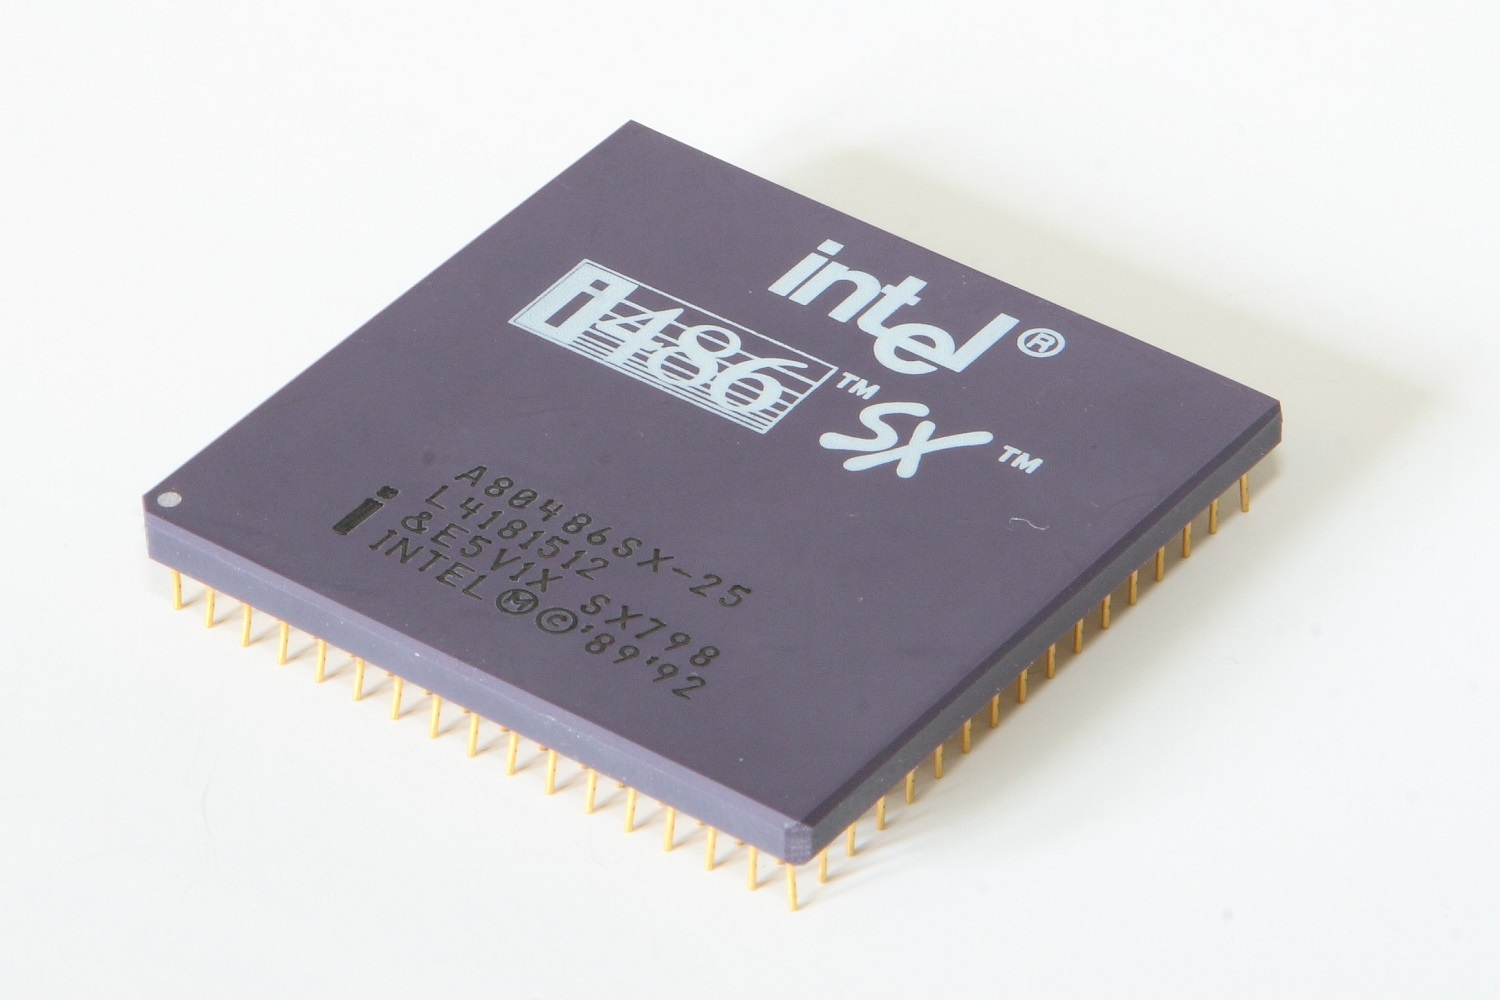
I had to remove the K6-2’s heatsink I was using and replace it with one from an older 486 machine that I had lying around. The profile of the 486 heatsink was much lower, allowing the 3dfx Voodoo 2 card to slot into a PCI slot, extending over the heatsink.

The problem now was that the 3dfx card’s lower PCB edge was now just about in direct contact with the heatsink. Another issue was that the heatsink was not made for mounting to a Socket 7 board. This forced me to lay my computer’s chassis down on it’s side in order for gravity to keep the heatsink in place!

I had a plan to keep pressure on the heatsink to maintain better contact with the CPU. Using a bit of non-conductive material between the 3dfx card’s PCB and the heatsink, I kept things in place. I also had to permanently angle a large fan blowing into the now open case.

This was the price I would pay to have my budget 3dfx voodoo 2 enabled system.

The Retro 3dfx Voodoo 2 PC Build

Recently after a bout of nostalgia and watching LGR videos, I started trawling eBay for old PC parts. The goal was to almost identically match my original PC build.

After a number of weeks of searching, I found the following parts. The motherboard was the most difficult to find (at a good price). Most Super Socket 7 boards I would find were dead and listed as spare parts.

all the parts for the Retro PC build, including the 3dfx voodoo 2 card.
Most of the parts lined up and ready for the build.
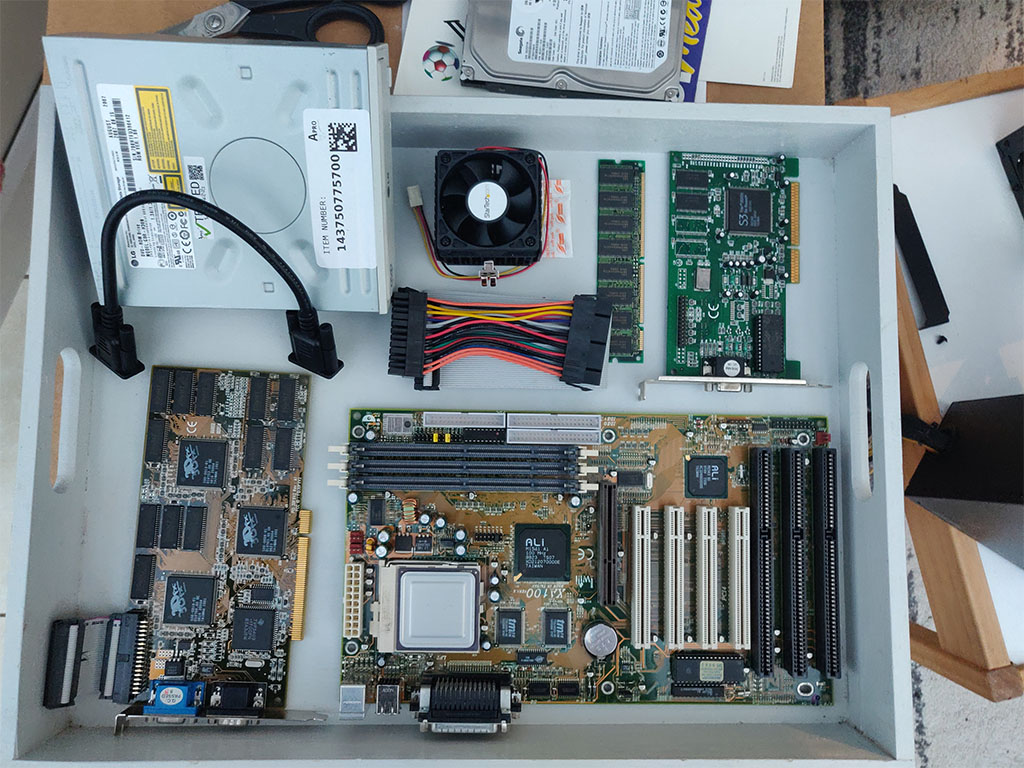
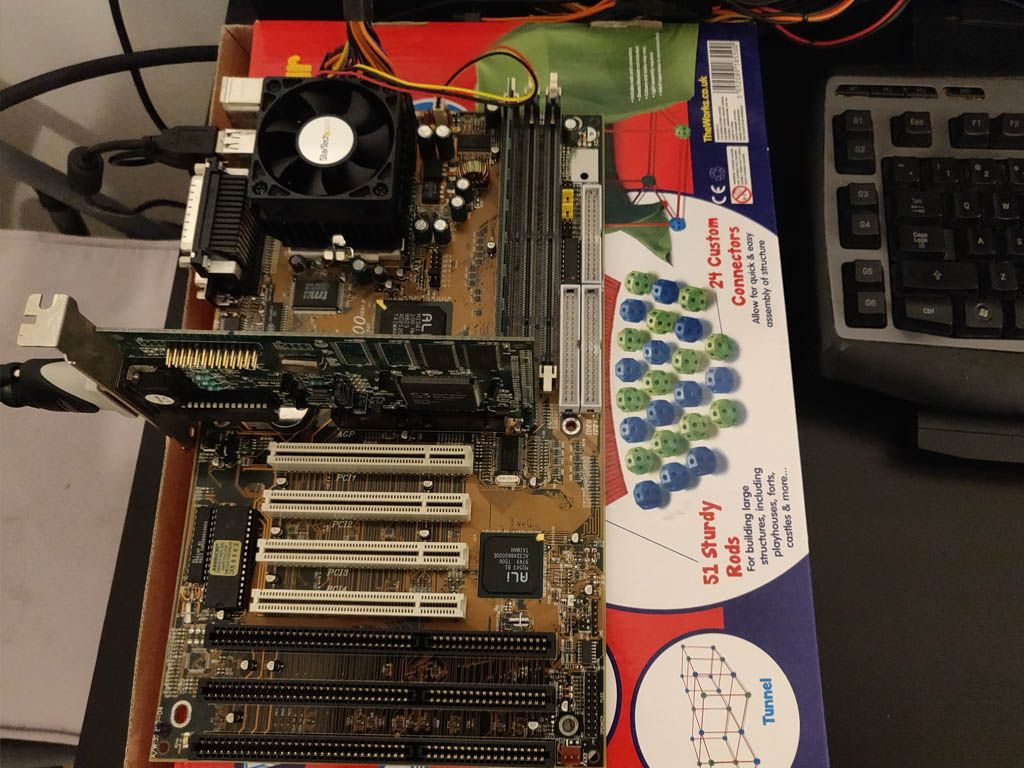
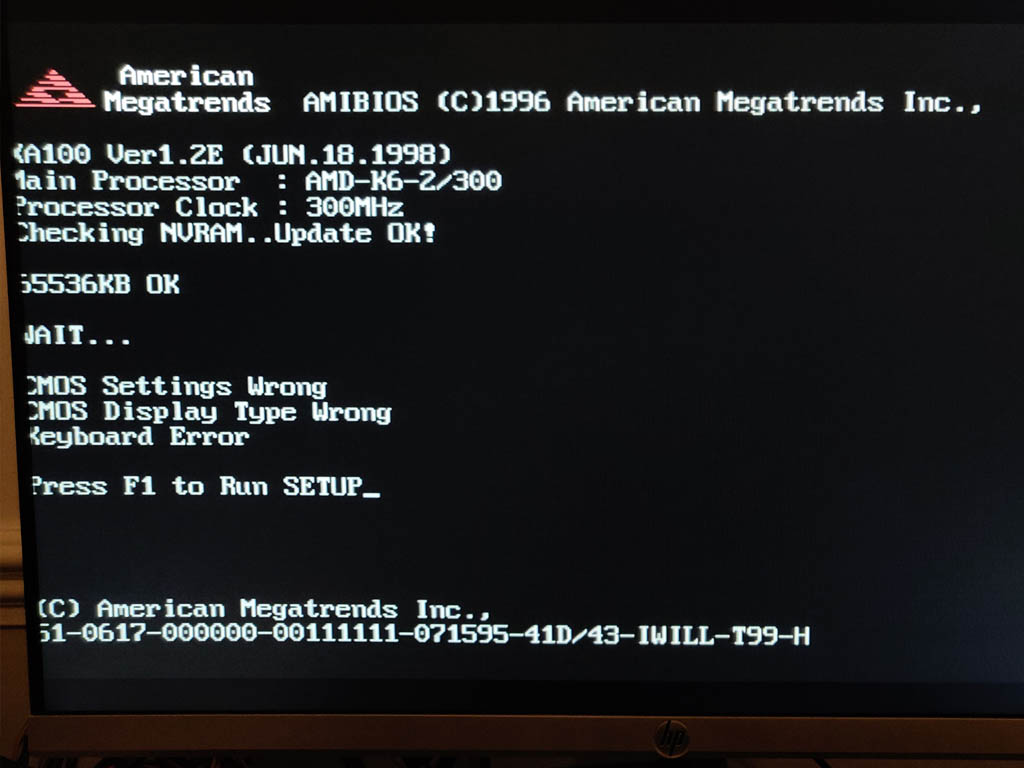
  • Iwill XA100 Aladdin V Super7 Motherboard, an AMD K6-2 300 CPU, and 64MB of PC100 SDRAM (168 pin)
  • S3 Trio 3D/2X graphics card (the Voodoo only handled 3D, and uses a loopback cable to plug into a ‘2D’ card)
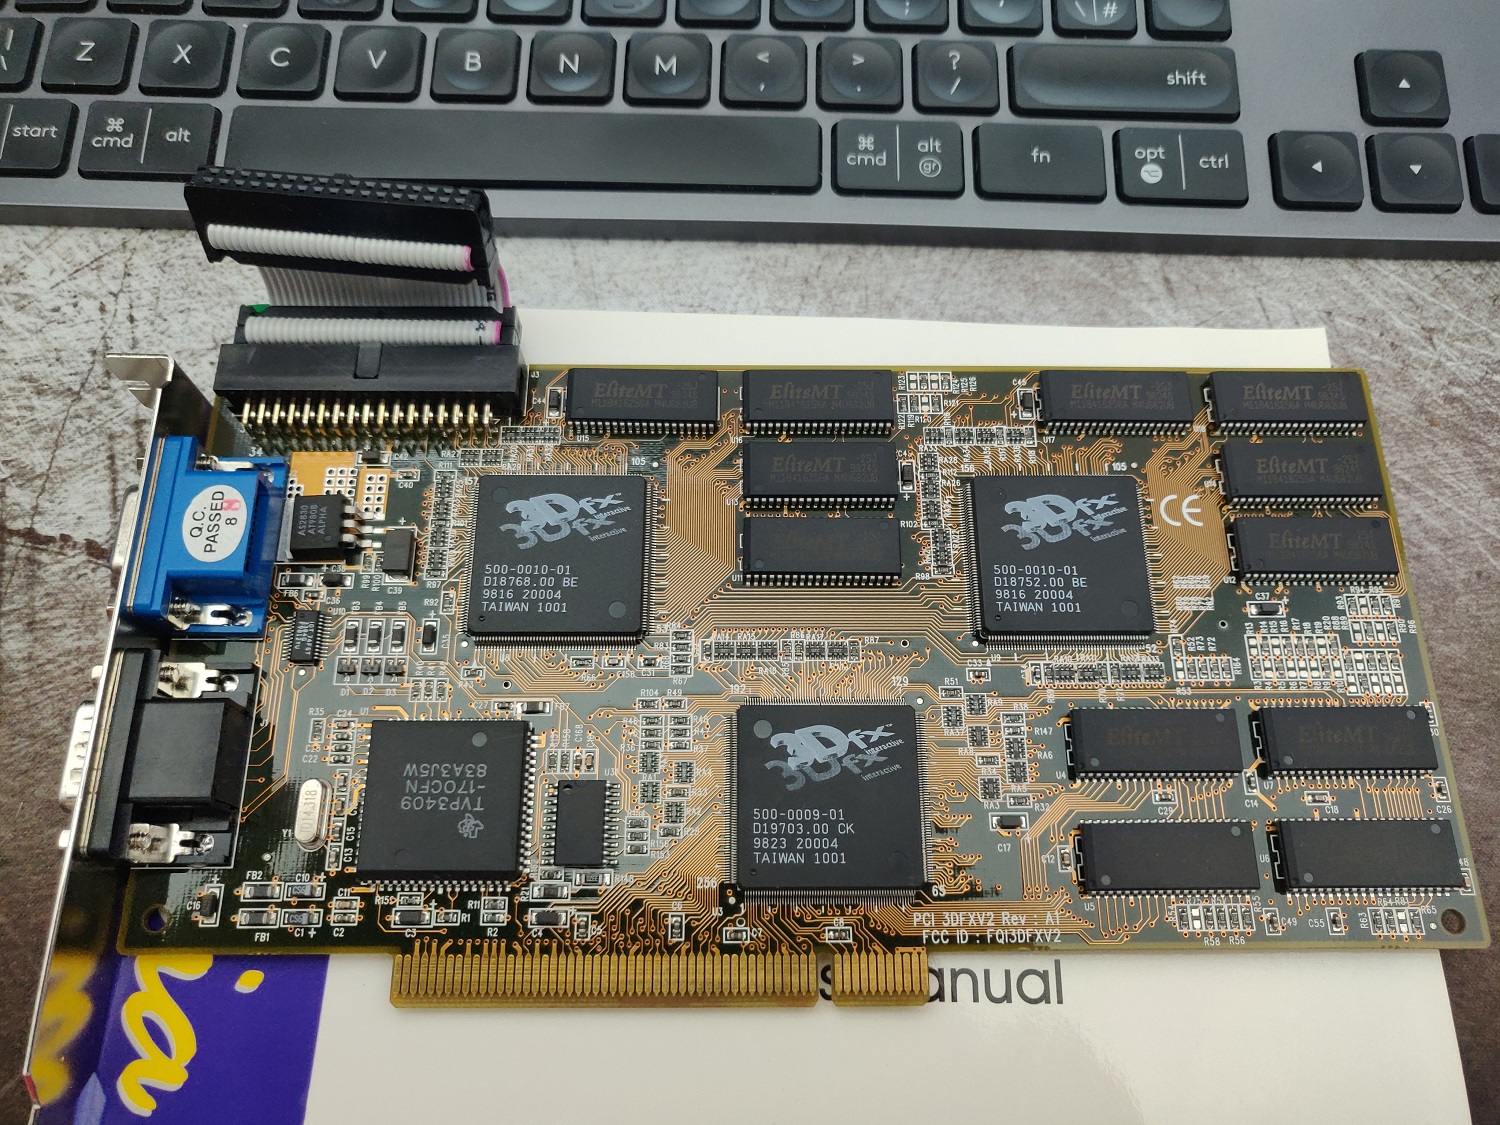
  • 3DFX JoyMedia Apollo 3D fast II 12Mb Video Card PCI Voodoo2 3DFX V2 Rev A1
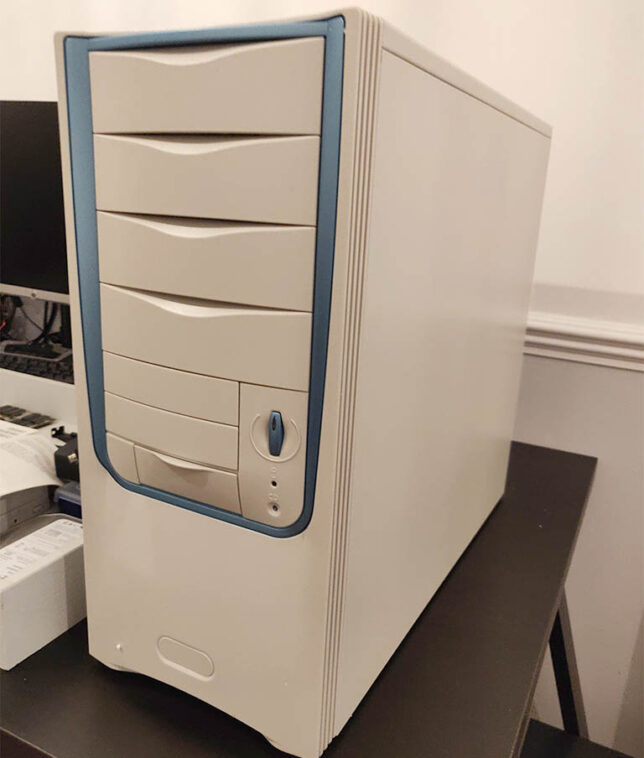
  • A Retro styled, beige ATX PC Chassis, Computer MIDI Tower Case
  • Creative Sound Blaster Live 5.1 Digital SB0220 PCI Sound Card
  • An 80GB IDE HDD, IDE ribbon cable, and an older DVD-R drive.
  • I used a modern 80 plus certified ATX power supply. It has a power connector with an older 20 pin layout which was perfect to re-use.

To test the hardware, I powered up the basic components on top of a cardboard box. Generally a good idea and especially so when using older hardware.

first bench test of the hardware.
‘Bench’ test of the hardware
POST checking the motherboard and components.
First POST successful, aside from USB keyboard not working (needed legacy option for USB enabled)
The ‘retro’ looking MIDI tower chassis I got for the build

Gaming on the Retro PC Build

After digging out a CD burner and an old image of Windows 98 SE, I’ve got an operating system running and have installed drivers along with a bunch of games.

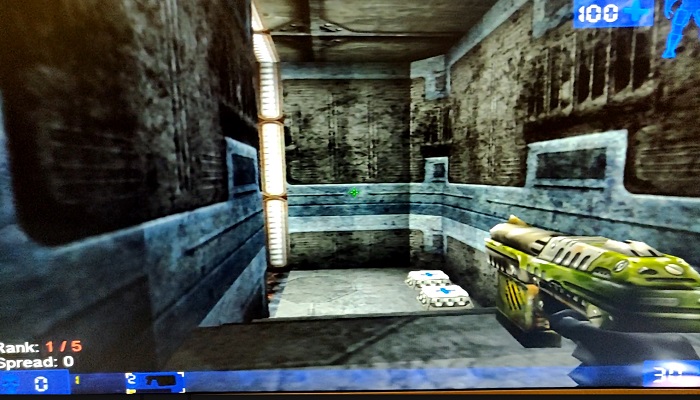
They play just as I remember. I’ve installed Quake, Quake 2, Unreal Tournament, and a few others to keep me busy for now.

unreal tournament game running with a 3dfx voodoo 2 accelerator card.
Unreal Tournament in Glide 3dfx rendered mode.

The next step is to replace the temporary modern day LCD monitor I’m using right now. A period correct CRT monitor would really complete the build. I remember Samsung SyncMaster CRTs being excellent. My aim is pick one of these up to complete the system.

If you’re nostalgic like me and want to revisit the PC and games hardware of the late 1990s I highly recommend a build like this.

Follow my ‘Retro’ PC series blog posts:

The 486 era – My Computer Hardware Journey

486 processor

My computer hardware journey started in the mid 1990s, when I was about 10 or 11 years old. It started out with me dismantling and reconfiguring various 486 machines. These were also known as i486 or Intel 80486 systems.

Electronics had always been a big curiosity for me. As a child I liked to open up devices and extract their internals. I would collect PCBs and join them in nonsensical ways, imagining I had invented new and wonderful devices, capable of many great things.

To illustrate my passion for tinkering with electronics, here is a quick story going back to my toddler years: My parents had noticed my love for tools as a toddler and had tried in vain to make them safe for me. According to my father, he once added a solid lump of pratley steel putty to the end of a sharp screwdriver for me. An attempt to make it safe for me to handle. As soon as I saw this, I threw it to the ground in protest. I only wanted real tools. One of the toys I had was an old 5+1⁄4-inch floppy disk drive!

My First 486 Build

Fast forwarding to the mid 1990s, I was far more capable with tools and had begun to scavenge surplus PC hardware. My uncle owned a PC repair shop where I grew up. As far as I recall I managed to scavenge old discarded parts from his collection, as well as other sources. Schools or universities that would throw out old machines as they cycled or upgraded them, cousins or family friends that had no need for old systems, etc…

The very first working system that I managed to modify was an Acer branded 486 desktop system. It had a horizontally aligned desktop chassis, one that allowed you to place a CRT monitor on top of.

This isn’t the exact one, but mine looked just like this, minus the CDROM drive.

I remember it had a 486 SX-33 CPU. A rather weakly clocked 486 processor, that didn’t even require a heatsink and fan assembly. The 486 SX processors had their FPU (floating point unit) disabled. I imagine this reduced cost and heat output.

This wasn’t exactly a scratch build, but it allowed me to get my feet wet in the world of computer hardware.

Upgrading the CPU

I swapped out the CPU for a 486 DX2-66, a much faster processor, adding a small aluminium heatsink and fan. The fan was powered by a molex power connector.

Memory and Upgrades

Another upgrade on this particular system that I remember was going from 4MB of RAM (SIMM, or single in-line memory module) to 8MB.

I don’t recall if the memory was the 30 or 72 pin type.

Hard Drive Configuration

Among other upgrades, the hard disk drive got swapped out for a slightly larger one. I think the capacity was somewhere around 400MB.

This upgrade had me reading manuals and learning about the importance of jumper placement. The drives connected with an ATA ribbon cable. It was important that the jumper on the back of the hard drive was configured according to the other devices sharing the same cable.

The jumper could be configured to make a drive device 0 or 1 (also known back then as the master or slave device) when sharing the same ATA cable.

The cables themselves were also rated for different transfer speeds. For example 16 or 33 MB/s, and later cables allows Ultra DMA to be used for speeds above 66 MB/s.

Future 486 Systems and Nostalgia

That Acer machine was a good learning experience for me. Soon after that time, I started building and configuring more 486 systems. I had all sorts from 486 DX2-66 to DX4-100 machines.

I started a little side hustle, where I would pick up old components and build fully configured systems, selling them in the local paper’s classifieds section.

Thinking back, this was seriously impressive for a kid my age. By the late 90s (at age 12 or so) I was earning chunks of cash from selling systems that I had built for next to nothing.

Fixing Old CRT Monitors

One of the big wins for me was when I learned from my uncle how to ‘fix’ blurry CRT monitors.

If opened up, all monitors had analog adjustment dials (potentiometers) that could be turned with a screwdriver to control the flyback. One of these would control focus.

I would gather up old CRT monitors that nobody wanted anymore because they had gone ‘blurry over time’. The fix was simply to adjust the focus potentiometer inside while the monitor was on. Of course this was very dangerous as these old monitors contained high voltage capacitors that remained charged up for a while, even after power was disconnected. However, having learned from an adult, I was very careful about this, and the payoff was being able to make cash from selling full systems with monitor included.

This was an amazing time for me as a kid. I learned how to operate DOS, and further operating systems such as Windows 3.1 and further on, Windows 95.

Computer Knowledge Acquired from my ‘486 era’

Here are some random things I learned in the 1990s during my time tinkering with 486 systems. I guess some of the time was also spent with older 386 machines too.

  • DOS configuration using the CONFIG.SYS and AUTOEXEC.BAT files
  • Expanded memory manager configuration with EMM386.
  • Configuring CDROM device drivers in DOS and setting them up on boot.
  • Writing simple batch (.BAT) scripts.
  • Simple QBASIC programming.
  • A little later on, Turbo Pascal programming basics.
  • Compression and decompression with tools like ARJ.
  • Manual sound card configuration by selecting specific addresses and channels.
  • Networking two machines using serial or parallel cables (COM or LPT), and using laplink software to copy files between.

Gaming and PC use in the 1990s

Not all of my computer time as a kid was spent working with computer hardware. I enjoyed playing games just as much.

Some of my most memorable and favourite DOS games that I enjoyed playing on the first 486 system my parents owned, (and later on the 486 systems I built were):

  • X-Wing and Tie Fighter
  • UFO – Enemy Unknown
  • Ultima VIII: Pagan
  • Master of Orion (MOO)
  • Wacky Wheels
  • Death Rally
  • Screamer
  • Cannon Fodder
  • Strike Commander
  • Wing Commander

I also fondly remember writing science fiction (short stories) in word processing software in DOS and then printing them out on a dot matrix printer. I would take these to school and share with friends (who would also do the same thing).

Follow my Retro Hardware blog post series:

Notes:

The featured image of the 486 SX CPU is sourced from: https://en.m.wikipedia.org/wiki/File:Intel_i486_sx_25mhz_2007_03_27b.jpg and comes with this creative commons license.

SpotiPod – Spotify Streaming Device from an iPod Classic

spotipod classic

I recently came across the sPot: Spotify in a 4th-gen iPod (2004) project on hackaday.io by Guy Dupont. This post is my go at building Guy’s project from the ground up – the SpotiPod.

Here is my version, up and running, albeit with some hardware leaking out the side for now…

The main components required in terms of hardware are:

  • iPod Classic (4th gen) – at least the device case and clickwheel components
  • A Raspberry Pi Zero W
  • 2″ LCD display (see note further on about an alternative)
  • 3.7V 1000mah LiPo battery
  • Adafruit boost module (to boost 3.7V to 5V required by the Pi, LCD, etc…
  • Adafruit USB charge controller module

Once it’s all connected and configured, you’ll be able to load up your own Spotify playlists and libraries, browse them, and play them all from your iPod Classic device over a bluetooth speaker or remote system.

The SpotiPod build almost complete.
Some wire reduction still required before I can completely close it up.

SpotiPod High-level Build

I won’t be getting into the low-level parts of the build, so for specific details I would recommend viewing Guy’s project log and branching off the posts there.

Initial Raspberry Pi Zero W setup with 2″ LCD display

I started off loading Raspbian Lite OS onto an 8GB microSD card and booting up a barebones Pi Zero W. The W version is important because it has WiFi and Bluetooth on the board.

My first task was to configure SSH to start automatically on boot. Useful when I have no display to start with. I also added some of the required software components to begin testing and messing around with, including redis server, compiling the click c++ application that Guy wrote to interface with the iPod’s clickwheel, and setting up some of the X11 components for a basic UI.

Soldering up the connection for the 2″ LCD display was my first hardware connection task. My soldering iron might come out once in a year, so I’m a bit of a novice in this area, but I managed the task on my first go.

Connecting the LCD to Raspberry Pi Zero via Composite Connector
testing the LCD
First LCD test successful

I posted more details here on the 2″ LCD connection and configuration in software.

Connecting the Charge Controller and Voltage Boost Modules

Next up I focused on getting the power delivery working. The goal was to be able to charge the LiPo battery via USB and have the circuit supply 5V to all SpotiPod components where required.

I familiarised myself with the Adafruit module documentation and pinout diagrams before connecting the circuit up.

  • Adafruit Powerboost 1000 module
  • Adafruit Charge Controller

Here is a useful diagram to follow, posted by Kakoub on the hackaday.io project page, re-hosted here in case the imgur upload ever disappears:

Click for a larger, clearer version

So after getting power delivery and connections soldered in place, and precariously placing all the components away from eachother to prevent shorts, here is where I was at:

SpotiPod Powerboost and Charge modules connected
Powerboost and Charge modules connected

Testing the Click wheel and Software

The click wheel connectivity is made easier with an 8 Pin FPC cable breakout board. I hooked this up next, soldering the 4 wires required for power and data.

The click wheel ribbon connector could then snap into the breakout board ribbon connector. This is by far the most delicate part of the build in my opinion. The ribbon cable is super thin and delicate.

Connecting the 8 pin FPC breakout board. My soldering skills slowly coming back with a bit of practice…

Testing the interface was a case of compiling the clickwheel program with gcc over an SSH connection then executing it with everything connected.

If wired up correctly, the program will output touch and click data to stdout.

iPod Classic click wheel testing over SSH

Gutting the old iPod Classic

I managed to snag an old iPod Classic 4th gen off eBay for about £20. It wasn’t working, but had the two bits I needed – the chassis, and the clickwheel.

Breaking out my trusty iFixit essentials toolkit, I set about opening it up to remove the unecessary components.

The method I found to work was to pry it open on the left and right edges using the pry tool. Once you can get into one of the edges, slide the tool around, and things get easier.

Insulating the case and components

With most of the electronics connected, I began insulating things with polyimide tape. Most importantly, the metal iPod case. I put down about three layers of tape and tried to cover all parts as best I could.

Insulating the iPod classic shell for the SpotiPod build.

Installing into the iPod Classic Case

This is the tricky part. It’s quite difficult to squeeze all the SpotiPod hardware in.

I started out by strengthening all my soldering connections with a bit of hot glue.

adding hot glue to the soldered connections for the SpotiPod
Adding hot glue to the soldered connections

After a bit of arranging, squeezing, and coercing, everything fits… Mostly!

Things are still not perfect though. I need to reduce my wire lengths before I can get the case to fully close.

For now though, everything works and I have a fully functional SpotiPod!

Tips and Tricks

I’ve put together a list of things that might help if you do this yourself. These are bits that I recall getting snagged on:

  • Make sure you setup all the X11 and software dependencies correctly. Getting Openbox and the frontend application to launch on start up can be tricky and this is crucial. Pay attention to your /etc/X11/xinit/xinitrc and /etc/xdg/openbox/autostart configurations.
  • You don’t have to use the more expensive Adafruit composite LCD display. Ricardo’s build at RSFlightronics uses a much cheaper LCD and some creative approaches to get display output working.
  • Watch out for the click wheel ribbon orientation when you connect it to the breakout board!
  • Use thin and short length wires for connections where possible. Not too short though as it is useful to be able to open the device up and put the two halves side-by-side.
  • Make sure you have a Spotify Premium subscription. I can’t remember exactly, but I’m sure that creating your own app to get your client and secret keys, or some of the scopes required for the app will only work on Premium. (It might have even been spotify connect).
  • You’ll need to configure your own Spotify App using the Spotify Developer portal. Keep your client and secret keys safe to yourself. Remember to setup environment variables with these that the openbox session can access.
  • The frontend/UI application has a hardcoded reference to the Spotify Connect device as “Spotifypod”. Keep things simple by setting your raspotify configuation to use this name too, otherwise you need to update the code too.
  • If you’re struggling to get the software side working at first, it can really help to setup VNC while you debug things. This allows you to get a desktop environment on the Pi Zero and execute scripts or programs in an x session as openbox would.

Thanks again to Guy Dupont for his excellent SpotiPod project and idea. Putting this all together really makes for a fun and rewarding hardware/software hacking experience.

Restarting the VMWare ESX 3.5 Pegasus health monitoring service

Here is something I ran into the other day at work that might help anyone else getting this issue. VMWare also told me that this tends to happen from time to time on an ESX 3.5 infrastructure. Apparently the issue has been sorted out in vSphere. It doesn’t have any negative effect on production though, apart from the fact that you can’t see your host health statuses correctly.

Also I wouldn’t recommend only relying on these health statistics. Install Dell’s OMSA for extra health monitoring and statistics if you are running Dell servers for example.

Problem:

The Pegasus hardware health service needs restarting or a specific ESX host in the Virtual Center cluster is not showing it’s hardware health indicators in VC correctly. (Could be showing as “Unknown”).

Solution:

Log into the console of the ESX Host in question using PuTTy (SSH).

Run the following command from the ESX server console as root to restart the Pegasus service.

service pegasus restart

I did speak to VMWare support about this and they have said that this does not have any effect on live VMs. I have tested this in a live environment twice now and it did not affect any Virtual Machines.

In both cases I needed to wait 5 to 10 minutes for the ESX host health to update in Virtual Center.

Note that restarting the pegasus health monitoring service does not affect any running VMs on your host.