SpotiPod – Spotify Streaming Device from an iPod Classic

spotipod classic

I recently came across the sPot: Spotify in a 4th-gen iPod (2004) project on hackaday.io by Guy Dupont. This post is my go at building Guy’s project from the ground up – the SpotiPod.

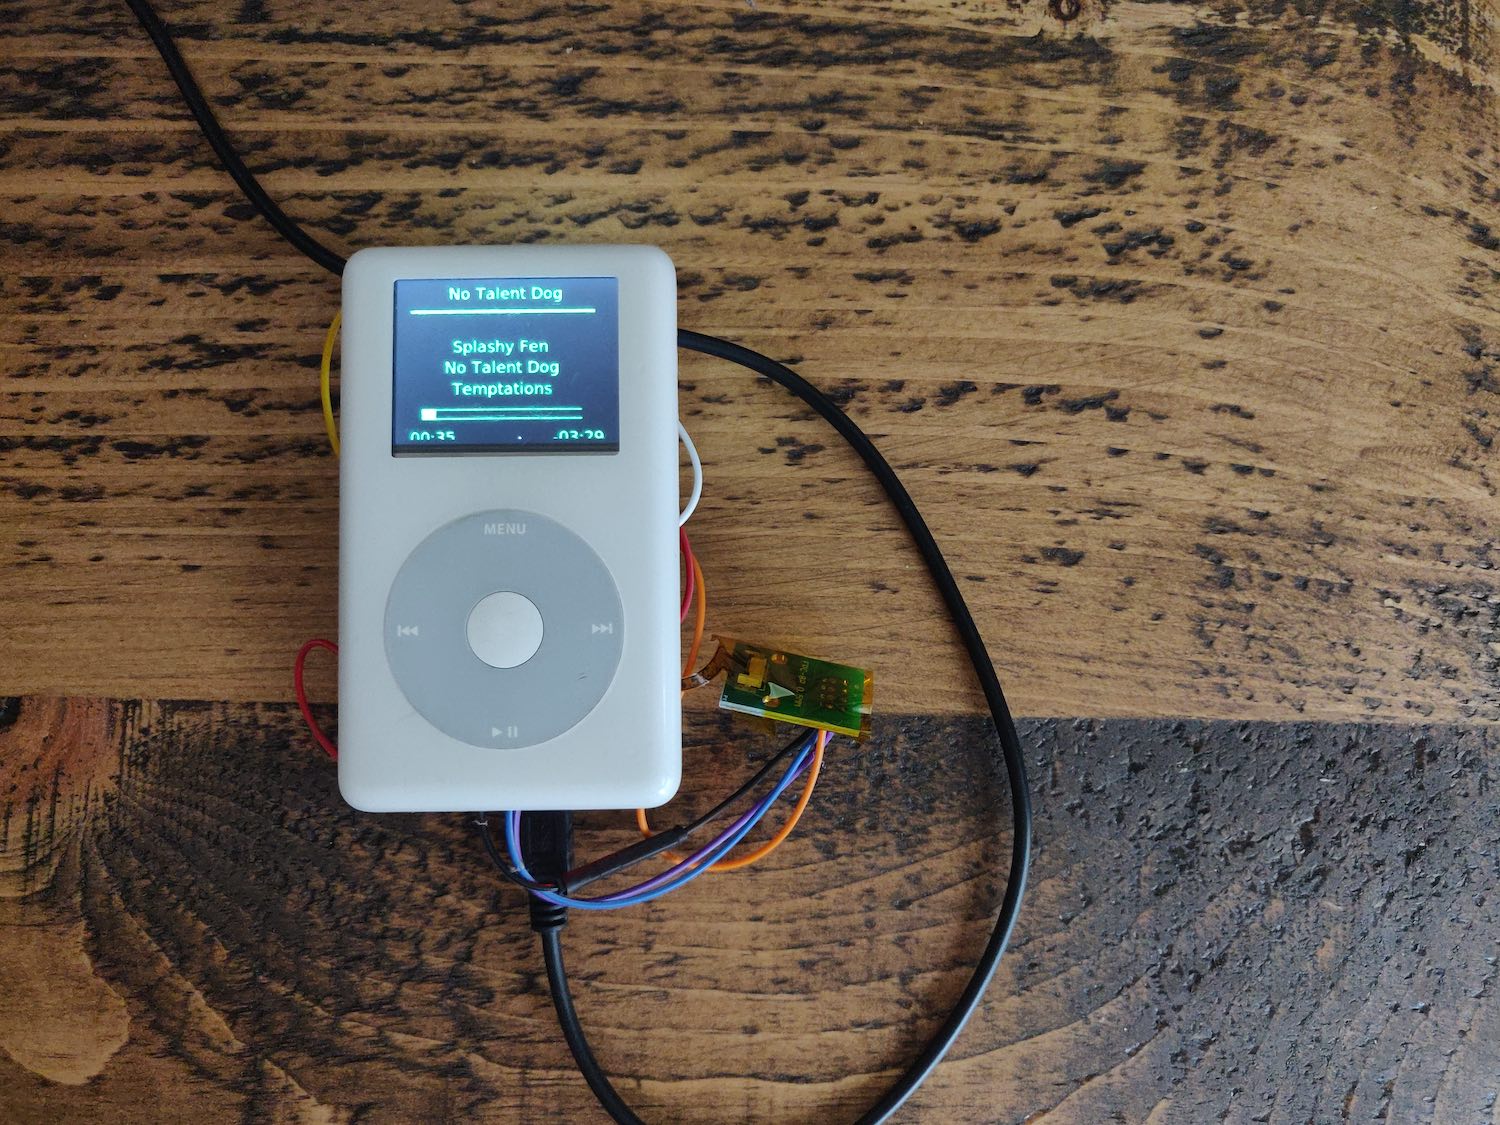
Here is my version, up and running, albeit with some hardware leaking out the side for now…

The main components required in terms of hardware are:

  • iPod Classic (4th gen) – at least the device case and clickwheel components
  • A Raspberry Pi Zero W
  • 2″ LCD display (see note further on about an alternative)
  • 3.7V 1000mah LiPo battery
  • Adafruit boost module (to boost 3.7V to 5V required by the Pi, LCD, etc…
  • Adafruit USB charge controller module

Once it’s all connected and configured, you’ll be able to load up your own Spotify playlists and libraries, browse them, and play them all from your iPod Classic device over a bluetooth speaker or remote system.

The SpotiPod build almost complete.
Some wire reduction still required before I can completely close it up.

SpotiPod High-level Build

I won’t be getting into the low-level parts of the build, so for specific details I would recommend viewing Guy’s project log and branching off the posts there.

Initial Raspberry Pi Zero W setup with 2″ LCD display

I started off loading Raspbian Lite OS onto an 8GB microSD card and booting up a barebones Pi Zero W. The W version is important because it has WiFi and Bluetooth on the board.

My first task was to configure SSH to start automatically on boot. Useful when I have no display to start with. I also added some of the required software components to begin testing and messing around with, including redis server, compiling the click c++ application that Guy wrote to interface with the iPod’s clickwheel, and setting up some of the X11 components for a basic UI.

Soldering up the connection for the 2″ LCD display was my first hardware connection task. My soldering iron might come out once in a year, so I’m a bit of a novice in this area, but I managed the task on my first go.

Connecting the LCD to Raspberry Pi Zero via Composite Connector
testing the LCD
First LCD test successful

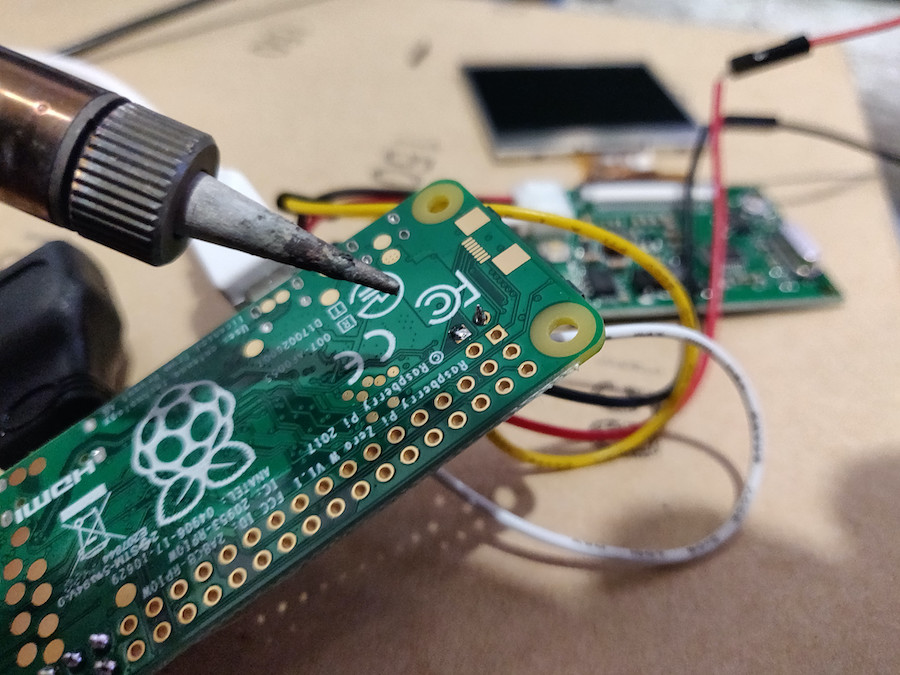
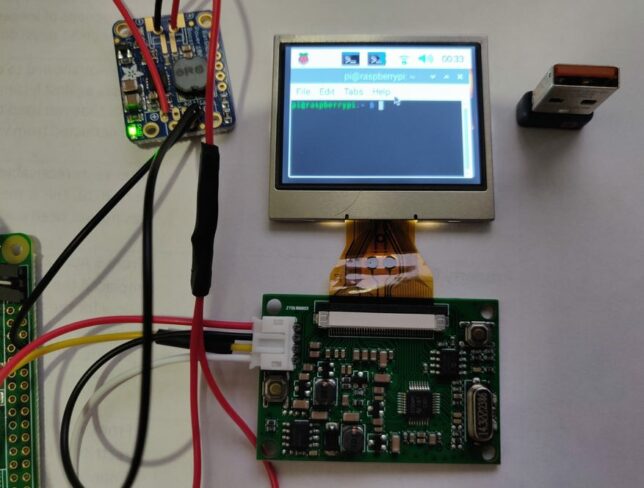
I posted more details here on the 2″ LCD connection and configuration in software.

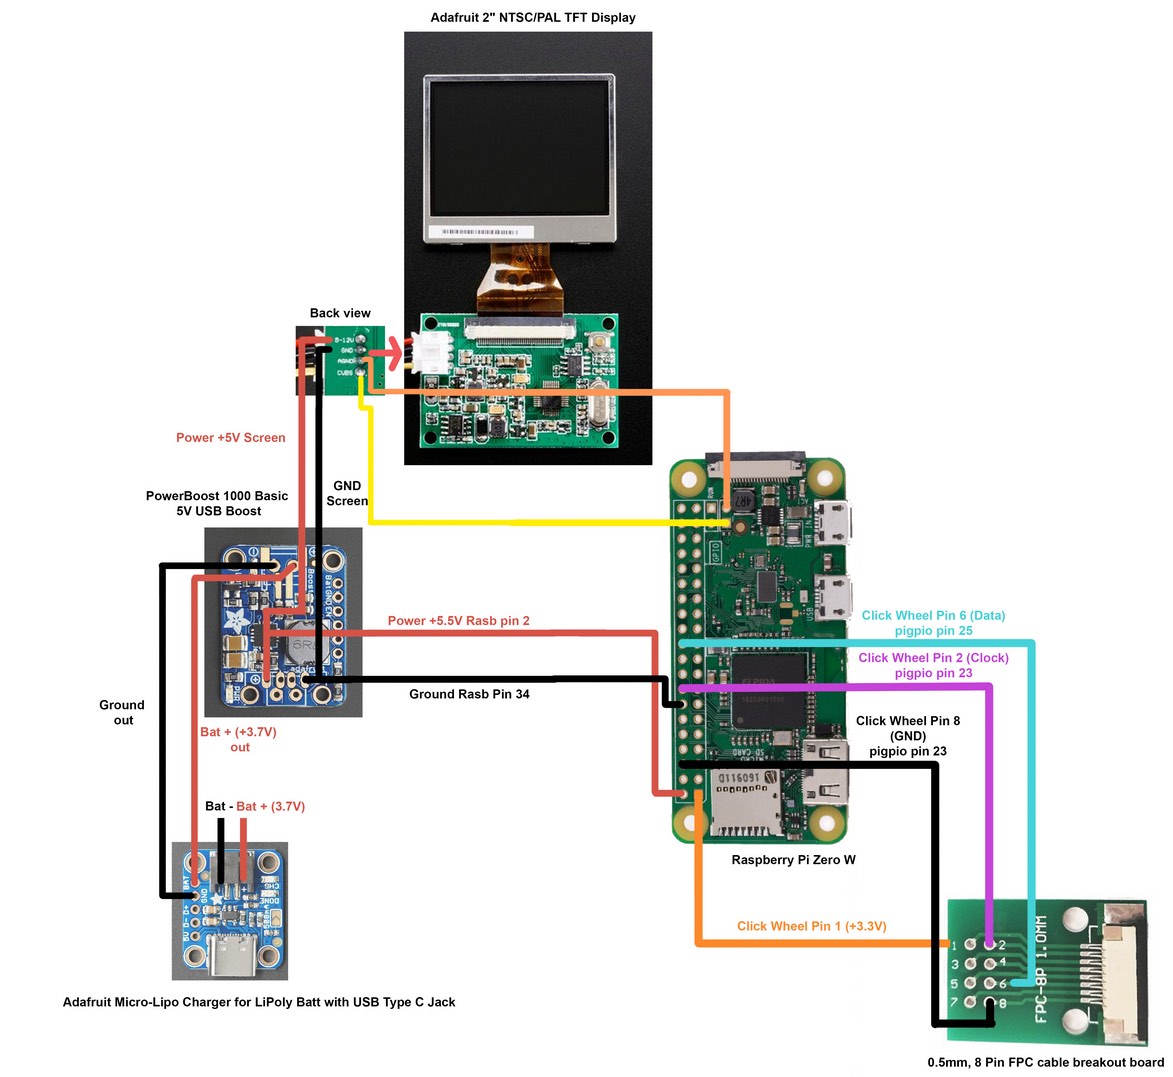
Connecting the Charge Controller and Voltage Boost Modules

Next up I focused on getting the power delivery working. The goal was to be able to charge the LiPo battery via USB and have the circuit supply 5V to all SpotiPod components where required.

I familiarised myself with the Adafruit module documentation and pinout diagrams before connecting the circuit up.

  • Adafruit Powerboost 1000 module
  • Adafruit Charge Controller

Here is a useful diagram to follow, posted by Kakoub on the hackaday.io project page, re-hosted here in case the imgur upload ever disappears:

Click for a larger, clearer version

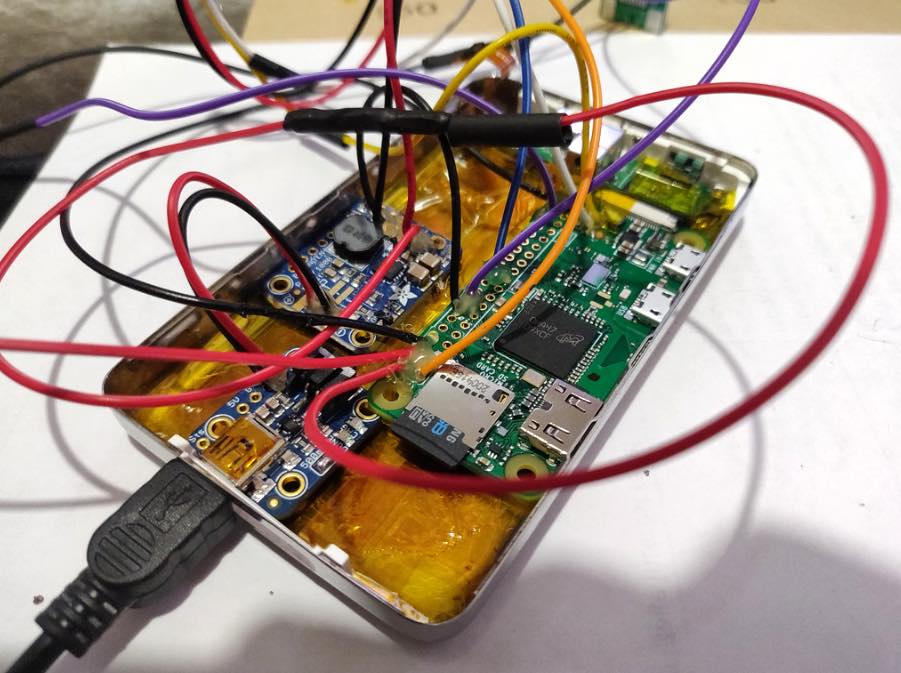
So after getting power delivery and connections soldered in place, and precariously placing all the components away from eachother to prevent shorts, here is where I was at:

SpotiPod Powerboost and Charge modules connected
Powerboost and Charge modules connected

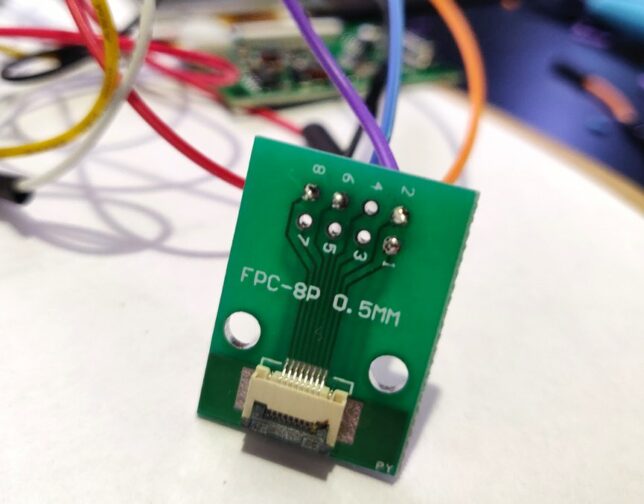
Testing the Click wheel and Software

The click wheel connectivity is made easier with an 8 Pin FPC cable breakout board. I hooked this up next, soldering the 4 wires required for power and data.

The click wheel ribbon connector could then snap into the breakout board ribbon connector. This is by far the most delicate part of the build in my opinion. The ribbon cable is super thin and delicate.

Connecting the 8 pin FPC breakout board. My soldering skills slowly coming back with a bit of practice…

Testing the interface was a case of compiling the clickwheel program with gcc over an SSH connection then executing it with everything connected.

If wired up correctly, the program will output touch and click data to stdout.

iPod Classic click wheel testing over SSH

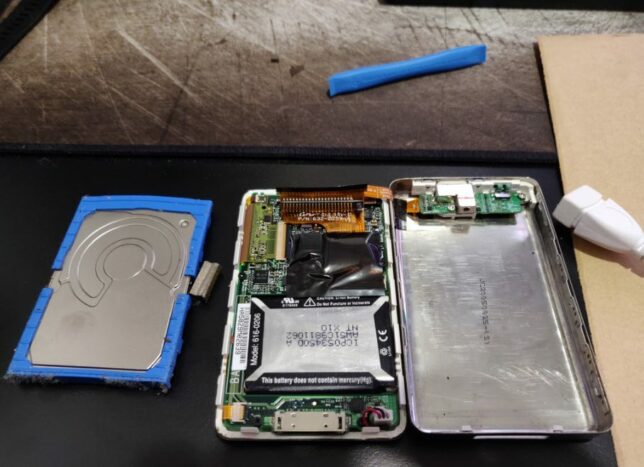
Gutting the old iPod Classic

I managed to snag an old iPod Classic 4th gen off eBay for about £20. It wasn’t working, but had the two bits I needed – the chassis, and the clickwheel.

Breaking out my trusty iFixit essentials toolkit, I set about opening it up to remove the unecessary components.

The method I found to work was to pry it open on the left and right edges using the pry tool. Once you can get into one of the edges, slide the tool around, and things get easier.

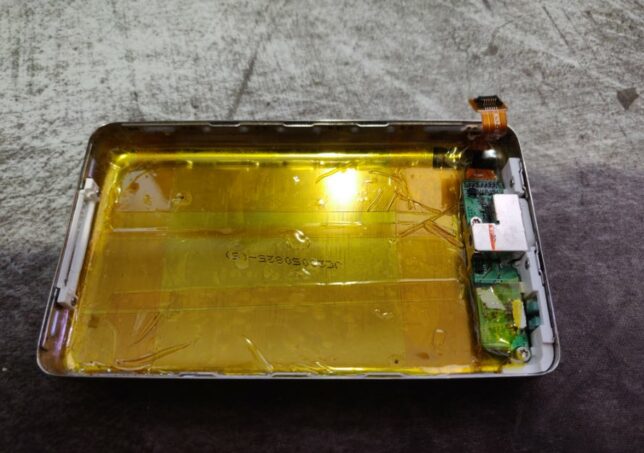
Insulating the case and components

With most of the electronics connected, I began insulating things with polyimide tape. Most importantly, the metal iPod case. I put down about three layers of tape and tried to cover all parts as best I could.

Insulating the iPod classic shell for the SpotiPod build.

Installing into the iPod Classic Case

This is the tricky part. It’s quite difficult to squeeze all the SpotiPod hardware in.

I started out by strengthening all my soldering connections with a bit of hot glue.

adding hot glue to the soldered connections for the SpotiPod
Adding hot glue to the soldered connections

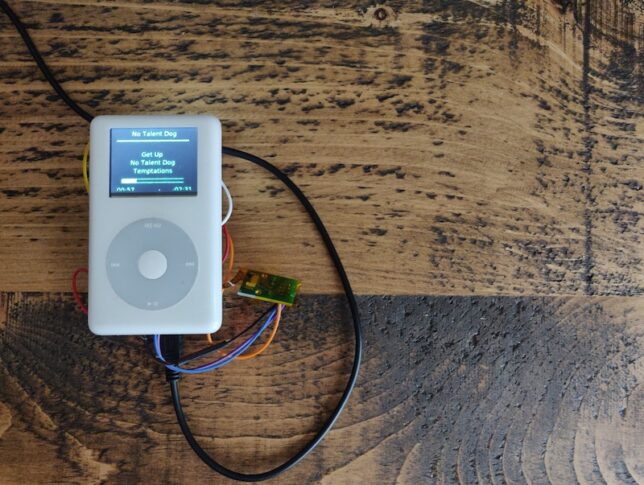
After a bit of arranging, squeezing, and coercing, everything fits… Mostly!

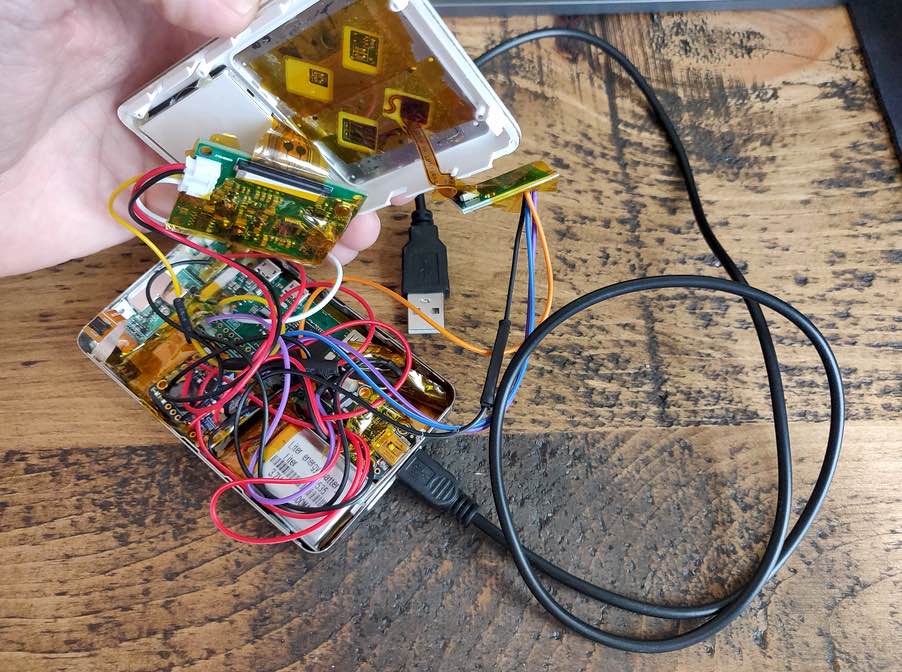
Things are still not perfect though. I need to reduce my wire lengths before I can get the case to fully close.

For now though, everything works and I have a fully functional SpotiPod!

Tips and Tricks

I’ve put together a list of things that might help if you do this yourself. These are bits that I recall getting snagged on:

  • Make sure you setup all the X11 and software dependencies correctly. Getting Openbox and the frontend application to launch on start up can be tricky and this is crucial. Pay attention to your /etc/X11/xinit/xinitrc and /etc/xdg/openbox/autostart configurations.
  • You don’t have to use the more expensive Adafruit composite LCD display. Ricardo’s build at RSFlightronics uses a much cheaper LCD and some creative approaches to get display output working.
  • Watch out for the click wheel ribbon orientation when you connect it to the breakout board!
  • Use thin and short length wires for connections where possible. Not too short though as it is useful to be able to open the device up and put the two halves side-by-side.
  • Make sure you have a Spotify Premium subscription. I can’t remember exactly, but I’m sure that creating your own app to get your client and secret keys, or some of the scopes required for the app will only work on Premium. (It might have even been spotify connect).
  • You’ll need to configure your own Spotify App using the Spotify Developer portal. Keep your client and secret keys safe to yourself. Remember to setup environment variables with these that the openbox session can access.
  • The frontend/UI application has a hardcoded reference to the Spotify Connect device as “Spotifypod”. Keep things simple by setting your raspotify configuation to use this name too, otherwise you need to update the code too.
  • If you’re struggling to get the software side working at first, it can really help to setup VNC while you debug things. This allows you to get a desktop environment on the Pi Zero and execute scripts or programs in an x session as openbox would.

Thanks again to Guy Dupont for his excellent SpotiPod project and idea. Putting this all together really makes for a fun and rewarding hardware/software hacking experience.

Minimal Cost Web Hosting With Spot, Graviton2, EFS, Traefik, & Let’s Encrypt

web

I’m constantly searching for minimal cost web hosting solutions. To clarify that statement, I mean ‘dynamic‘ websites, not static. At the moment I am running this blog and a bunch of others on a Raspberry Pi Kubernetes cluster at home. I got to thinking though, what happens if I need to move? I’ll have an inevitable period of downtime. Clearly self-hosting from home has it’s drawbacks.

I’ve run my personal dynamic websites from AWS before (EC2 with a single Docker instance), but used an application load balancer (ALB) to help with routing traffic to different hostnames. The load balancer itself adds a large chunk of cost, and storage was EBS, a little more difficult to manage when automating host provisioning.

A Minimal Cost Web Hosting Infrastructure in AWS

I wanted to find something that minimises costs in AWS. My goal was to go as cheap as possible. I’ve arrived at the following solution, which saves on costs for networking, compute, and storage.

minimal cost web hosting Infrastructure diagram
  • AWS spot EC2 single instance running on AWS Graviton2 (ARM).
  • EFS storage for persistence (a requirement is that containers have persistence, as I use wordpress and require MySQL etc…)
  • Elastic IP address
  • Simple Lambda Function that manages auto-attachment of a static, Elastic IP (EIP) to the single EC2 instance. (In case the spot instance is terminated due to demand/price changes for example).
  • Traefik v2 for reverse proxying of traffic hitting the single EC2 instance to containers. This allows for multiple websites / hosts on a single machine

It isn’t going to win any high availability awards, but I’m OK with that for my own self-hosted applications and sites.

One important requirement with this solution is the ability to run dynamic sites. I know I could be doing this all a lot easier with S3/CloudFront if I were to only be hosting static sites.

Using this setup also allows me to easily move workloads between my home Kubernetes cluster and the cloud. This is because the docker images and tags I am using are now compatible between ARM (on Raspberry Pi) and ARM on Graviton2 AWS docker instances.

The choices I have gone with allow me to avoid ‘cloud lock in’, as I can easily switch between the two setups if needed.

Cost Breakdown

I’ve worked out the monthly costs to be roughly as follows:

  • EC2 Graviton2 ARM based instance (t4g.medium), $7.92
  • 3GB EFS Standard Storage, $0.99
  • Lambda – will only invoke when an EC2 instance change occurs, so cost not even worth calculating
  • EIP – free, as it will remain attached to the EC2 instance at all times
minimal cost web hosting solution - spot instance pricing chart
Current Spot Instance pricing for t4g.medium instances

If you don’t need 4GB of RAM, you can drop down to a t4g.small instance type for half the cost.

Total monthly running costs should be around $8.91.

Keep in mind that this solution will provide multiple hostname support (multiple domains/sites hosted on the same system), storage persistence, and a pretty quick and responsive ARM based Graviton2 processor.

You will need to use ARM compatible Docker images, but there are plenty out there for all the standard software like MySQL, WordPress, Adminer, etc…

How it Works

The infrastructure diagram above pretty much explains how everything fits together. But at a high level:

  • An Autoscaling Group is created, in mixed mode, but only allows a single, spot instance. This EC2 instance uses a standard Amazon Linux 2 ARM based AMI (machine image).
  • When the new instance is created, a Lambda function (subscribed to EC2 lifecycle events) is invoked, locates a designated Elastic IP (EIP), and associates it with the new spot EC2 instance.
  • The EC2 machine mounts the EFS storage on startup, and bootstraps itself with software requirements, a base Traefik configuration, as well as your custom ‘dynamic’ Traefik configuration that you specify. It then launches the Traefik container.
  • You point your various A records in DNS to the public IP address of the EIP.
  • Now it doesn’t matter if your EC2 spot instance is terminated, you’ll always have the same IP address, and the same EFS storage mounted when the new one starts up.
  • There is the question of ‘what if the spot market goes haywire?’ By default the spot price will be allowed to go all the way up to the on-demand price. This means you could potentially pay more for the EC2 instance, but it is not likely. If it did happen, you could change the instance configuration or choose another instance type.

Deploying the Solution

As this is an AWS opinionated infrastructure choice, I’ve packaged everything into an AWS Cloud Development Kit (AWS CDK) app. AWS CDK is an open source software development framework that allows you to do infrastructure-as-code. I’ve used Typescript as my language of choice.

Clone the source from GitHub

Deploy Requirements

You’ll need the following requirements on your local machine to deploy this for yourself:

  • NodeJS installed, along with npm.
  • AWS CDK installed globally (npm install -g aws-cdk)
  • Define your own traefik_dynamic.toml configuration, and host it somewhere where the EC2 instance will be able to grab it with curl. Note, that the Traefik dashboard basic auth password is defined using htpasswd.
htpasswd -nb YourUsername YourSuperSecurePasswordGoesHere
  • An existing VPC in your account to use. The CDK app does not create a VPC (additional cost). You can definitely use your default account VPC that is already available in all accounts though.
  • An existing AWS Keypair
  • An existing Elastic IP address (EIP) created, and tagged with the key/value of Usage:Traefik (this is for the Lambda function to identify the right EIP to associate to the EC2 instance when it starts)
Tag requirement for the Elastic IP Address

I haven’t set up the CDK app to pass in parameters, so you’ll just need to modify a bunch of variables at the top of aws-docker-web-with-traefik-stack.ts to substitute your specific values for the aforementioned items. For example:

const vpcId = "your-vpc-id";
const instanceType = "t4g.medium"; // t4g.small for even more cost saving
const keypairName = "your-existing-keypair-name";
const managementLocationCidr = "1.1.1.1/32"; // your home / management network address that SSH access will be allowed from. Change this!
const traefikDynContentUrl = "https://gist.githubusercontent.com/Shogan/f96a5a20183e672f9c49f278ea67503b/raw/351c52b7f2bacbf7b8dae65404b61ff4e4313d81/example-traefik-dynamic.toml"; // this should point to your own dynamic traefik config in toml format.
const emailForLetsEncryptAcmeResolver = 'email = "youremail@example.com"'; // update this to your own email address for lets encrypt certs
const efsAutomaticBackups = false; // set to true to enable automatic backups for EFS

Build and Deploy

Build the Typescript project using npm run build. This compiles the CDK and the EIP Manager Lambda function typescript.

At this point you’re ready to deploy with CDK.

If you have not used CDK before, all you really need to know is that it takes the infrastructure described by the code (typescript in this case), and coverts it to CloudFormation language. The cdk deploy command deploys the stack (which is the collection of AWS resources defined in code).

Run:

# Check what changes will be made first
cdk diff

# Deploy
cdk deploy

Testing a Sample Application Stack

Here is a sample docker-compose stack that will install MySQL, Adminer, and a simple WordPress setup.

SSH onto the EC2 instance that is provisioned, and use docker-compose up -d deploy the compose example stack. Just remember to edit and change the template passwords in the two environment variables.

You’ll also need to update the hostnames to your own (from .example.com), and point those A records to your Elastic public IP address.

One more thing, there is a trick to running docker-compose on ARM systems. I personally prefer to grab a docker image that contains a pre-built docker-compose binary, and shell script that ties it together with the docker-compose command. Here are the steps if you need them (run on the EC2 instance that you SSH onto):

sudo curl -L --fail https://raw.githubusercontent.com/linuxserver/docker-docker-compose/master/run.sh -o /usr/local/bin/docker-compose
sudo chmod +x /usr/local/bin/docker-compose

For your own peace of mind, make sure you inspect that githubusercontent run.sh script yourself before downloading, as well as the docker image(s) it references and pulls down to run docker-compose.

Tear Down

To destroy the stack, simply issue the cdk destroy command. The EFS storage is marked by default with a retain policy, so it will not be deleted automatically.

cdk destroy AwsDockerWebWithTraefikStack
deleting the minimal cost web hosting solution cdk stack

Closing

If you’re on the look out for a minimal cost web hosting solution, then give this a try.

The stack uses the new Graviton2 based t4g instance type (ARM) to help achieve a minimal cost web hosting setup. Remember to find compatible ARM docker images for your applications before you go all in with something like this.

The t4g instance family is also a ‘burstable’ type. This means you’ll get great performance as long as you don’t use up your burst credits. Performance will slow right down if that happens. Keep an eye on your burst credit balance with CloudWatch. For 99% of use cases you’ll likely be just fine though.

Also remember that you don’t need to stick to AWS. You could bolt together services from any other cloud provider to do something similiar, most likely at a similar cost too.