How do you create files filled with random data to a certain size specification, and then overwrite a specified portion of this data? I’ll show you how to do this in Windows or Linux. dd is traditionally a Unix program, however there is a Windows port available. I have used this in my testing, but the command line usage is pretty much identical for Linux or Windows. Grab the Windows port over here (I used the beta 0.6 version).
My requirement was to be able to create a large file, say 10GB in size, and then replace bits of that file with random data (for example change the first 5GB of data in that file with random data).
An example use case would be to test how Rsync works with data that has changed slightly. Another use case may be to simply just create large files on a virtual disk attached to a VM (VMDK) and to see how a Backup Solution would handle change block tracking to intelligently backup only the blocks of a VM that have changed. With dd, you can specify how big you want a file to be created as, as well as whether or not that should contain random data, zero filled data, or content from another file amongst other things. Of course there are many other uses for dd, including copying or cloning files, partitions and other data types of data. Just be careful when using dd at a lower level, as it has the ability to destroy data too of course! (This is probably where it earned one of it’s nicknames “Data Destroyer”)
So to get started, simply put the dd.exe file in the location you want to work with, or set up an environment variable for it. To create a 10GB file with random data, you would use the following from your cmd prompt:
dd if=/dev/random of=testfile.txt bs=1k count=10485760
“if” refers to your input, “of” is your output, “bs” is your Byte Size and “count” is how many of these you want in your output.
Now, the cool part – using dd to overwrite a certain amount of your existing file:
dd if=/dev/random of=testfile.txt bs=1k count=1024 conv=notrunc
The above command would overwrite the beginning of the 10GB file with just 1MB (1024 count multiplied by 1KB) of random data. Notice the conv=notrunc bit – this means “do not truncate the output file”, or in other words if the output file already exists, it should only replace the specified bytes and leave the rest of the output file alone. It goes without saying that if you are overwriting data, you should specify the output as being an existing file.
If you would like to create a 1MB zero-filled file, simply use:
dd if=/dev/zero of=testfile.tst bs=1k count=1024
To create a file with content based on another file, you would use something like this:
dd if=samplefile.txt of=newfile.txt
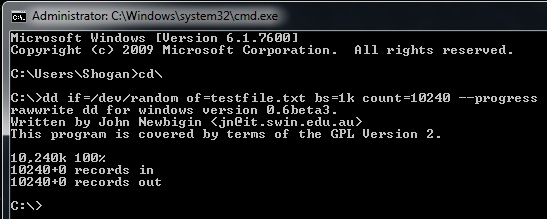
Lastly, a useful parameter that I found is the –progress parameter. This is especially useful for large operations, giving you a visual size/percentage progress indicator on the current operation. Example:
dd if=/dev/random of=testfile.tst bs=1k count=10485760 --progress
Here is the output after creating a random 10MB file with progress indicator in cmd prompt.


