Building a Raspberry Pi Kubernetes Cluster – Part 2 – Master Node

Building a Raspberry Pi Kubernetes Cluster - part 2 - master node title featured image

The Kubernetes Master node is one that runs what are known as the master processes: The kube-apiserver, kube-controller-manager and kube-scheduler.

In this post we’ll go through some common setup that all nodes (masters and workers) in your cluster should get, and then on top of that, the specific setup that will finally configure a single node in the cluster to be the master.

If you would like to jump to the other partes in this series, here are the links:

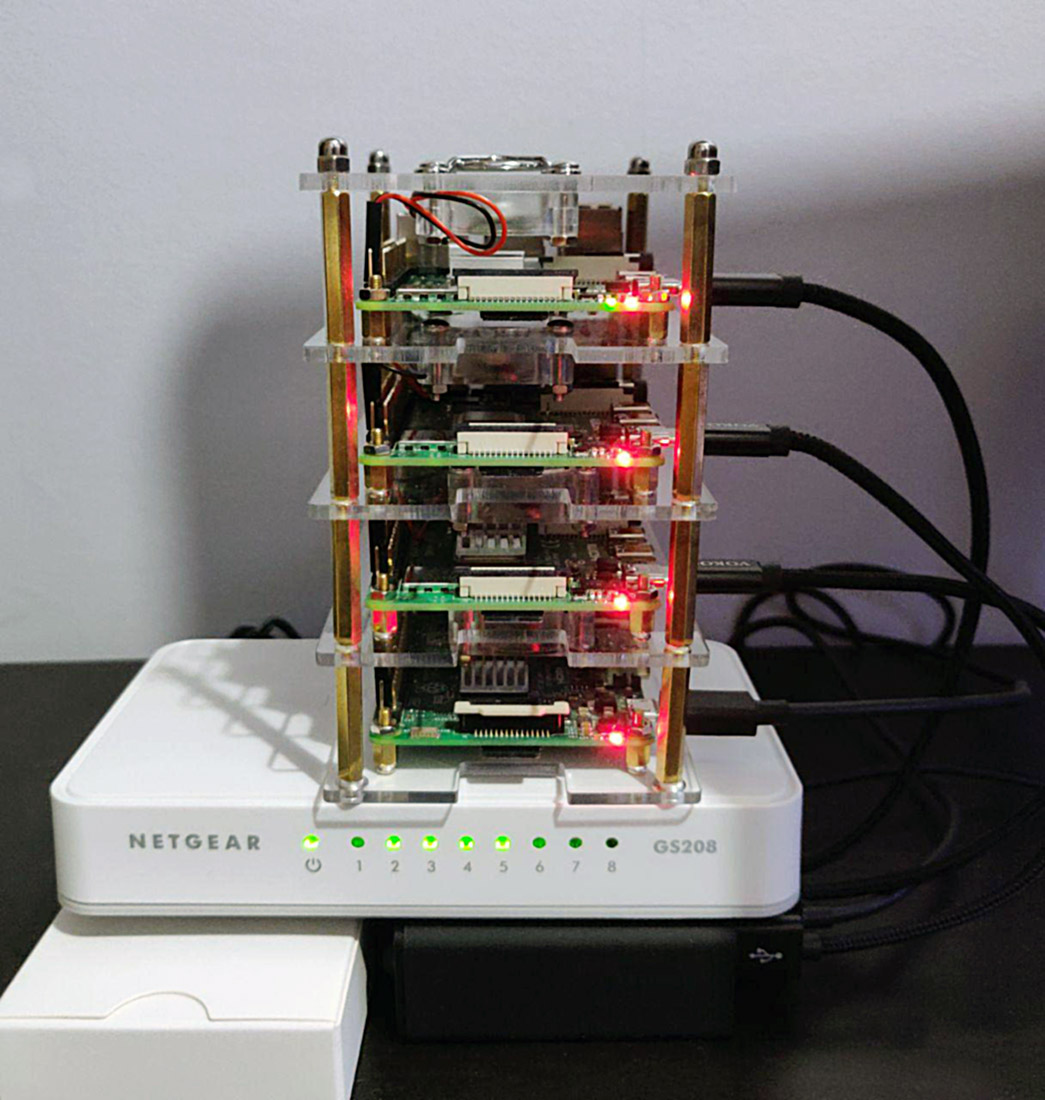
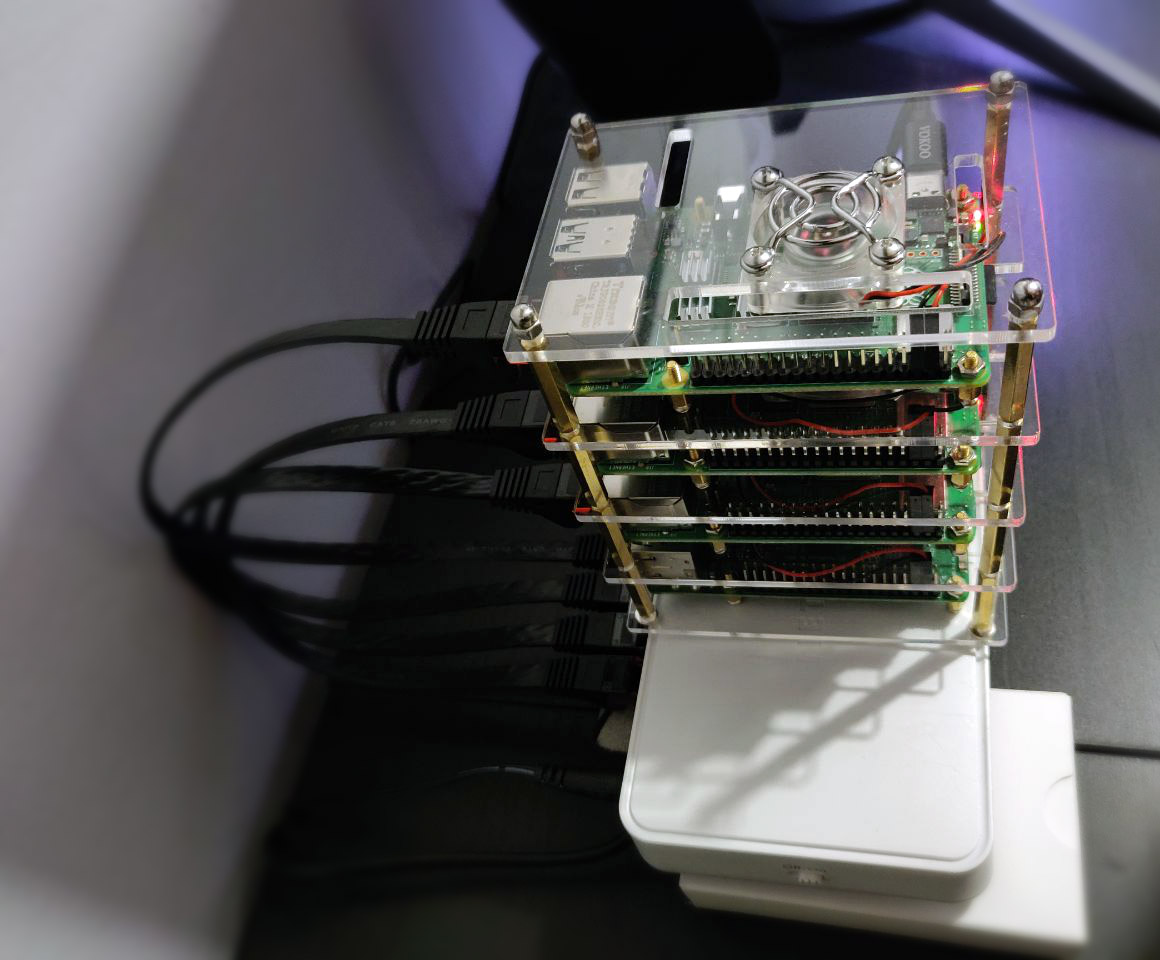
By now you should have some sort of stack or collection of Raspberry Pis going. As mentioned in the previous post, I used a Raspberry Pi 3 for my router/dhcp server for the Kubernetes Pi Cluster network, and Raspberry Pi 4’s with 4GB RAM each for the master and worker nodes. Here is how my stack looks now:

picture of raspberry pi devices in stack, forming the kubernetes cluster
The stack of Rasperry Pi’s in my cluster. Router Pi at the bottom, master and future worker nodes above. They’re sitting on top of the USB power hub and 8 port gigabit network switch

Common Setup

This setup will be used for both masters and workers in the cluster.

Start by writing the official Raspbian Buster Lite image to your microSD card. (I used the 26th September 2019 version), though as you’ll see next I also updated the Pi’s firmware and OS using the rpi-update command.

After attaching your Pi (master) to the network switch, it should pick up an IP address from the DHCP server you setup in part 1.

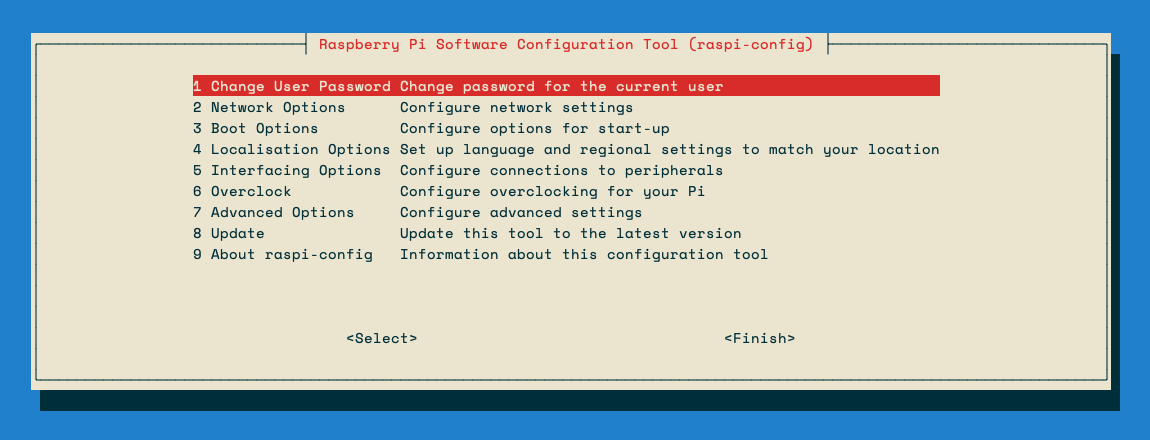
SSH into the Pi and complete the basic setup such as setting a hostname and ensuring it gets a static IP address lease from DHCP by editing your dnsmasq configuration (as per part 1).

Note: As the new Pi is running on a different network behind your Pi Router, you can either SSH into your Pi Router (like a bastion host or jump box) and then SSH into the new Master Pi node from there.

Now update it:

sudo rpi-update

After the update completes, reboot the Pi.

sudo reboot now

SSH back into the Pi, then download and install Docker. I used version 19.03 here, though at the moment it is not ‘officially’ supported.

export VERSION=19.03
curl -sSL get.docker.com | sh && sudo usermod pi -aG docker && newgrp docker

Kubernetes nodes should have swap disabled, so do that next. Additionally, you’ll enable control groups (cgroups) for resource isolation.

sudo dphys-swapfile swapoff
sudo dphys-swapfile uninstall
sudo update-rc.d dphys-swapfile remove
sudo systemctl disable dphys-swapfile.service

sudo sed -i -e 's/$/ cgroup_enable=cpuset cgroup_memory=1 cgroup_enable=memory/' /boot/cmdline.txt

Installing kubeadm and other Kubernetes components

Next you’ll install the kubeadm tool (helps us create our cluster quickly), as well as a bunch of other components required, such as the kubelet (the main node agent that registers nodes with the API server among other things), kubectl and the kubernetes cni (to provision container networking).

Next up, install the legacy iptables package and setup networking so that it traverses future iptables rules.

Note: when I built my cluster initially I discovered problems with iptables later on, where the kube-proxy and kubelet services had trouble populating all their required iptables rules using the pre-installed version of iptables. Switching to legacy iptables fixed this.

The error I ran into (hopefully those searching it will come across this post too) was:

proxier.go:1423] Failed to execute iptables-restore: exit status 2 (iptables-restore v1.6.0: Couldn't load target `KUBE-MARK-DROP':No such file or directory

Setup iptables and change it to the legacy version:

sudo sysctl net.bridge.bridge-nf-call-iptables=1
sudo update-alternatives --set iptables /usr/sbin/iptables-legacy

Lastly to finish off the common (master or worker) node setup, reboot.

sudo reboot now

Master Node Setup

Now you can configure this Pi as a master Kubernetes node. SSH back in after the reboot and pull down the various node component docker images, then initialise it.

Important: Make sure you change the 10.0.0.50 IP address in the below code snippet to match whatever IP address you reserved for this master node in your dnsmasq leases configuration. This is the IP address that the master API server will advertise out with.

Note: In my setup I am using 192.168.0.0./16 as the pod CIDR (overlay network). This is specifically to keep it separate from my internal Pi network of 10.0.0.0/8.

sudo kubeadm config images pull -v3
sudo kubeadm init --token-ttl=0 --apiserver-advertise-address=10.0.0.50 --pod-network-cidr=192.168.0.0/16

# capture text and run as normal user. e.g.:
# mkdir -p $HOME/.kube
# sudo cp -i /etc/kubernetes/admin.conf $HOME/.kube/config
# sudo chown $(id -u):$(id -g) $HOME/.kube/config

Once the kubeadm commands complete, the init command will output a bunch of commands to run. Copy and enter them afterwards to setup the kubectl configuration under $HOME/.kube/config.

You’ll also see a kubeadm join command/token. Take note of that and keep it safe. You’ll use this to join other workers to the cluster later on.

kubeadm join 10.0.0.50:6443 --token yi4hzn.glushkg39orzx0fk \
    --discovery-token-ca-cert-hash sha256:xyz0721e03e1585f86e46e477de0bdf32f59e0a6083f0e16871ababc123

Installing the CNI (Weave)

You’ll setup Weave Net next. At a high level, Weave Net creates a virtual container network that connects your containers that are scheduled across (potentially) many different hosts and enables their automatic discovery across these hosts too.

Kubernetes has a pluggable architecture for container networking, and Weave Net is one implementation of this.

Note: the command below assumes you’re using an overlay/container network of 192.168.0.0/16. Change this if you’re not using this range.

On your Pi master node:

curl --location -o ./weave-cni.yaml "https://cloud.weave.works/k8s/net?k8s-version=$(kubectl version | base64 | tr -d '\n')&env.IPALLOC_RANGE=192.168.0.0/16"
kubectl apply -f ./weave-cni.yaml

After a few moments waiting for your node to pull down the weave net container images, check that the weave container(s) are running and that the master node is showing as ready. Here is how that should look…

kubectl -n kube-system get pods
kubectl get nodes
pi@korben:~ $ kubectl -n kube-system get pods | grep weave
weave-net-cfxhr                  2/2     Running   20         10d
weave-net-chlgh                  2/2     Running   17         23d
weave-net-rxlg8                  2/2     Running   13         23d

pi@korben:~ $ kubectl get nodes
NAME     STATUS   ROLES    AGE   VERSION
korben   Ready    master   23d   v1.16.2

That is pretty much it for the master node setup. You now have a single master node running the Kubernetes master components / API server, and have even used to successfully provision and configure container networking.

As a result of deploying Weave Net, you now have a DaemonSet that will ensure that any new node that joins the cluster will automatically get the Weave Net CNI. All other nodes in the cluster will automatically update to ‘know’ about the new node and subsequently containers in the cluster will be able to talk to each other over the overlay network.

Building a Raspberry Pi Kubernetes Cluster – Part 1 – Routing

Building a Raspberry Pi Kubernetes Cluster - part 1 - routing - title featured image

I’ve recently built myself a Kubernetes (1.16.2) cluster running on a combination of Raspberry Pi 4 and 3 devices.

Raspberry Pi Cluster Stack

I’ll be running through the steps I took to build it out in this series, with part 1 focusing on the router and internal node network side of things.

If you want to jump to the other parts in this series:

First off, here is a list of parts I used to set everything up:

To make the setup as portable as possible, and also slightly seggregated from my home network, I used the 1 x Raspberry Pi 3 device I had as a router between my home network and my Kubernetes Layer 2 Network (effectively the devices on the 8 port Netgear Switch).

Here is a network diagram that shows the setup.

Raspberry Pi Kubernetes Network Diagram

Building the Raspberry Pi Cluster Router

Of course you’ll need an OS on the microSD card for each Raspberry Pi you’re going to be using. I used the latest Raspbian Buster Lite image from the official Raspbian Downloads page (September 26).

This is a minimal image and is exactly what we need. You’ll need to write it to your microSD card. There are plenty tutorials out there on doing this, so I won’t cover it here.

One piece of advice though, would be to create a file called “ssh” on the imaged card filesystem after writing the image. This enables you to SSH on directly without the need to connect up a screen and setup the SSH daemon yourself. Basically just login to your home network DHCP server and look for the device once it boots then SSH to it’s automatically assigned IP address.

Also, it would be wise to reserve an IP address on your home network’s DHCP service for your Pi Router. Grab the MAC address of your Pi and add it to your home network DHCP service’s reserved IP addresses. I set mine to 192.168.2.30 on my WiFi network.

List the wlan interface’s MAC address with:

ifconfig wlan0

Setting Hostname and Changing the Default Password

On the Router Raspberry Pi, run the following command to change the hostname to something other than “raspberry” and change the default password too:

sudo raspi-config
Change the default password and hostname of the Raspberry Pi

Setting up the Pi Router

Now the rest of the guide deserves much credit to this blog post, however, I did change a few things on my setup, as the routing was not configured 100% correctly to allow external access to services on the internal Kubernetes network.

I needed to add a couple of iptables rules in order to be able to access my Ingress Controller from my home network. More on that later though.

Interface Setup

You need to configure the WiFi interface (wlan0) and the Ethernet Interface (eth0) for each “side” of the network.

Edit the dhcpd.conf file and add an eth0 configuration right at the bottom, then save.

sudo nano /etc/dhcpcd.conf
interface eth0
static ip_address=10.0.0.1/8
static domain_name_servers=1.1.1.1,208.67.222.222
nolink

Of course replace the above DNS servers with whichever you prefer to use. I’ve used Cloudflare and OpenDNS ones here.

Next, setup your WiFi interface to connect to your home WiFi. WiFi connection details get saved to /etc/wpa_supplicant/wpa_supplicant.conf but it is best to use the built-in configuration tool (raspi-config) to do the WiFi setup.

sudo raspi-config

Go to Network Options and enter your WiFi details. Save/Finish afterwards.

Install and Configure dnsmasq

sudo apt update
sudo apt install dnsmasq
sudo mv /etc/dnsmasq.conf /etc/dnsmasq.conf.backup

Create a new /etc/dnsmasq.conf file with the below command:

The script is the main dnsmasq configuration that sets DHCP up over the eth0 interface (for the 10.0.0.0/8 network side) and configures some nameservers for DNS as well as a few other bits.

Edit the service file for dnsmasq (/etc/init.d/dnsmasq) to prevent issues with start-up order of dnsmasq and dhcpcd:

sudo nano /etc/init.d/dnsmasq

Change the top of the file to look like this:

#!/bin/sh

# Hack to wait until dhcpcd is ready
sleep 10

### BEGIN INIT INFO
# Provides:       dnsmasq
# Required-Start: $network $remote_fs $syslog $dhcpcd
# Required-Stop:  $network $remote_fs $syslog
# Default-Start:  2 3 4 5
# Default-Stop:   0 1 6
# Description:    DHCP and DNS server
### END INIT INFO

The lines changed above are the sleep 10 command and the Required-Start addition of $dhcpcd.

At this point its a good idea to reboot.

sudo reboot now

After the reboot, check that dnsmasq is running.

sudo systemctl status dnsmasq

Setup iptables

First of all, enable IP forwarding. Edit the /etc/sysctl.conf file and uncomment this line:

net.ipv4.ip_forward=1

This enables us to use NAT rules with iptables.

Now you’ll configuring some POSTROUTING and FORWARD rules in iptables to allow your Raspberry Pi devices on the 10.0.0.0/8 network to access the internet via your Pi Router’s wlan0 interface.

sudo iptables -t nat -A POSTROUTING -o wlan0 -j MASQUERADE
sudo iptables -A FORWARD -i wlan0 -o eth0 -m state --state RELATED,ESTABLISHED -j ACCEPT
sudo iptables -A FORWARD -i eth0 -o wlan0 -j ACCEPT

Optional Step

This is optional, and you might only need to do this later on once you start running services in your Kubernetes Pi Cluster.

Forward Traffic from your home network to a Service or Node IP in your Cluster Network:

sudo iptables -t nat -A PREROUTING -i wlan0 -p tcp --dport 80 -j DNAT --to-destination 10.23.220.88:80
sudo iptables -t nat -A POSTROUTING -p tcp -d 10.23.220.88 --dport 80 -j SNAT --to-source 10.0.0.1

The above assumes a couple of things that you should change accordingly (if you use this optional step):

  • You have a Service running in the Kubnernetes network, listening on port 80 (http) on IP 10.23.220.88
  • You setup your Pi Router to use 10.0.0.1 as the eth0 device IP (as per above in this post), and your wlan0 interface is the connection that your Pi router is using to connect to your home network (WiFi).
  • You actually want to forward traffic hitting your Pi Router (from the WiFi wlan0 interface) through the 10.0.0.1 eth0 interface and into a service IP on the 10.0.0.0/8 network. (In my example above I have an nginx Ingress Controller running on 10.23.220.88).

Persisting your iptables rules across reboots

Persist all of your iptables rules by installing iptables-persistent:

sudo apt install iptables-persistent

The above will run a wizard after installation and you’ll get the option to save your IPv4 rules. Choose Yes, then reboot afterwards.

After reboot, run sudo iptables -L -n -v to check that the rules persisted after reboot.

Note: if you ever update your Pi Router’s iptables rules and want to re-save the new set of rules to persist across reboots, you’ll need to re-save them using the iptables-persistent package.

sudo dpkg-reconfigure iptables-persistent

Adding new Pi devices to your network in future

Whenever you add an additional Raspberry Pi device to the 8 port switch / Kubernetes network in the future, make sure you edit /etc/dnsmasq.conf to update the list of MAC addresses assigned to 10.0.0.x IP addresses.

You’ll want to set the new Pi’s eth0 MAC address up in the list of pre-defined DHCP leases.

You can also view the /var/lib/misc/dnsmasq.leases file to see the current dnsmasq DHCP leases.

This is handy when adding a new, un-configured Pi to the network – you can pick up the auto-assigned IP address here, and then SSH to that for initial configuration.

Concluding

That is pretty much the setup and configuration for the Pi Router complete. As mentioned above, much credit for this configuration goes to this guide on downey.io.

I ended up modifying the iptables rules for service traffic forwarding from my home network side into some Kubernetes LoadBalancer services I ended up running later on which I covered above in the Optional Steps section.

At this point you should have your Pi Router connected to your home network via WiFi, and have the Ethernet port plugged into your network switch. Make sure the switch is not connected back to your home network via an Ethernet cable or you’ll run into some strange network loop issues.

You should now be able to plug in new Pi’s to the network switch, and they should get automatically assigned DHCP addresses on the 10.0.0.0/8 network.

Updating your dnsmasq.conf file with the new Pi’s ethernet MAC addresses means that they can get statically leases IP addresses too, which you’ll need for your Kubernetes nodes once you start adding them (see Part 2 coming next).