Accessing network equipment via console cable from your ESX / linux server

Ever wondered how you can access your Cisco router, switch, or other network device over console cable from your ESX host / other linux machine? Obviously you’ll need a COM port on the physical hardware to start… Here’s a guide I wrote for SysAdmin-Talk. Have a read if you are interested in finding out how to achieve this. They have some other great articles and how-to’s posted up there. I have already found some extremely useful Exchange how-tos and guides and am looking forward to writing more for SysAdmin Talk!

SysAdmin Talk – Don’t Tear your Hair Out over Access to Cisco Devices

How to officially deactivate a Windows 2008 R2 RDS licensing server and remove RDS CALs

This post will explain how to remove Remote Desktop Services Client Access Licenses.

I just got off the phone with Microsoft after wanting to remove some RDS CALs (Formerly known as TS CALs) from a Windows 2008 R2 Terminal Server (Now called Remote Desktop Server). After initially  looking this up, a Technet article mentioned needing to use the Remote Desktop Services Windows Management Instrumentation (WMI) provider. However clicking the link popped up a page stating that the document they refer you to was not available yet. (Not very helpful Technet). The other option in the Technet article mentioned deactivating the licensing server as another option. However when I tried this, followed by a reactivation of the licensing server, the old RDS CALs were still there.

So to get this done here is the process we followed:

1. Open the RD Licensing Manager.

2. Select the Server name, right-click it and then choose Properties. Switch connection method to Telephone and choose your Country. Note – if you want you could also use Internet as connection manager. I did Telephone as I had a guy from the Clearing House / Licensing department on the line already. Click OK to confirm.

3a. Right-click the server name again, go to Advanced, then choose “Deactivate Server”. Run through the wizard. With telephone selected I had to read out a deactivation number. The consultant then read out a confirming code that I entered into the wizard. After this I finished the Wizard which deactivated the Licensing.

b. Next, re-activate the License server – right-click the server name, select Activate, read out the codes in the wizard and enter the key they give back to you. (Or just use the Internet activate method). I needed to close the RD Licensing console at this stage.

4. So next up I launched the Services console (Start -> Run, type services.msc and click OK). Go down to Remote Desktop Licensing, right-click it and choose “Stop” to stop the service.

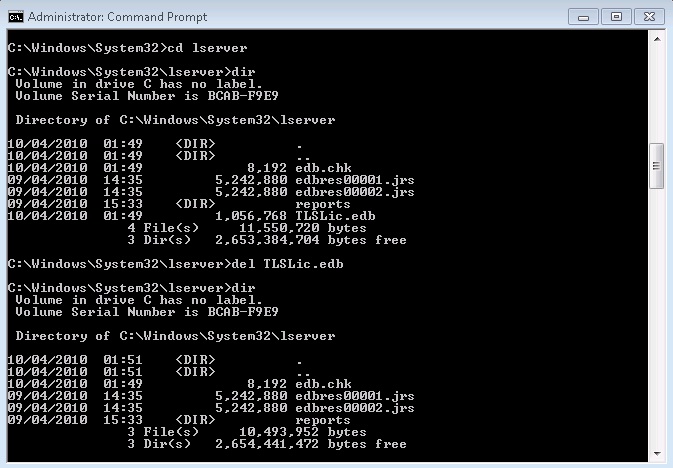
5. Navigate to C:\Windows\System32\lserver and look for the “TLSLic.edb” file. Delete this file. (I would make a backup just in case you wanted it back for some reason).

6. Start the Remote Desktop Licensing service again. (Right-click service and choose “Start”).

7. The Service should start correctly.

8. Launch the RD Licensing console again (you should have closed it at the end of step 3). Your previous licenses should be gone now.

9. Right-click the server and choose “Install Licenses”. Go through the wizard to get the correct RDS CALs installed. You won’t be violating any Microsoft licensing agreements because you deleted your previous RDS CALs. Once everything is working again, delete your backup of your old RDS CALs (the .EDB file that you backed up).

That is it. You should now have removed your old RDS CALs and installed new RDS CALs. Note that no users will be able to login to this RDSH server whilst there are no CALs in place, so do this as planned down time.

Blackberry (BES) user able to receive e-mail but can’t send

There can be many different causes for the problem where a Blackberry user can receive e-mail, but cannot send out. A good place to start troubleshooting is the Application Event log on your BES Server.

In this case we have a user who is unable to send e-mail but they can still receive e-mail. After some inspecting the event logs, I found some event ID “20000” logs, which read as follows:

Event Type:    Warning
Event Source:    BlackBerry Messaging Agent BES01 Agent 1
Event Category:    None
Event ID:    20000
Date:        03/03/2010
Time:        18:43:00
User:        N/A
Computer:    BES01
Description:
{useremailaddress@domainname.com} Send() failed: ERR_MAILBOX_FULL, Tag=173571

It is quite clear that this is indicating a full mailbox (or at least a restriction on the mailbox which only allows the user to receive e-mail and not send once this limit has been reached). Your next steps should be to get the user to clear out their mailbox to free up some space, or to increase their mailbox size limit or send limit size in Exchange.

Blackberry Technical Documentation describes this event error in more detail as follows:

The BlackBerry device user has reached the mailbox storage limit and is not permitted to send email messages until the Microsoft Information Store size returns to an acceptable range. The Blackberry device user can receive email messages, but cannot send email messages. Troubleshooting: Delete email messages from the BlackBerry device user’s mailbox and empty their Deleted Items folder.

So clearing out the user’s mailbox or increasing their exchange mailbox size limits should clear this issue up. If you are experiencing the same symptoms, but are not getting this particular event ID message, there are other avenues to go down with regard to troubleshooting. One that I often check is to ensure that the BES admin account has got full “Send As” permission on the user’s account in Active Directory. (You’ll need to view Active Directory in Advanced Mode to see the permissions tab on the user object though).

If all else fails doing a wipe of the user’s BlackBerry device, followed by a new Enterprise Activation is a good fallback point. Provided everything else is working correctly (and all other users seem to be sending and receiving OK) this should clear up any issues for the user in question. Of course you should just about exhaust all other avenues of investigation before trying this though!

Create new mailboxes / AD objects using Powershell & Exchange 2007

Here is something new I learnt today. Using powershell scripting can potentially save you a lot of time performing common day to day tasks. In this example I use Powershell to create a new mailbox and Active Directory user object with Exchange 2007 running in my test environment.

1. First off start by opening the “Exchange Management Shell”. This will load a powershell window for you.

2. Now we need to create a password variable and assign a password string to this in the form of a “SecureString”. Issue the following command in your shell window :

$Password = ConvertTo-SecureString -string “TryPassword123” -asPlainText -Force

3. If you now type “$Password” and press Enter, you should get a prompt back saying “System.Security.SecureString”. This means you your plain text password is now stored as a SecureString variable and is ready to use.

4. Next we will run the command to do all the work (That is add the user and mailbox to Active Directory / Exchange 2007). Issue this command next (substituting the values relevant for your situation of course! :

New-Mailbox -Name “John Smith” -Database “First Storage Group\Mailbox Database” -Password $Password -UserPrincipalName John.Smith@youremaildomain.co.uk -Alias John.Smith -DisplayName “John Smith” -FirstName “John” -Initials “JS” -LastName “Smith” -OrganizationalUnit “Home Users”

You should get a prompt back giving you a summary of what has been done.

This screenshot illustrates the above few steps :

5. After you have run the New-Mailbox command successfully, run “Get-Mailbox” to get a list of current mailboxes residing on your Exchange 2007 server. This should now show your new mailbox.

How to: Swapping out LCD panel in Acer Laptops

Here is a quick photo guide I did on how I swapped out LCD panels (between two Acer Travelmate laptops – 15″ LCD from 4520 to the 4600’s chassis). The 4600 had a faulty LCD panel and the laptop worked perfectly apart from this one problem. I guess a lot of this would be relevant when dealing with most laptop LCDs. The only change being slightly different components and connectors in slightly different places. Hope this helps someone out in the future. I just ensured both panels were the same specification : i.e. both were 1024×768, XGA and were for Acer Travelmate laptops.

1. Here we have the two laptops. Donor laptop in dark grey, laptop to receive new LCD in light grey.
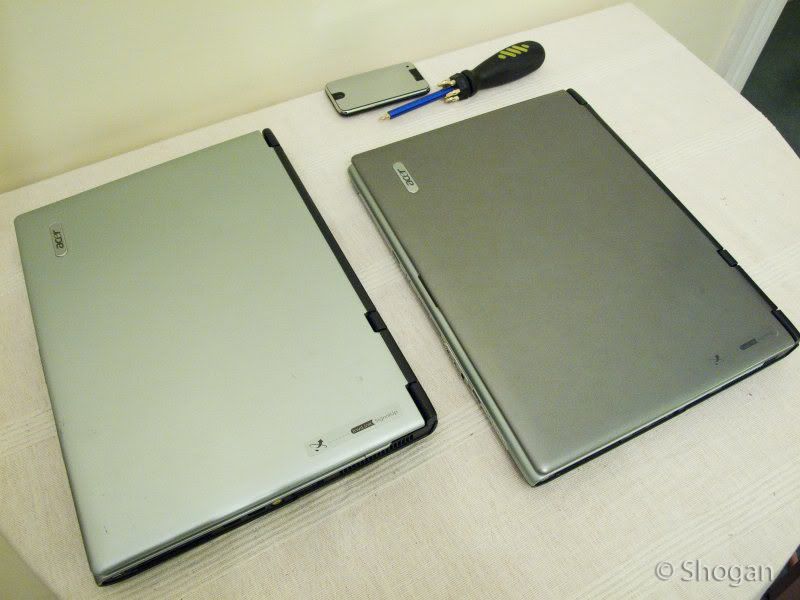
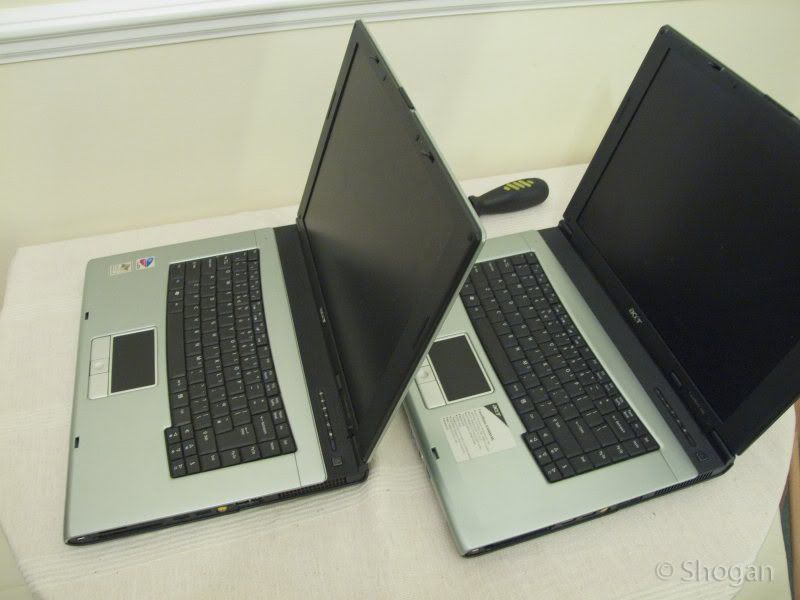
Start by removing your mains charger and disconnecting your laptop battery.

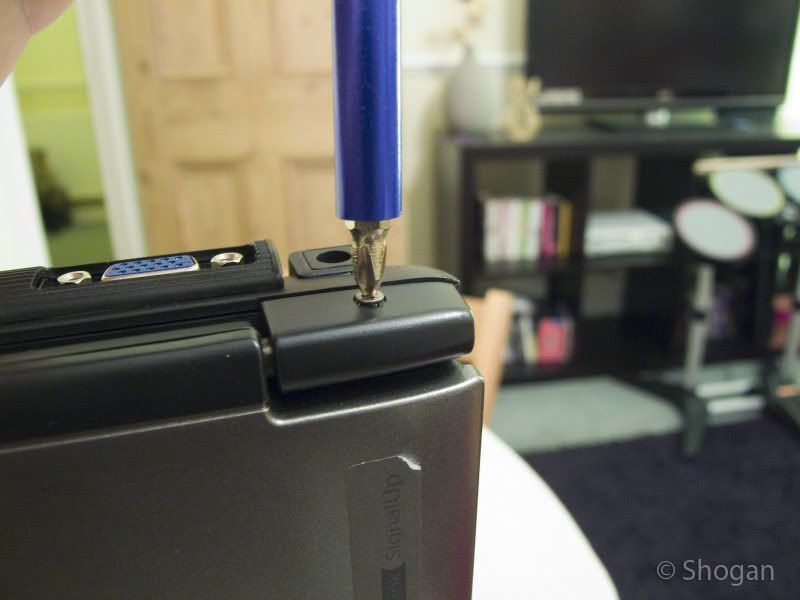
2. Flip the donor laptop on its edge, and unscrew the 3 screws on the back of the LCD hinges.
3. Next, fold the LCD backwards (open it as far as it will go), and pry off this plastic panel (gently as you can with your fingers). If you are gentle and patient enough, it should come off relatively easily without snapping anything.
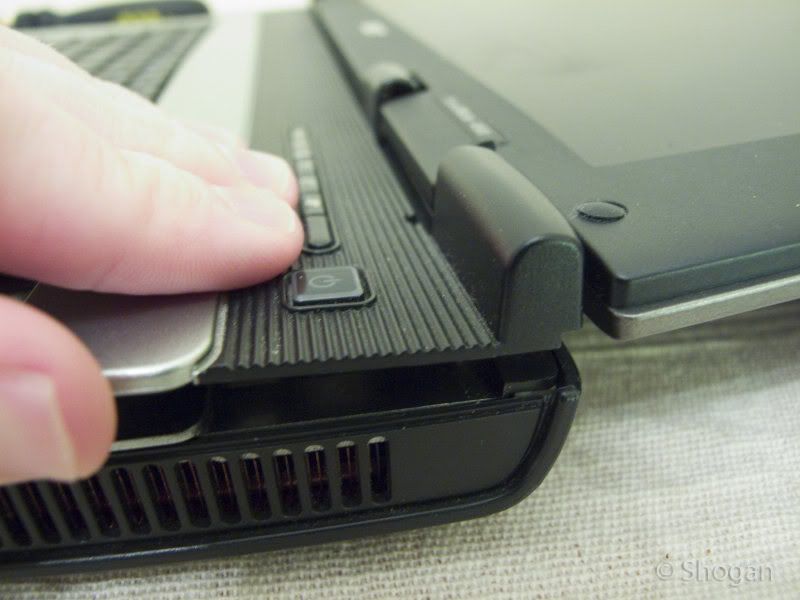
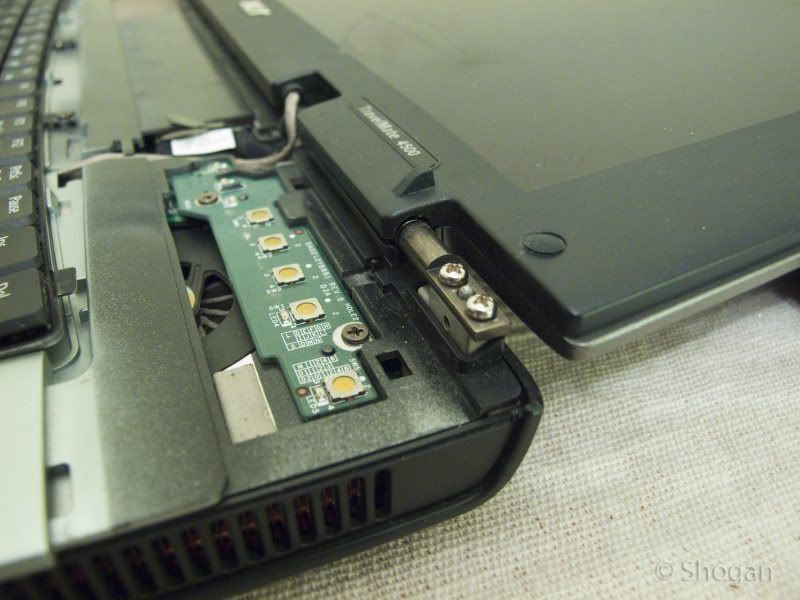
4. Flip the laptop over and unscrew the cover that protects the wifi and RAM components. On these laptops this is in the center.
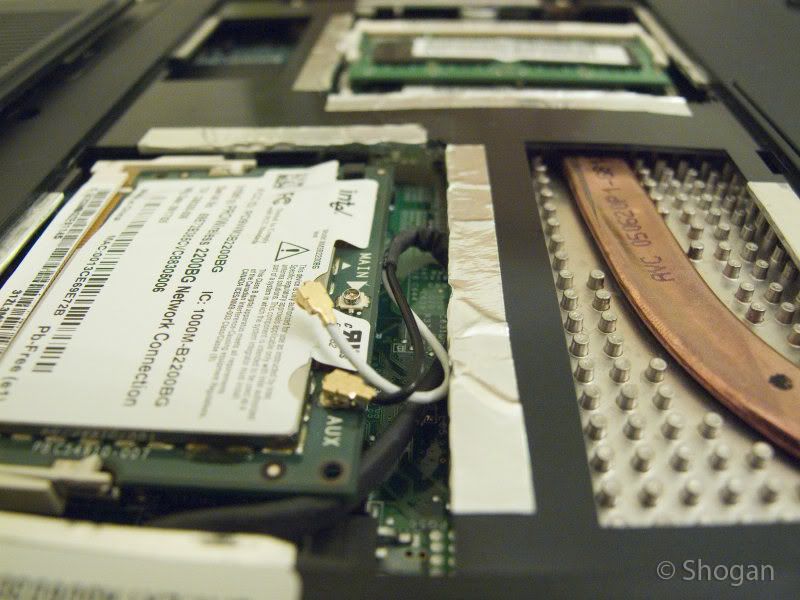
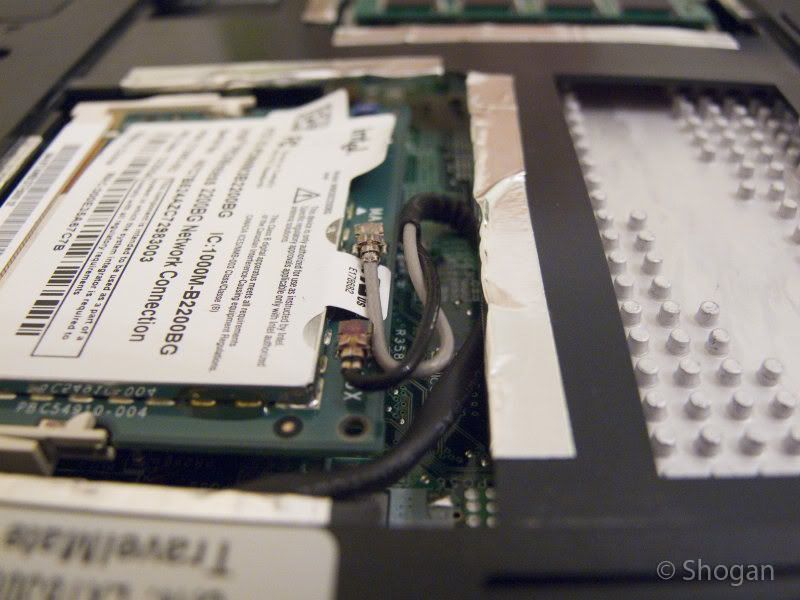
You will find that there should be two “pigtail” connectors attaching to your wifi card – these are labelled AUX and MAIN. (note down which colour wire attaches to which connector) – mine was black on AUX and White on MAIN. Disconnect these two pigtail connectors as these run through the notebook, up into the LCD to give you a better wireless signal.

5. Next we flip the laptop over again, and unscrew these two screws to remove the keyboard.
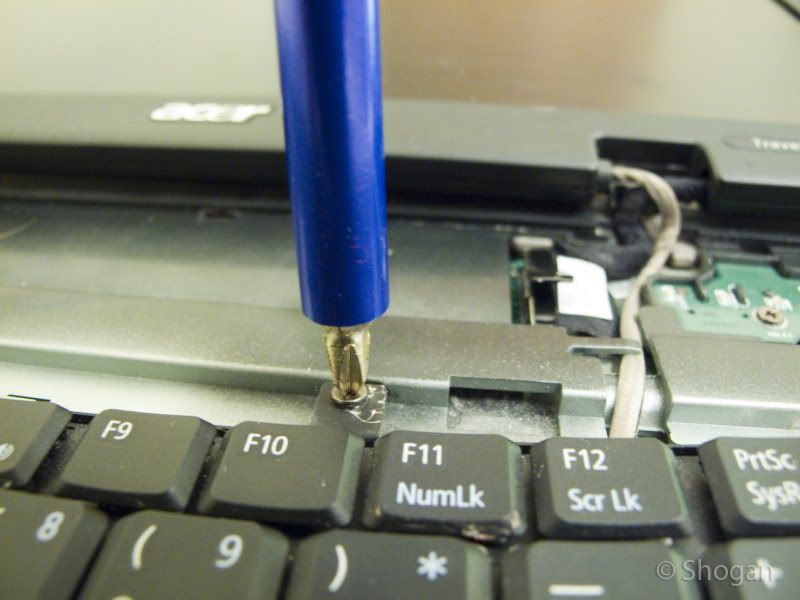
Lift the keyboard gently and notice the ribbon connector that attaches to the motherboard. Flick the black clip on this ribbon connector upwards and the ribbon connector can now be removed.
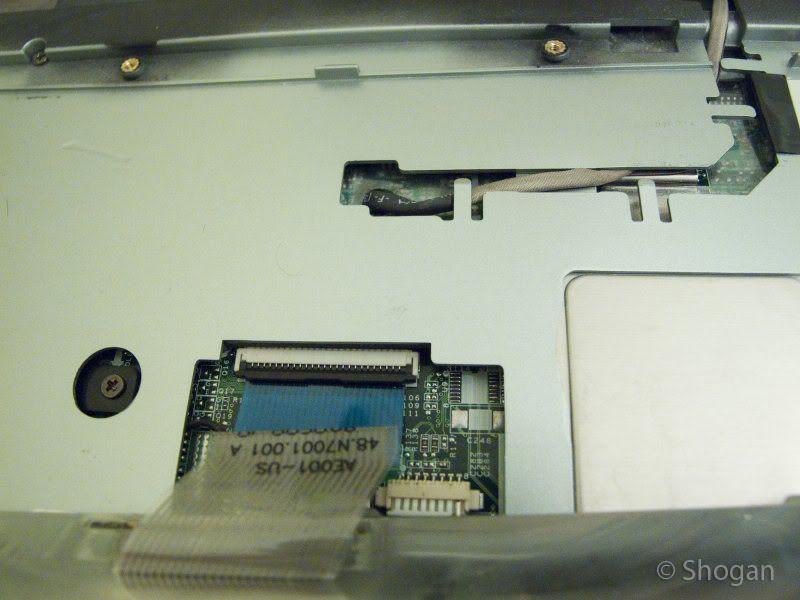
6. You can now tug carefully on the pigtail connector that runs under the keyboard and onto the wireless card (we have previously disconnected the pigtails). Pull this out until it is free from under the laptop. Be careful when it goes through the small hole on the motherboard.
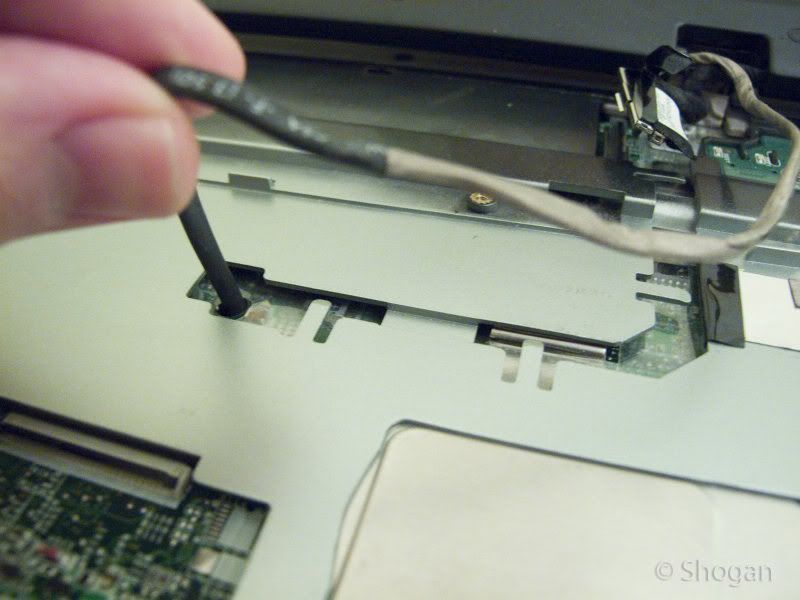
7. The main black coloured cable coming out from the LCD and connecting on to the motherboard is your main LCD connection. Carefully lift this off the motherboard, using the tag on the back of the connector to pull.
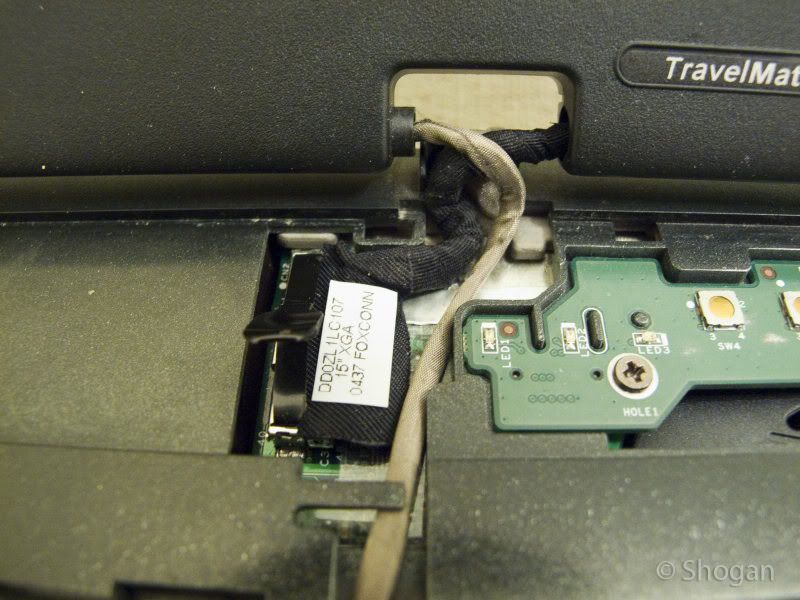
8. Once both the LCD cables are free we can now unscrew the main screws holding the LCD on to the laptop chassis. On these acers there are two on each side. PS. keep all your screws in a safe place so we can put everything back later!
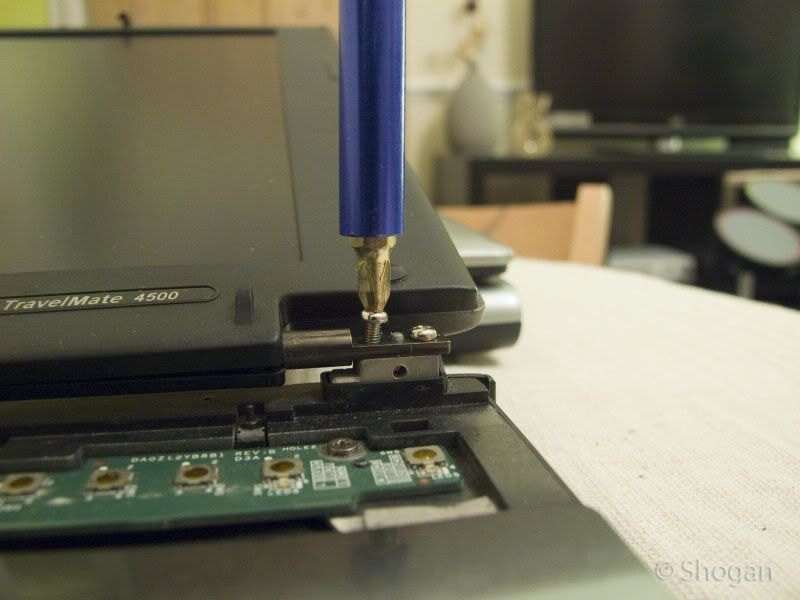
9. We should now have a separate laptop LCD disconnected from the main chassis.
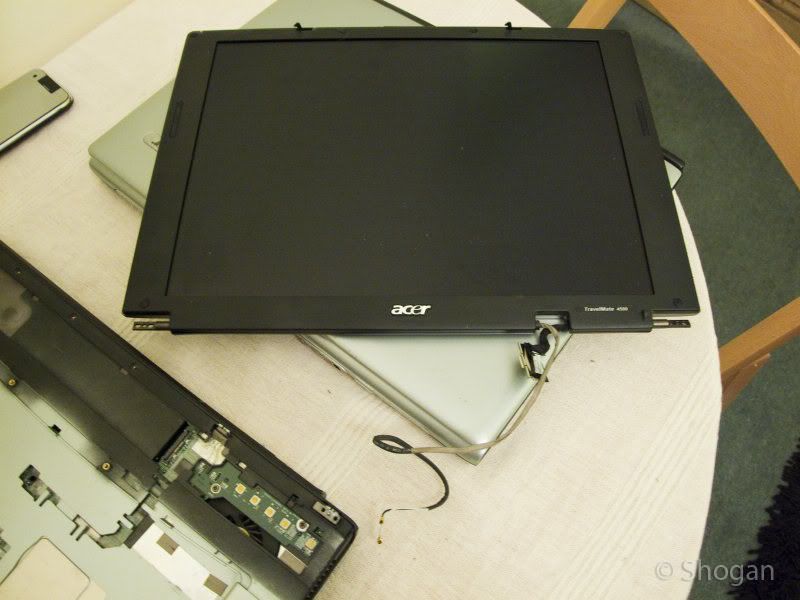
10. Do the same procedure as above but this time for the laptop that is going to receive the working LCD. Don’t get these muddled up now!

11. Once I had the working LCD off the other laptop, I hooked the main connector up to the receiving laptop with it lying down on the table to test. This was to ensure the new LCD was compatible and working as expected. See image below:
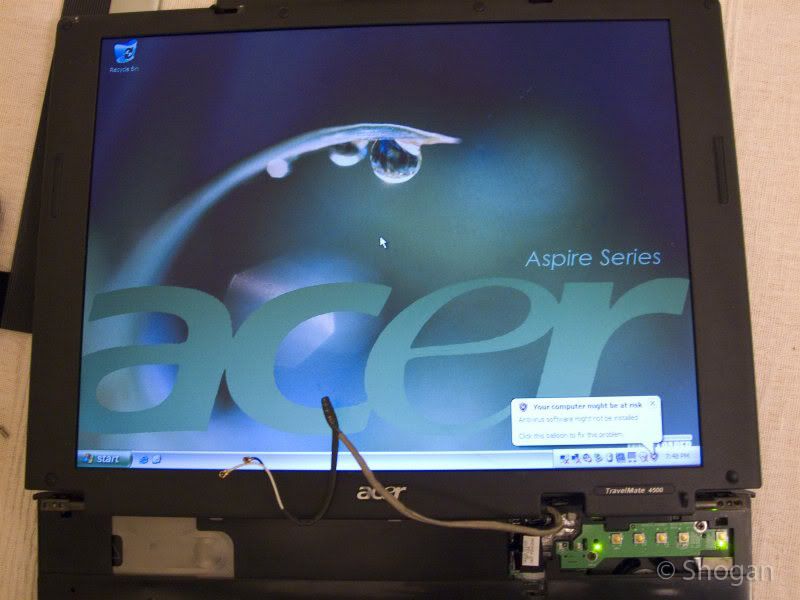
12. This was working so I shut the laptop down, removed the battery again and proceeded to remove the LCD from the top lid’s chassis to swap out. (I could have just moved the entire lid from one to the other laptop but the colour was slightly different and I was fussy)!

Start by removing the 4 x rubber pads from each corner of the LCD and unscrewing these 4 x screws.
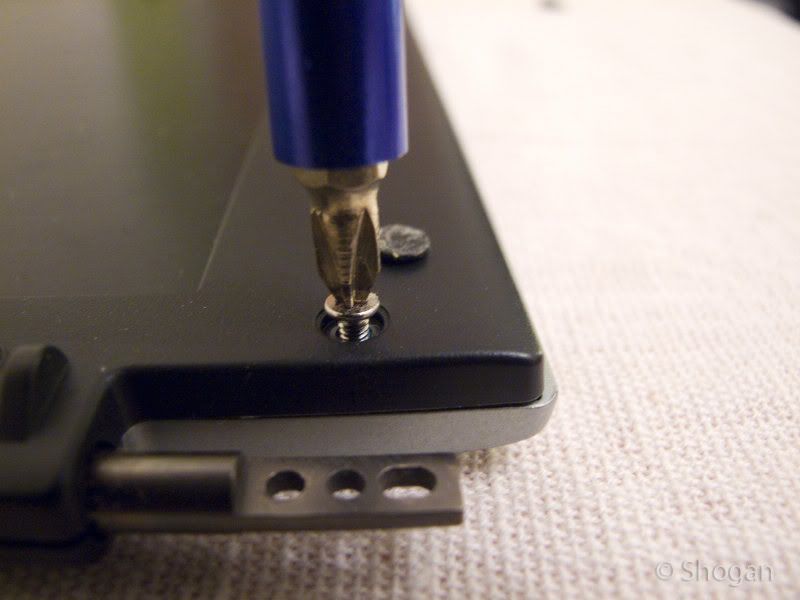
Once done, you can now carefully pry open the edge of the LCD lid as below:
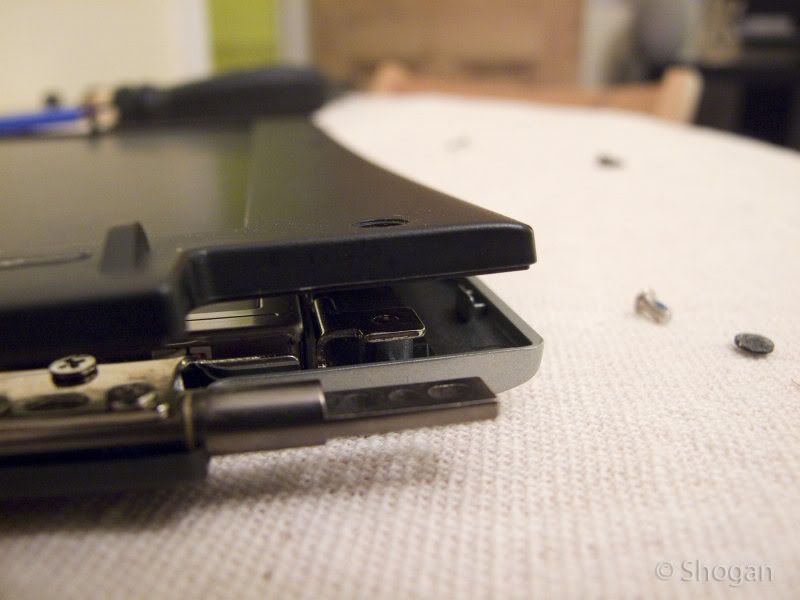
Once this has been carefully remove (The outer black frame of the lid), we can remove the screws inside the lid that hold the actual LCD panel in.
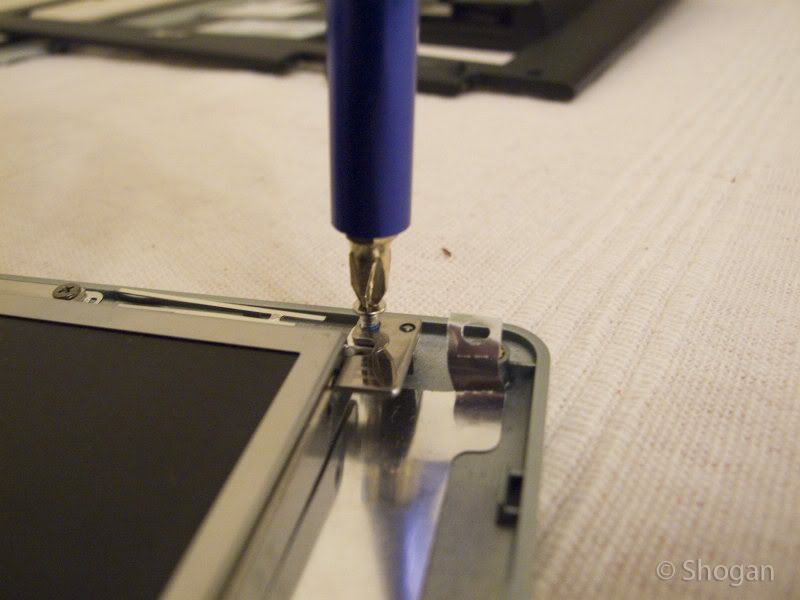
You also need to unplug the LCD controller panel’s plugs and unscrew a grounding wire.
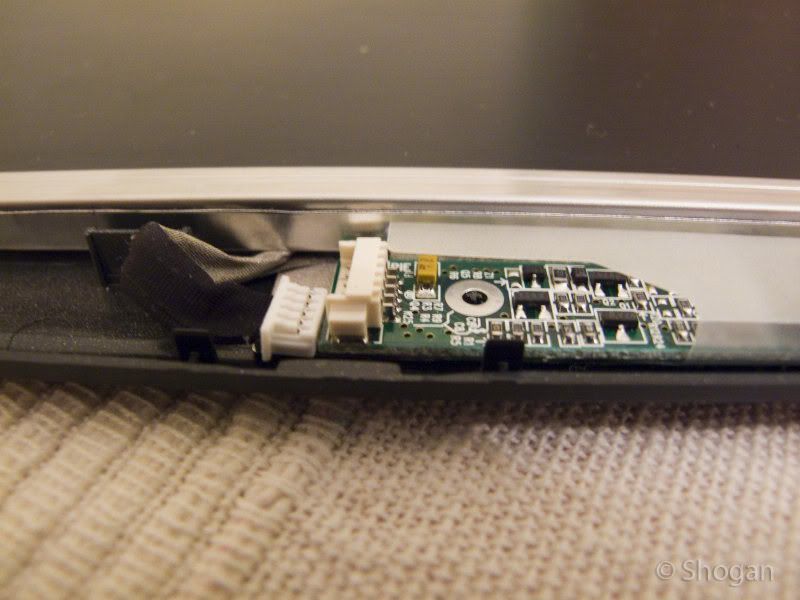
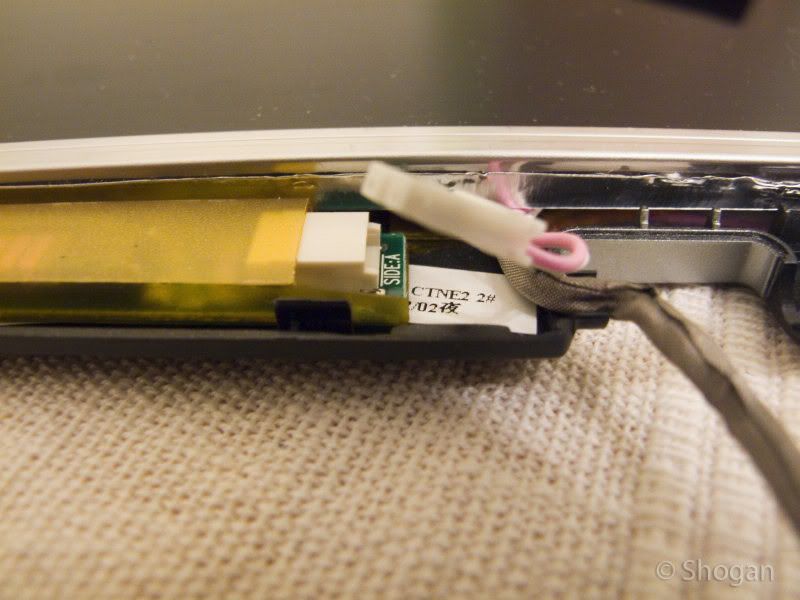
Do the same for the other LCD panel and remember which one is working and which doesn’t. Swap the working LCD over into the lid chassis you would like to use and screw everything back in. Make sure the cables are not getting pinched anywhere and run neatly out the bottom of the lid. Plug your two connectors back in to the LCD controller at the bottom of the lid and screw your grounding wire (black) back in (this is also next to the two cables at the bottom of the lid).

13. Re-assemble the lid and finally reconnect your LCD signal/power cable back to the laptop’s motherboard. Fasten the 4 x screws (2 x on each side) that hold the LCD Lid and panel to the laptop’s main chassis. Route the wireless pigtail wire back under the keyboard panel through the hole under the wireless card and reconnect the two pigtail connectors to the wireless card. Replace the back panel that covers the RAM and wireless card.
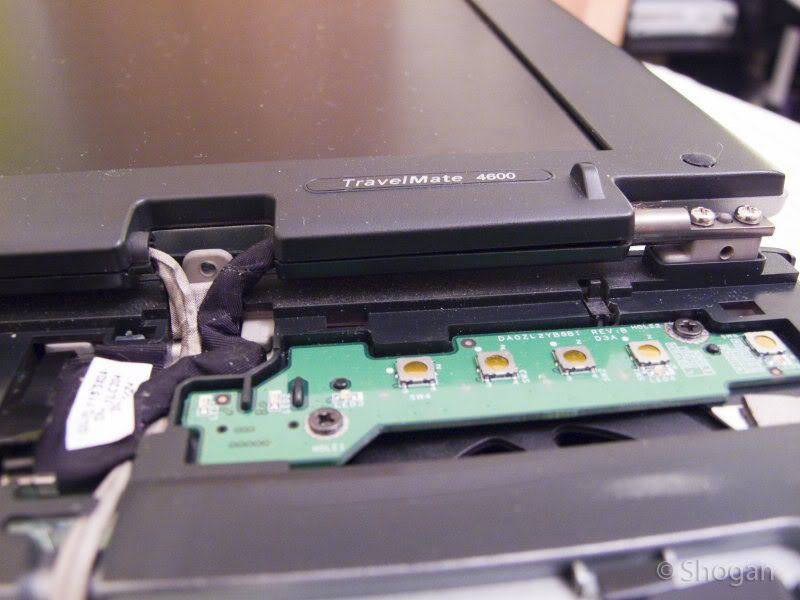
14. Place the keyboard ribbon connector back in and snap the black retainer clip over the ribbon to hold it in place. Screw the two screws back in to hold the keyboard down.

15. Replace the hinge panel over the LCD connector on the motherboard (you’ll need to fold the LCD all the back as far as it will go first). This panel is the same panel that has your power button on and is the same panel we removed earlier in step 3.

Replace the 3 x screws on the back hinges and ensure you haven’t missed any other screws anywhere and that everything looks good to go.

Replace your battery, lock the battery in and power up. You should hopefully now have a working LCD! Enjoy.
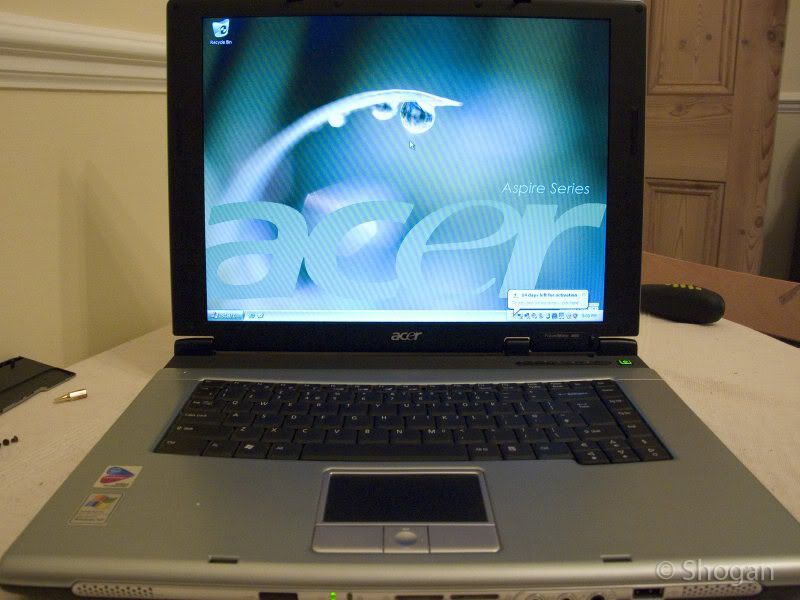
Hope this helps someone wanting to fix or replace their LCD panel in the future!