Saving £500 on a new Apple Mac Mini with 32GB RAM

mac mini internals

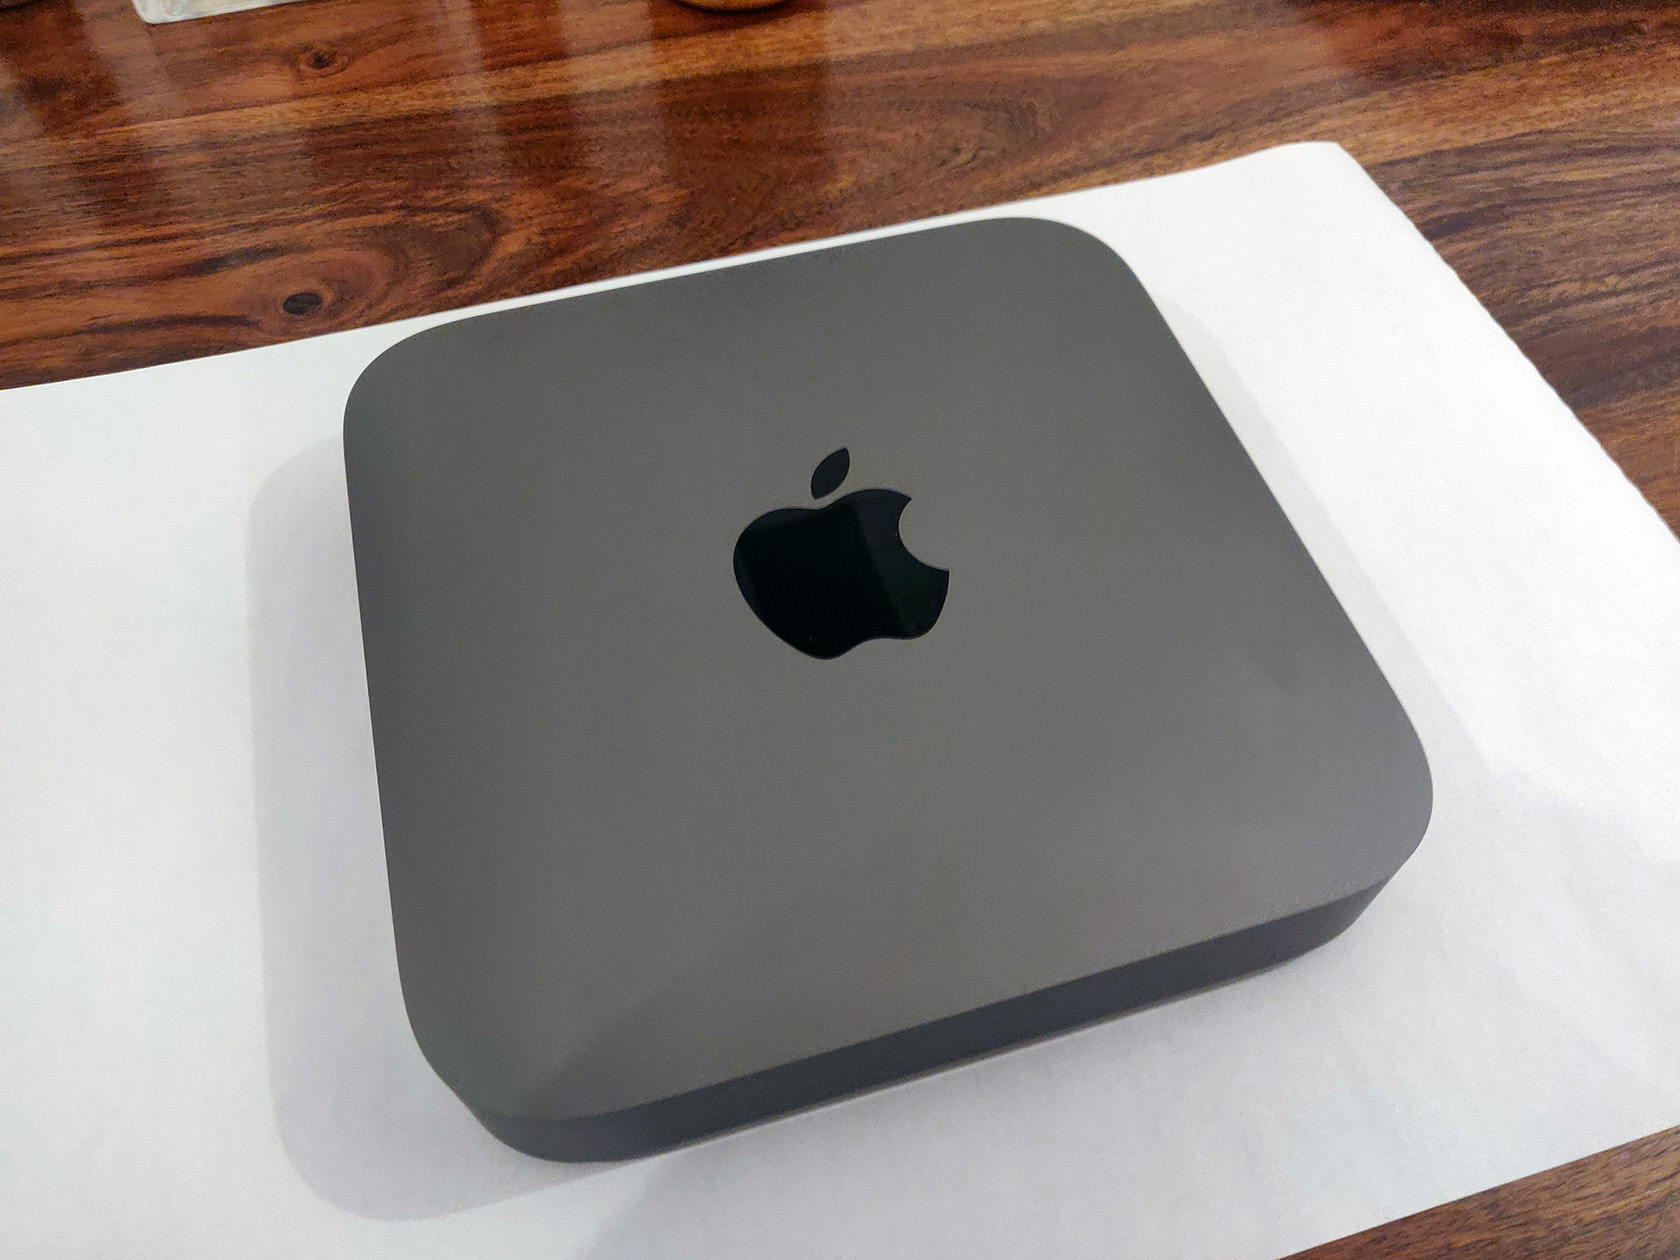
I purchased a new Apple Mac Mini recently and didn’t want to fall victim to Apple’s “RAM Tax”.

I used Apple’s site to configure a Mac Mini with a quad core processor, 32GB RAM, and a 512GB SSD.

I was shocked to see they added £600.00 to the price of a base model with 8GB RAM. They’re effectively charging all of this money for 24GB of extra RAM. This memory is nothing special, it’s pretty standard 2666MHz DDR4 SODIMM modules. The same stuff that is used in generic laptops.

I decided to cut back my order to the base model with 8GB of RAM. I ordered a Crucial 32GB Kit (2 x 16GB DDR4-2666 SODIMM modules running at 1.2 volts with a CAS latency of 19ns). This kit cost me just over £100.00 online.

The Crucial 2 x 16GB DDR4-2666 SODIMM kit

In total I saved around £500.00 for the trouble of about 30 minutes of work to open up the Mac Mini and replace the RAM modules myself.

The Teardown Process

Use the iFixit Guide

You can use my photos and brief explanations below if you would like to follow the steps I took to replace the RAM, but honestly, you’re better off following iFixit’s excellent guide here.

Follow along Here

If you want to compare or follow along in my format, then read on…

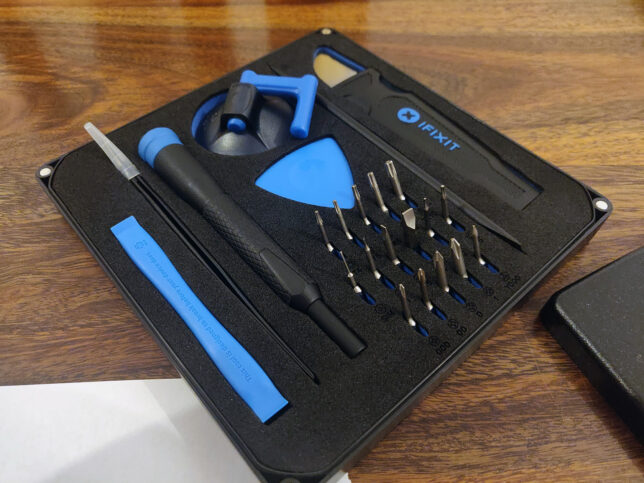
Get a good tool kit with hex screw drivers. I used iFixit’s basic kit.

iFixit basic tool kit

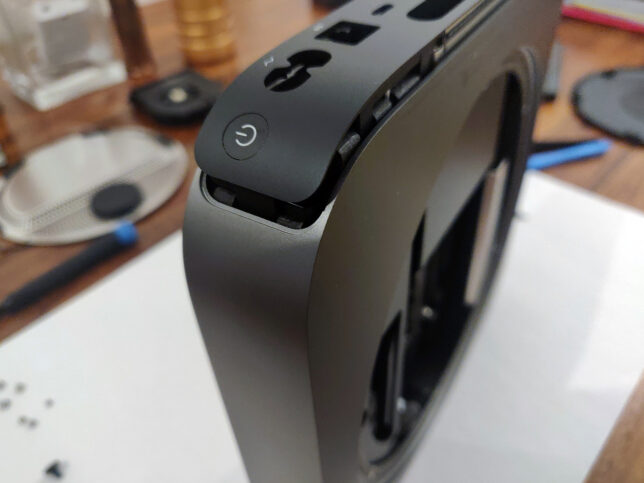
Flip the Mac Mini upside down.

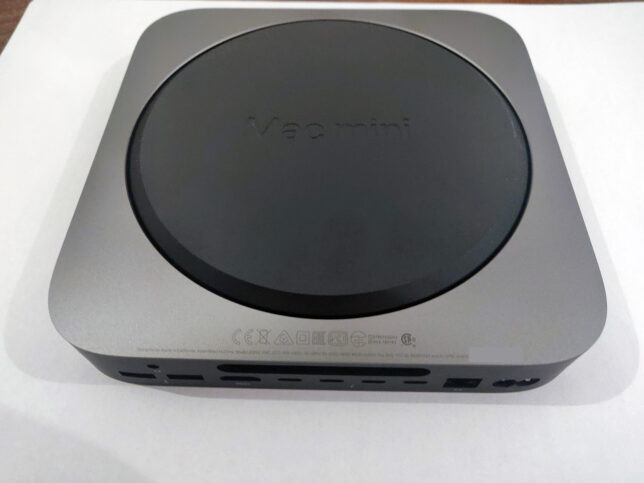
Pry open the back cover, carefully with a plastic prying tool

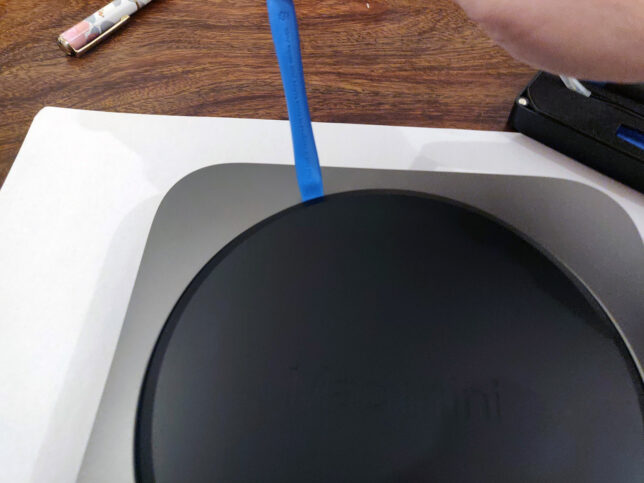
Undo the 6 x hex screws on the metal plate under the black plastic cover. Be careful to remember the positions of these, as there are 2 x different types. 3 x short screws, and 3 x longer.

opening the mac mini

Very carefully, move the cover to the side, revealing the WiFi antenna connector. Unscrew the small hex screw holding the metal tab on the cable. Use a plastic levering tool to carefully pop the antenna connector off.

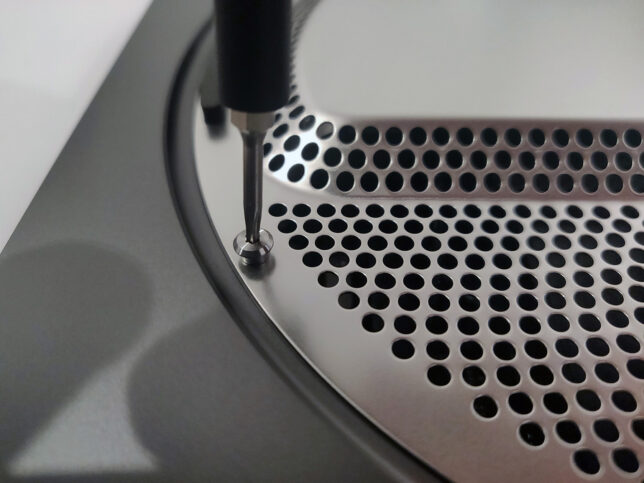
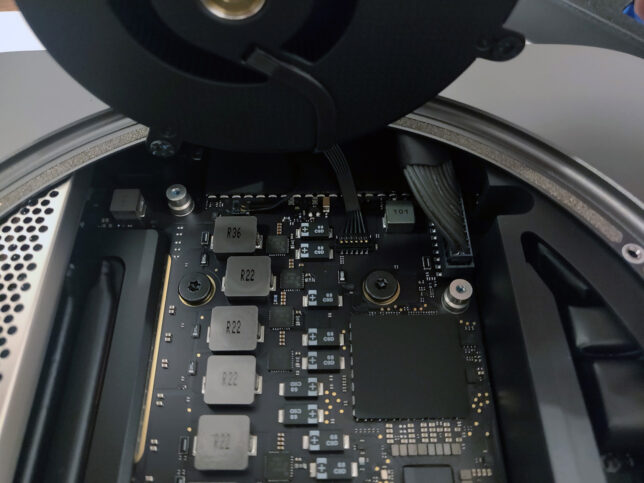
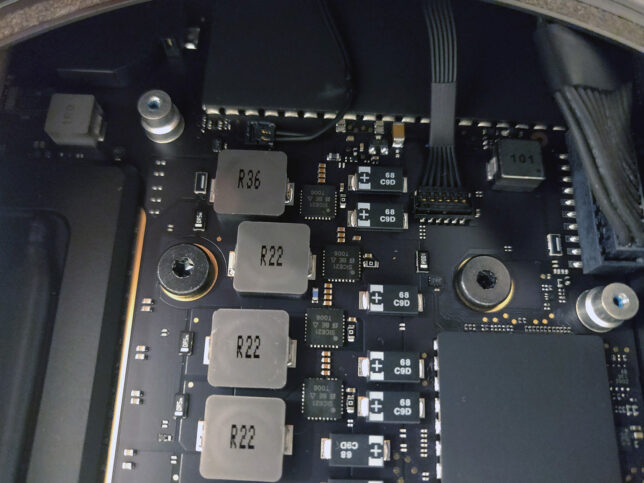
Next, unscrew 4 x screws that hold the blower fan to the exhaust port. You can see one of the screws in the photo below. Two of the screws are angled at a 45 degree orientation, so carefully undo those, and use tweezers to catch them as they come out.

Carefully lift the blower fan up, and disconnect it’s cable using a plastic pick or prying tool. The trick is to lift from underneat the back of the cable’s connector and it’ll pop off.

mac mini blower fan removal

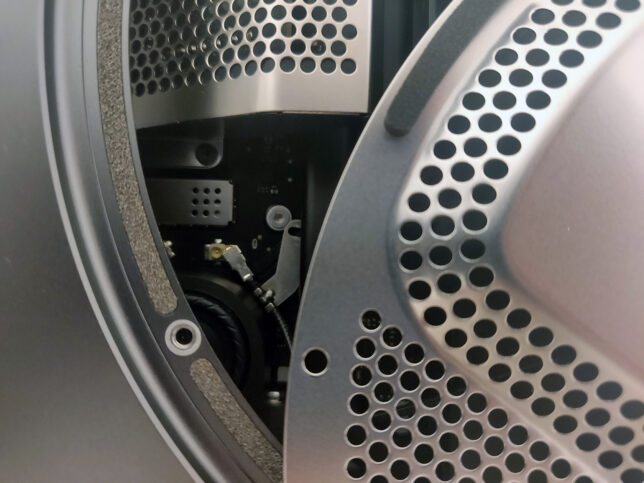
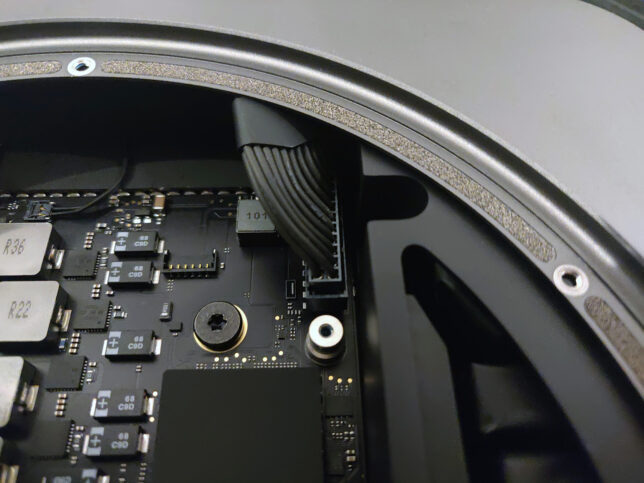
Next, disconnect the main power cable at the top right of the photo below. This requires a little bit of wiggling to loosen and lift it as evenly as possible.

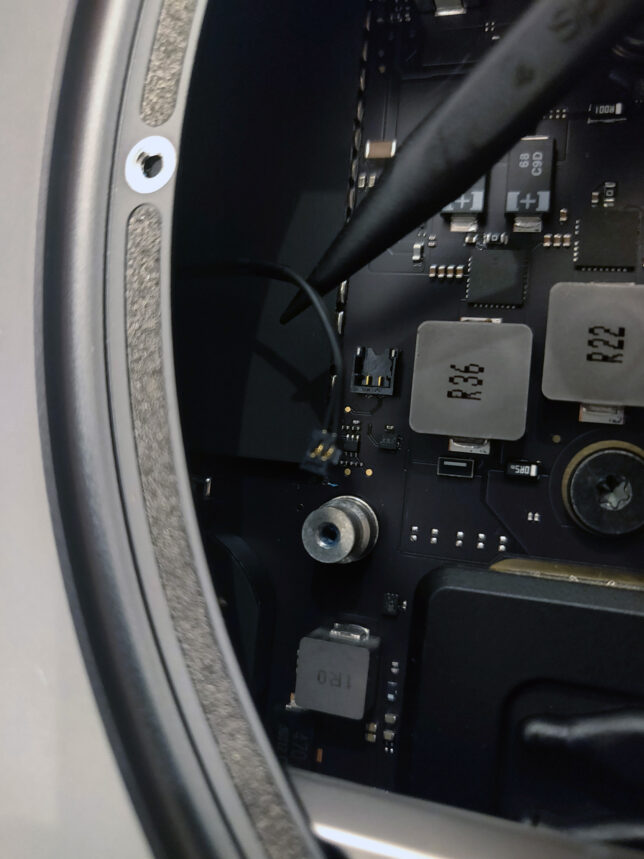
Now disconnect the LED cable (two pin). It’s very delicate, so do this as carefully as possible.

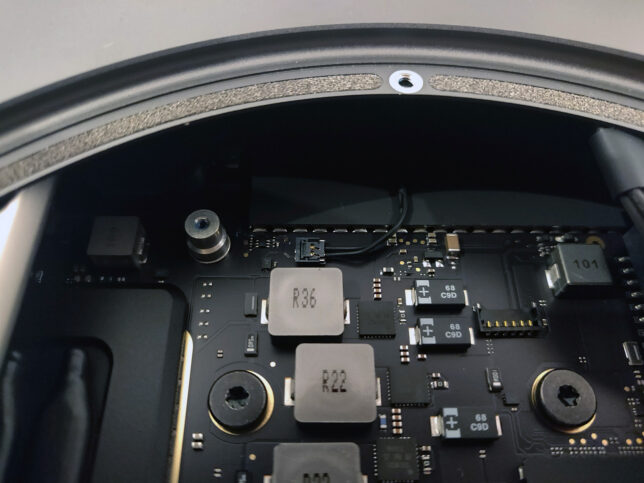
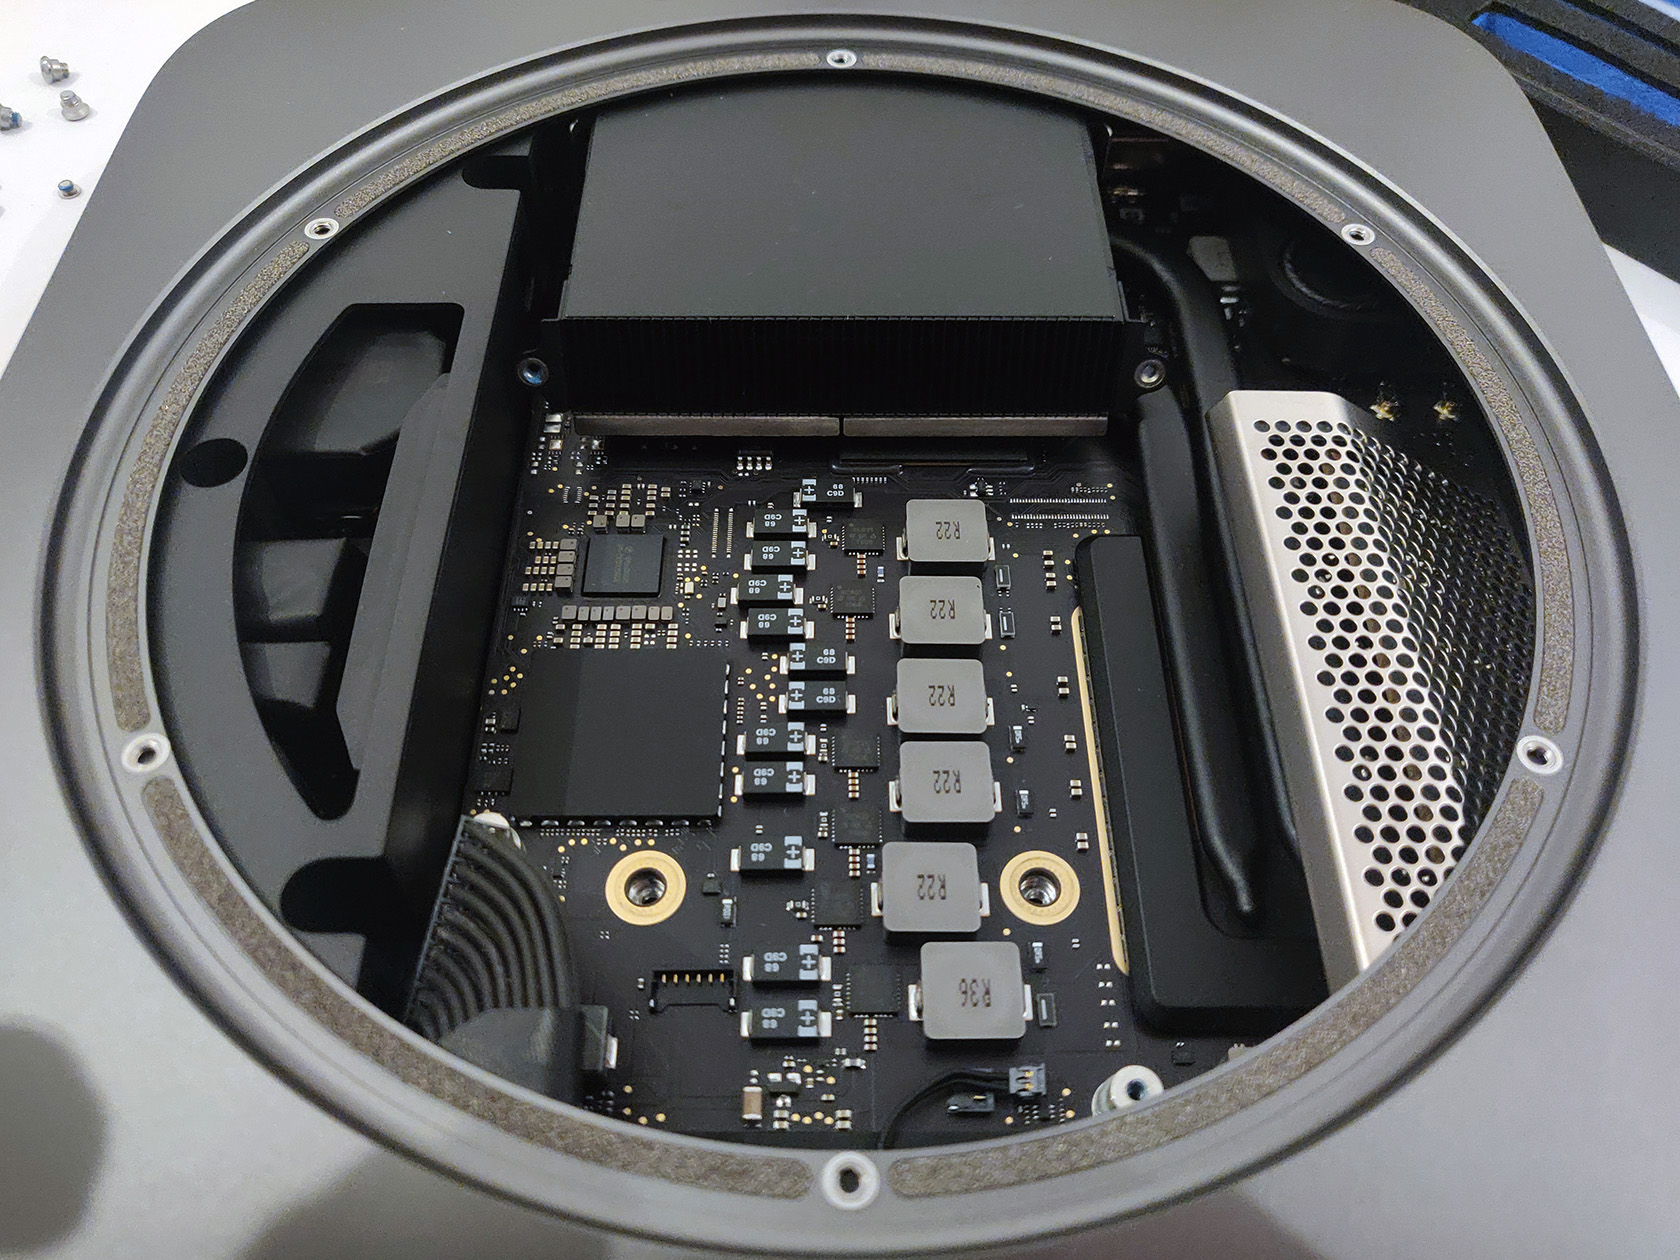
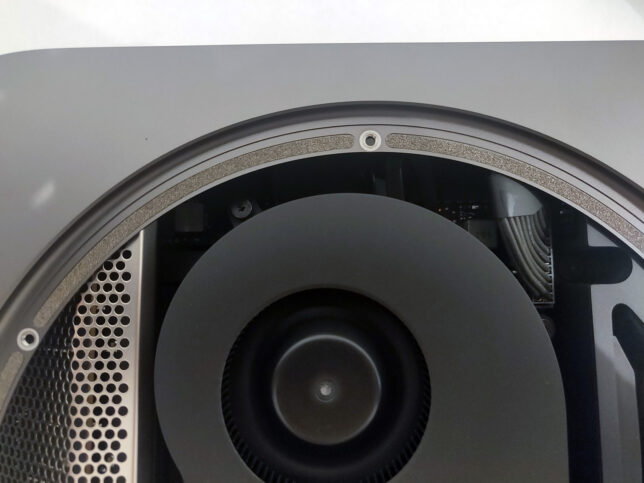
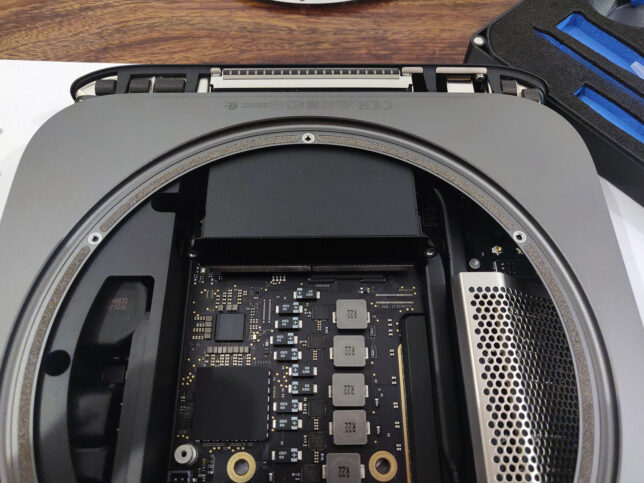
There are two main hex screws to remove from the motherboard central area now. You can see them removed below near the middle (where the brass/gold coloured rings are).

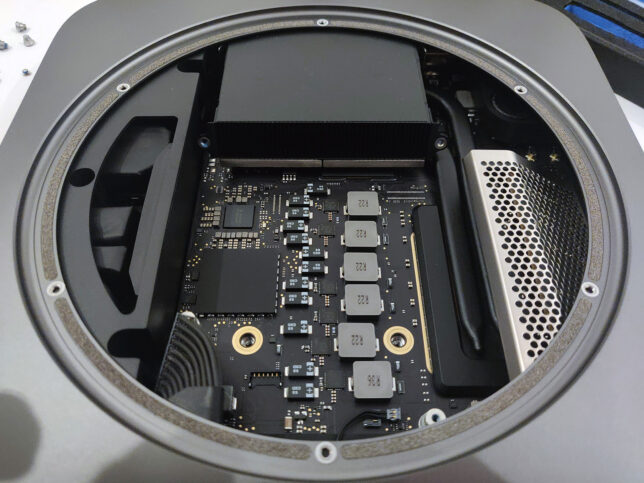
With everything disconnected, carefully push the inner motherboard and it’s tray out, using your thumbs on the fan’s exhaust port. You should ideally position your thumbs on the screw hole areas of the fan exhaust port. It’ll pop out, then just very carefully push it all the way out.

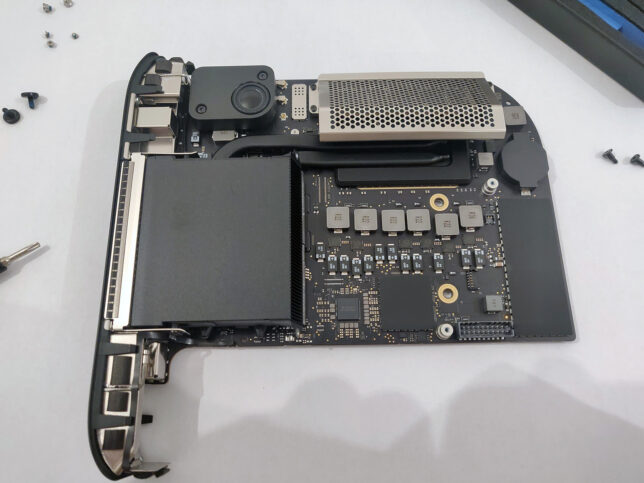
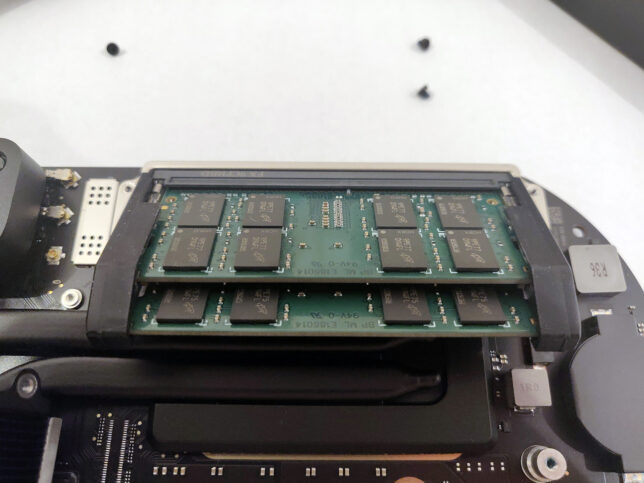
The RAM area is protected by a metal ‘cage’. Unscrew it’s 4 x hex screws and slowly lift the cage off the RAM retainer clips.

Carefully push the RAM module retainer clips to the side (they have a rubber grommet type covering over them), and the existing SODIMM modules will pop loose.

mac mini SODIMM RAM modules and slots

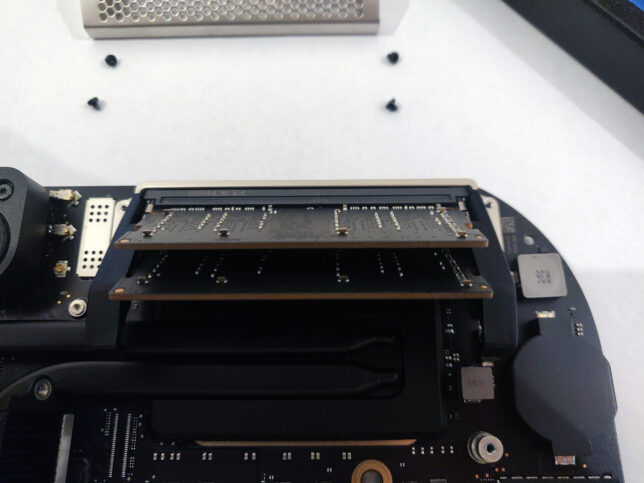
Remove the old modules and replace with your new ones. Make sure you align the modules in the correct orientation. The slots are keyed, so pay attention to that. Push them down toward the board once aligned and the retainer clips will snap shut and lock them in place.

Replace the RAM ‘cage’ with it’s 4 x hex screws.

Reverse the steps you took above to insert the motherboard tray back into the chassis and re-attach all the cables and connectors in the correct order.

Make sure you didn’t miss any screws or cables when reconnecting everything.

Finally boot up and enjoy your cheap RAM upgrade.

Corsair XMS3 RAM compatible with HP Microserver N40L

Just a quick post today on RAM compatibility with the good old trusty home lab server, the HP Proliant N40L Microserver. I am currently using Microservers for my home vSphere 5 lab, running ESXi 5.0 update 1.


I had 8GB of Corsair XMS3 PC3-12800 C9 (1600MHz) RAM lying around at home and wanted to put it back to good use. It does not have ECC, but I tried it out in my Microserver and it works! Despite being a higher voltage rated RAM kit (1.65v odd), it works with the Microserver’s 1.5 rated DIMM slots just fine. No need to buy an extra 8GB RAM kit with my second Microserver now.


Powershell – Check Free Memory script


Here’s a quick script I did using Powershell to check your free memory and report back the amount in MB and GB.


$freemem = Get-WmiObject -Class Win32_OperatingSystem

# Display free memory on PC/Server
"---------FREE MEMORY CHECK----------"
""
"System Name     : {0}" -f $freemem.csname
"Free Memory (MB): {0}" -f ([math]::round($freemem.FreePhysicalMemory / 1024, 2))
"Free Memory (GB): {0}" -f ([math]::round(($freemem.FreePhysicalMemory / 1024 / 1024), 2))
""
"------------------------------------"

Download the script here


The figure is determined and held in the $freemem variable. After that we simply output two lines to show the amount in MB and GB. We use a simple function to divide the figure by 1024 and round it off, displaying the result with two decimal places. The figure needs to be divided by 1024 as the variable holds the amount in Kilobytes (KB), therefore to determine Megabytes (MB), we divide by 1024. The second figure for GB requires one more division.


E8400 Gaming rig build

This is an old post from my other site. I thought as it was IT relevant I would clone the small write up I did across to this blog…

I recently bought myself a new rig, consisting of a Coolermaster CM-690 and the following hardware:

Asus P5Q P45 Pro motherboard
Intel E8400 overclocked to 3.6GHz 24/7
OCZ 2GB ATI Heatspreader RAM DDR800 4-4-4-12
Sapphire ATI HD 4870 512MB GDDR5 Graphics card
OCZ GameXstream 600w Power supply
Western Digital 750GB SATAII Hard drive
Logitech G15 Keyboard (orange backlight model)
Logitech MX518 (5 year old mouse that has travelled the world with me!)

For display I chose a 24″ Dell LCD with a native resolution of 1920×1200 and 6ms response time.

My ultimate goal was to build a faster, cooler and quieter PC than the previous one I had in S.A.

Right, so in my last rig I had the pre-built CM-690 L-shaped window panel. This came with the chassis when I bought it, so I was pretty lazy and didn’t change anything. I also had a Coolermaster Aquagate watercooling unit that fitted in 2 x optical drive bays, which had the pump, radiator and everything incorporated, cooling my E8200 on the old rig. Temperatures were not much better than the Zalman 9700LED that I used to have on it and it was quite messy. I also didn’t enjoy the tiny tubing that this unit used, hence my custom kit choice with 1/2″ diameter tubing for this project. I had never built myself a custom watercooling system, so this will be my first. It will also be the first batch of modding I have done in about 10 years! (The last mod I did was on an AMD K6-2 333MHz in an AT case many, many years ago)! That is barring some odd LED, and minor case mods here and there.

Anyway, here is an image of the final product (Case cut, window installed, hardware assembled and modded to fit the watercooling gear. Cables neatened and basically everything finished, barring the watercooling of the graphics card.

final-1

night-shot

I cut a rough pattern out of the top with my jigsaw, this is where the radiator is to be fit:

case-cut

I cabled-sleeved most of the loose / visible wiring throughout the chassis:

cable-sleeving

Next to be cut was the side panel – Masked off the area to be cut, and used the jigsaw once again:

perspex

This is the box of goodies (watercooling hardware) I ordered from Specialtech:

goodies

The waterblock for cooling the CPU:

cpu-block

Shortly after finishing the water components, and tubing, I started the system up for leak testing…

test-run

A few weeks later the graphics card was ready to be added to the watercooling system. This is a Sapphire ATI HD 4870 512MB (GDDR4) card. I had to remove the stock air cooler, and re-apply some new thermal compound. I used Zalman STG-1 thermal paste for this.

4870-air

Here the card is naked, with the old thermal compound applied to the GPU. The card still needed to be cleaned with some pure alcohol to remove the old thermal paste.

4870-naked

Everything installed, Feser one non-conductive cooling fluid in the loop with the system up and running :

final-2

A small update on this build.

Since the original work was finished, I have now upgraded the RAM. I added another 2GB OCZ RAM to give a total of 4GB. I also pushed my original overclock a bit further, and now run the FSB at 445MHz with a CPU multiplier of 9x giving me a total of 4.0GHz on the E8400. The RAM is running a multiplier of 2x overclocking the four modules to 890MHz each, with timings of 4-4-4-12. My Vcore setting for the processor is on around about 1.375 volts, and my RAM is sitting at 2.2 volts which is what I consider a safe 24/7 setting for RAM modules cooled by passive heatsinks. The FSB is set to 1.16 volts for the increase FSB speed to hold stable. I also flashed the 4870’s bios with a custom image, that sets the card’s default core speed to 795mhz (from a default of 750mhz) and the memory to 1100mhz (from a default of 900mhz). I then use Catalyst Control Centre to up the core speed to a further 830mhz for gaming. The PC now runs at these speeds 24/7 and has no stability issues.