In the mid 1990s at the age of 10 or 11 our family computer got an upgrade. Retaining it’s old beige ATX chassis, the internals were upgraded from a 486 DX2-66, to a Pentium 166 MMX. Quite the jump in processing power!
Unfortunately (for me) my parents were not keen on upgrading DOS and Windows 3.1 to the newly available Windows 98. My uncle, the seasoned computer expert, had convinced my parents that Windows 95 was evil and we wait for the bugs and other issues to be sorted out first. Not a bad software strategy in hindsight though.
DOS gaming on the Pentium
For the first couple of years I had to make do with DOS gaming, even with the ‘unlimted power’ the Pentium 166mhz processor could offer.
Windows 95 and DirectX had finally given a good, common API for game developers to use for game development. Gamers everwhere were starting to reap the rewards of this movement. Unfortunately I would have to wait until our machine got Windows 95.
For the time being games such as Duke Nukem 3D, Quake, and Carmageddon (all DOS compatible at the time) would have to do. Looking back I was quite young to be playing those games, but I knew it was all fantasy and they didn’t negatively affect me.
Windows 95 Upgrade
After a number of years, the system received the long awaited Windows 95 upgrade. Some of the first Windows 95 games I remember being able to play (and binging on) were:
Diablo
StarCraft (yes it was already 1998 by this point!)
POD: Planet of Death (first game to leverage the MMX instruction set as I recall)
Reliving the Pentium Days
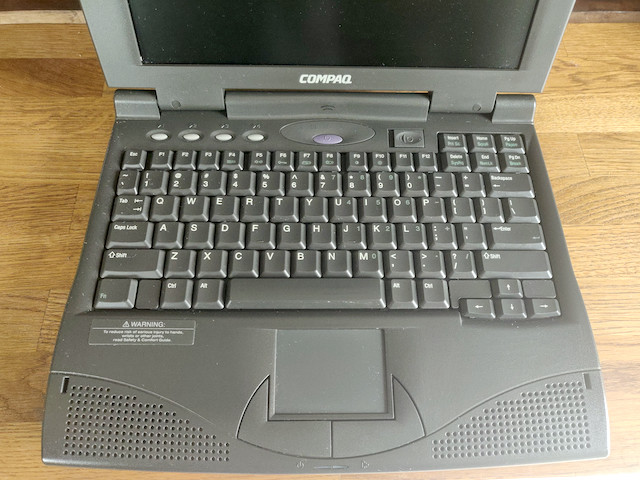
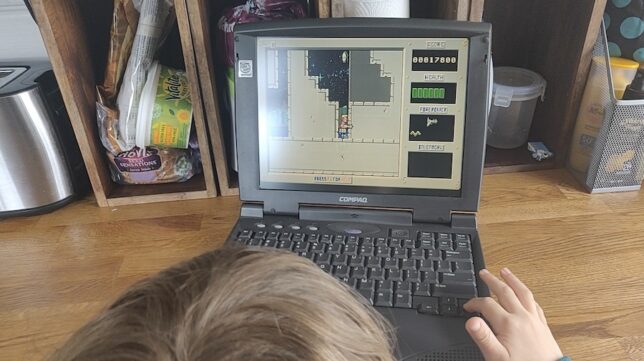
In a moment of nostalgia, I recently picked up an old retro Pentium Compaq Armada 1592DT laptop. With Windows 98 installed, I’ve been enjoying some memories from the mid to late 1990s.
I’ve now got a bunch of DOS and early Windows games installed, including:
Turbo Pascal 7 (reliving my early teens programming memories)
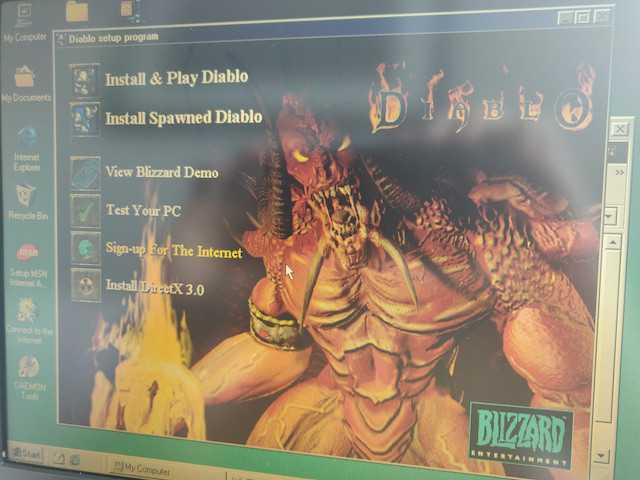
Diablo. I own the boxed orginal, and loved this game. It runs great on this system.
DOOM
Duke Nukem 3D, and a bunch of old Apogee shareware games, like Terminal Velocity, Wacky Wheels, ROTT, Raptor, etc…
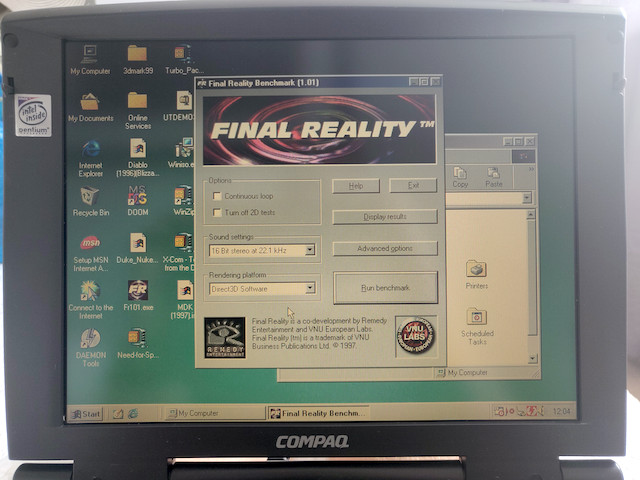
Final Reality benchmark – unfortunately this is too ‘new’ for the machine, and can only render in Direct3D Software Mode at a few frames per second.
Diablo’s Installer – DirectX 3.0. Wow. This must have been one of the first games on Windows 95.
Even my son has shown interest in this aging system. He saw me testing some of the games out, and immediately took to playing Duke Nukem (1).
I’ve found myself getting this system out on quiet evenings to play the odd game here and there, and even tried my hand at writing some Pascal on it.
It may be clunky and extremely slow by today’s standards, but there is something magical about reliving parts of your childhood like this.
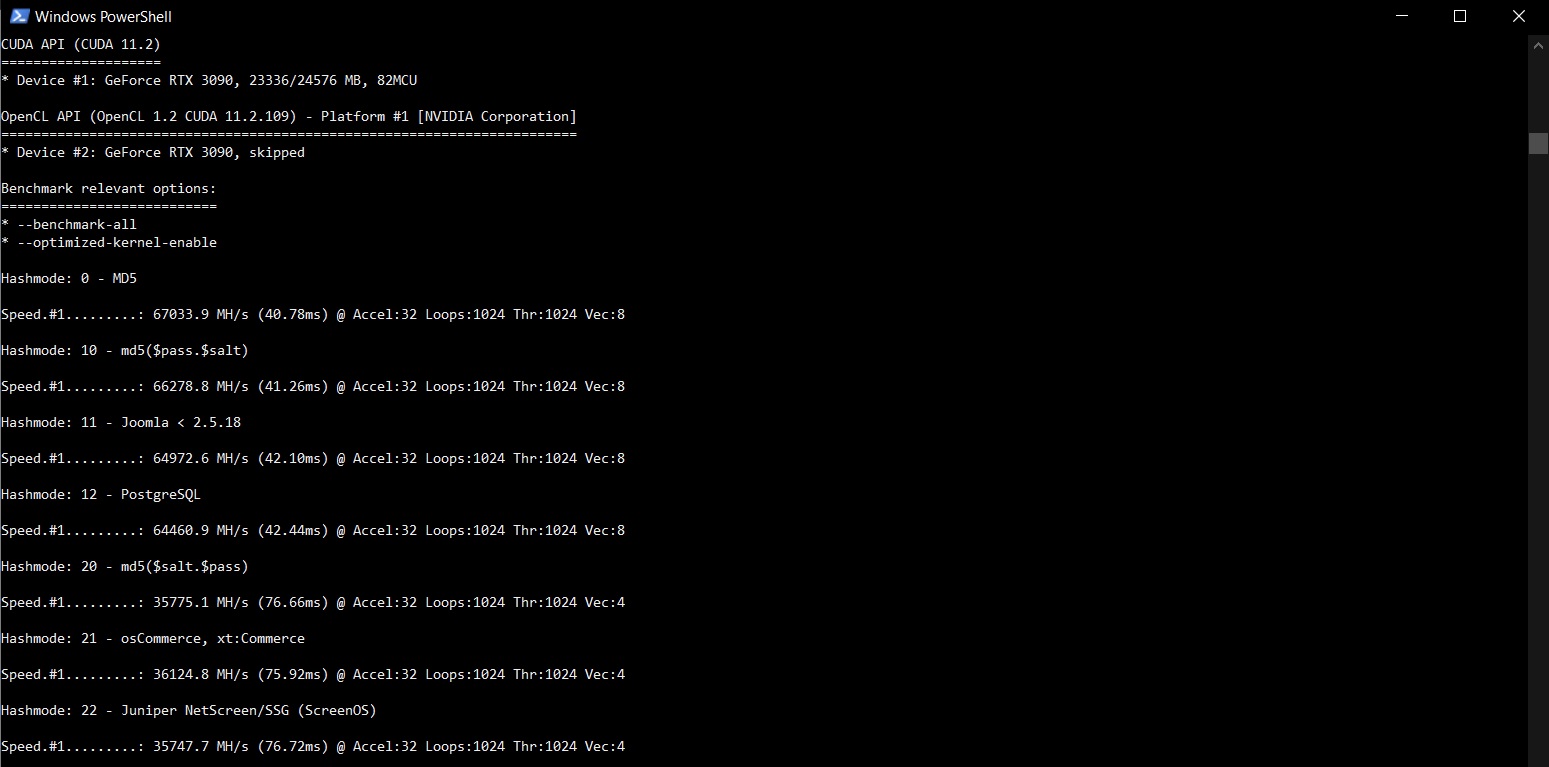
I picked up an nVidia RTX 3090 toward the end of last year. In hindsight, I was lucky to have purchased it early on soon after release. The GPU shortage has caused a massive spike in prices and this card is now worth double what I originally paid for it! Anyway, acquisition story aside, I was curious how it would perform in a Hashcat benchmark (all) run. Here are my Hashcat RTX 3090 benchmark results.
For a quick and easy run I’m using the hashcat 6.2.2 (Windows) binary.
.\hashcat.exe -b --benchmark-all
The performance seems on-par if not slightly higher than some other RTX 3090 benchmarks I have seen around. An impressive set of results.
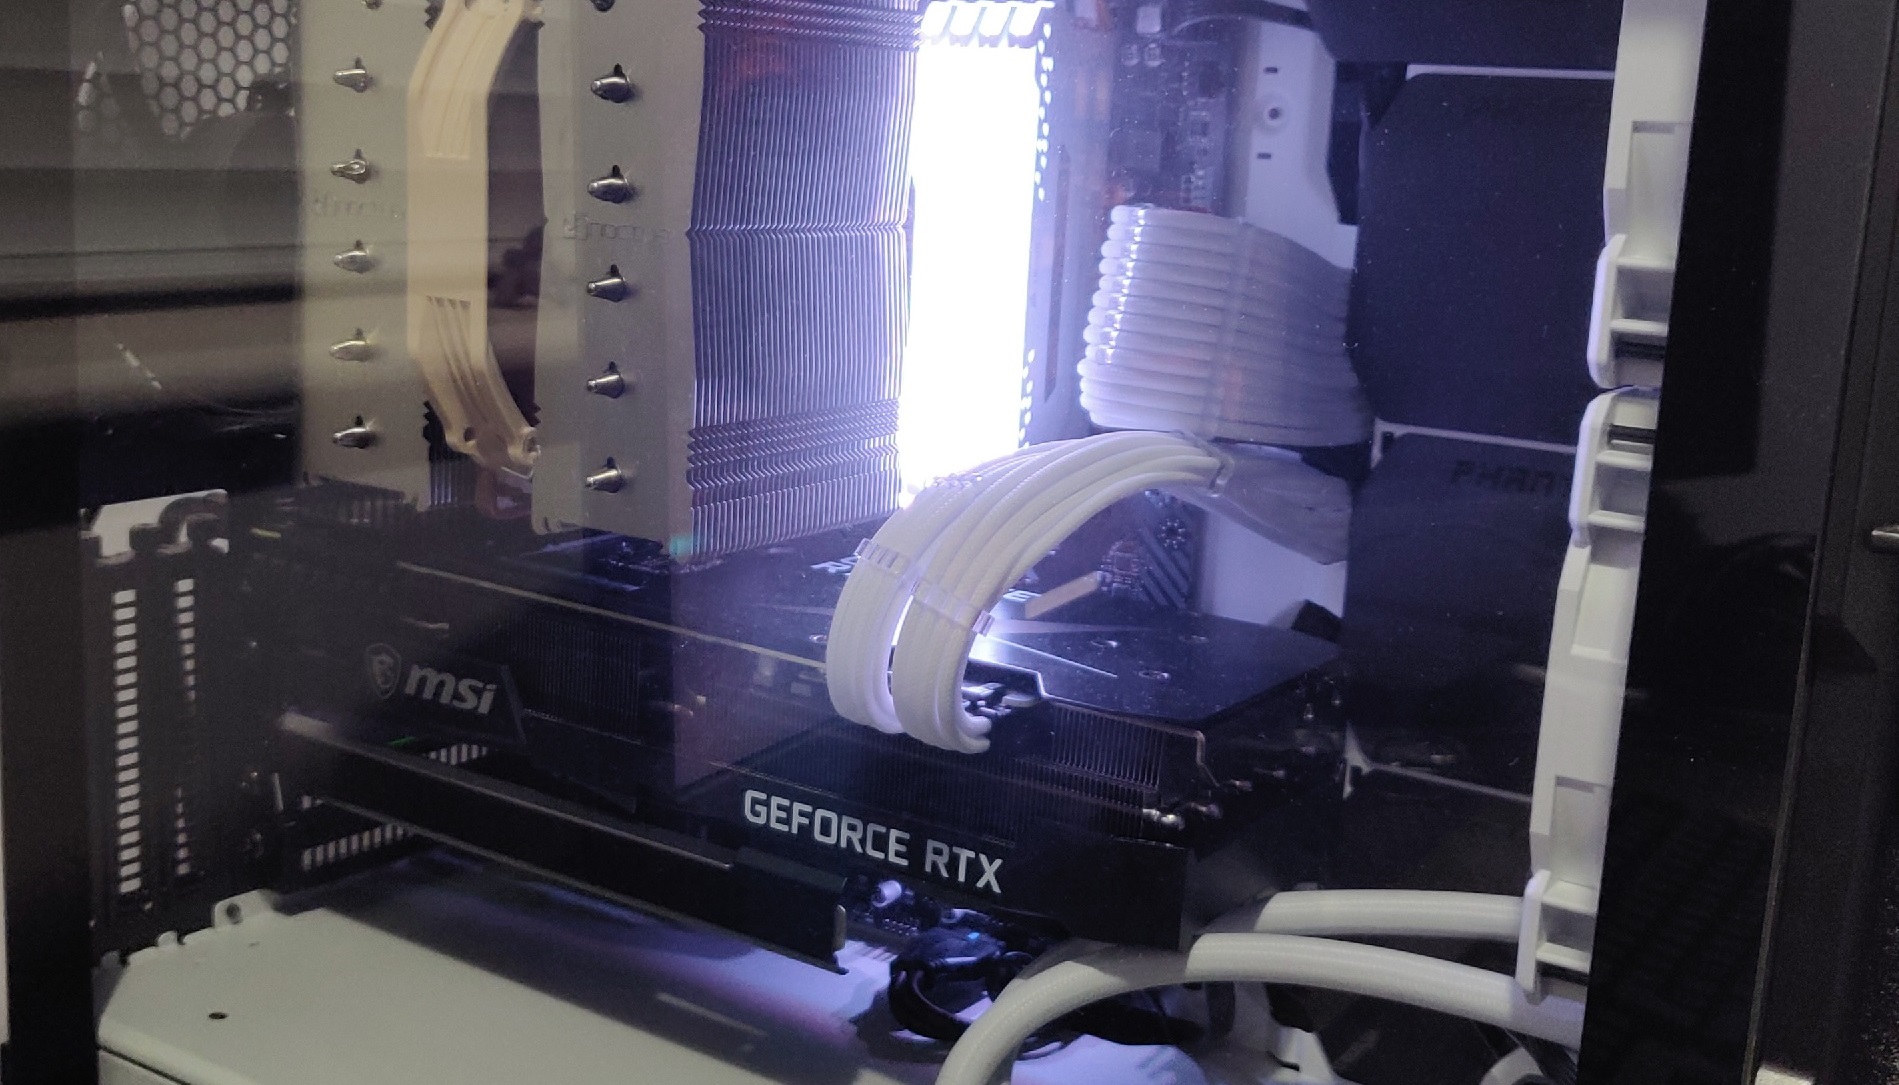
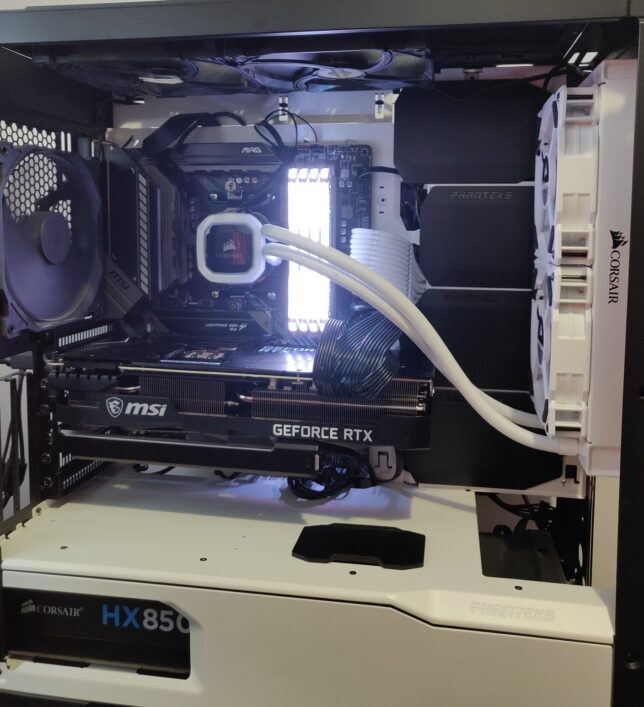
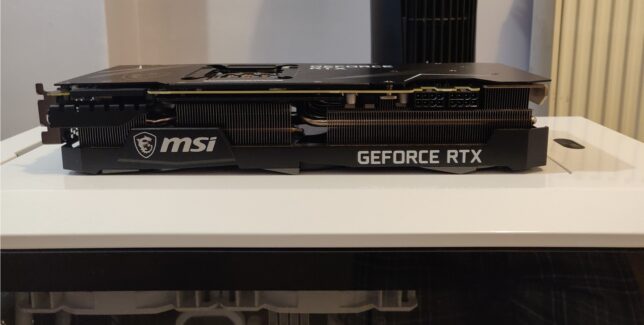
I am running the MSI GeForce RTX 3090 Ventus 3X OC 24GB model card. I upgraded from a GeForce 1080 Ti (12GB) model and the hashing speeds are way faster. The 3090 is a power hungry beast though. It gets hot and the fans are noisier than my 1080 Ti’s were. To ensure my system’s power delivery was up to the task, I also upgraded to a Seasonic Focus PX-850 850W 80+ Platinum at the same time.
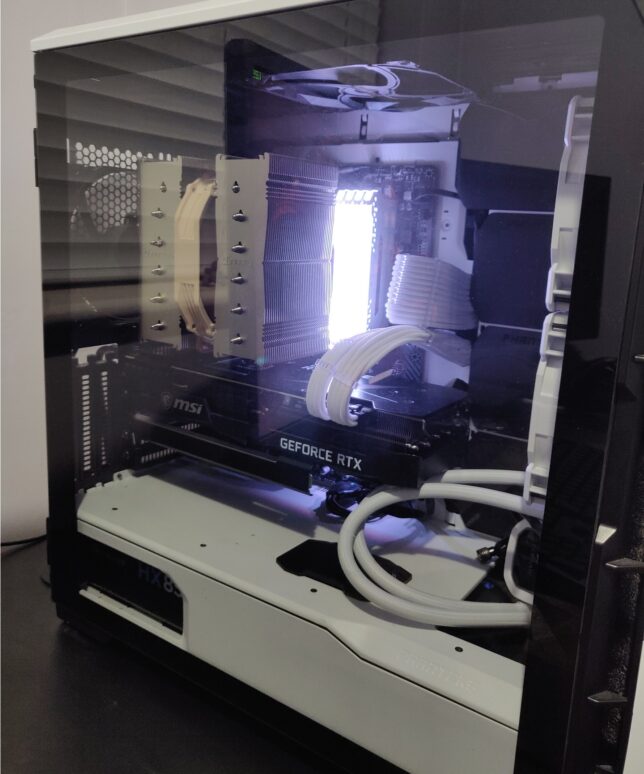
As for the PC build around the RTX 3090, here are a few photos…
You might notice an AIO installed, but not connected – I was in the process of testing a dual 240mm radiator (AIO) versus a high performing Noctua air cooler, so had left it in the chassis during transition.
I’ll see if I can run the same benchmark suite on my uBuntu install and update the results here. I have not tested the RTX 3090 card under this OS yet so I’m not sure if I’ll run into any driver issues or not.
Funny story of how I ended up with an RTX 3090 (it is a bit overkill!)…
Back in September or October of 2020 (I forget when the 3xxx series launch was), I had pre-ordered the MSI RTX 3080 at MSRP. I was 180 or so in the pre-order queue after months of already waiting. My queue position was barely changing week over week and I got impatient. I saw a handful of RTX 3090 cards come in stock at a local retailer and purchased one.
These cards would generally remain in stock for a few days due to everyone holding out for the much cheaper (at the time) RTX 3080 pre-order promises.
It was a lucky break for me, as those 3080 cards never came for most in that queue. GPU mining and GPU shortages made sure of that. Prices sky rocketed. Looking up this card now I see it costs almost double what I originally paid last year (if you can even get stock that is).
Now I just hope the card lasts at least a few years or more so I don’t ever have to worry about RMA and stock levels…
My computer hardware journey started in the mid 1990s, when I was about 10 or 11 years old. It started out with me dismantling and reconfiguring various 486 machines. These were also known as i486 or Intel 80486 systems.
Electronics had always been a big curiosity for me. As a child I liked to open up devices and extract their internals. I would collect PCBs and join them in nonsensical ways, imagining I had invented new and wonderful devices, capable of many great things.
To illustrate my passion for tinkering with electronics, here is a quick story going back to my toddler years: My parents had noticed my love for tools as a toddler and had tried in vain to make them safe for me. According to my father, he once added a solid lump of pratley steel putty to the end of a sharp screwdriver for me. An attempt to make it safe for me to handle. As soon as I saw this, I threw it to the ground in protest. I only wanted real tools. One of the toys I had was an old 5+1⁄4-inch floppy disk drive!
My First 486 Build
Fast forwarding to the mid 1990s, I was far more capable with tools and had begun to scavenge surplus PC hardware. My uncle owned a PC repair shop where I grew up. As far as I recall I managed to scavenge old discarded parts from his collection, as well as other sources. Schools or universities that would throw out old machines as they cycled or upgraded them, cousins or family friends that had no need for old systems, etc…
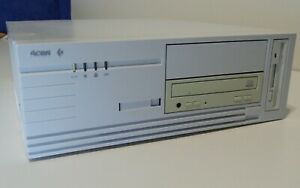
The very first working system that I managed to modify was an Acer branded 486 desktop system. It had a horizontally aligned desktop chassis, one that allowed you to place a CRT monitor on top of.
This isn’t the exact one, but mine looked just like this, minus the CDROM drive.
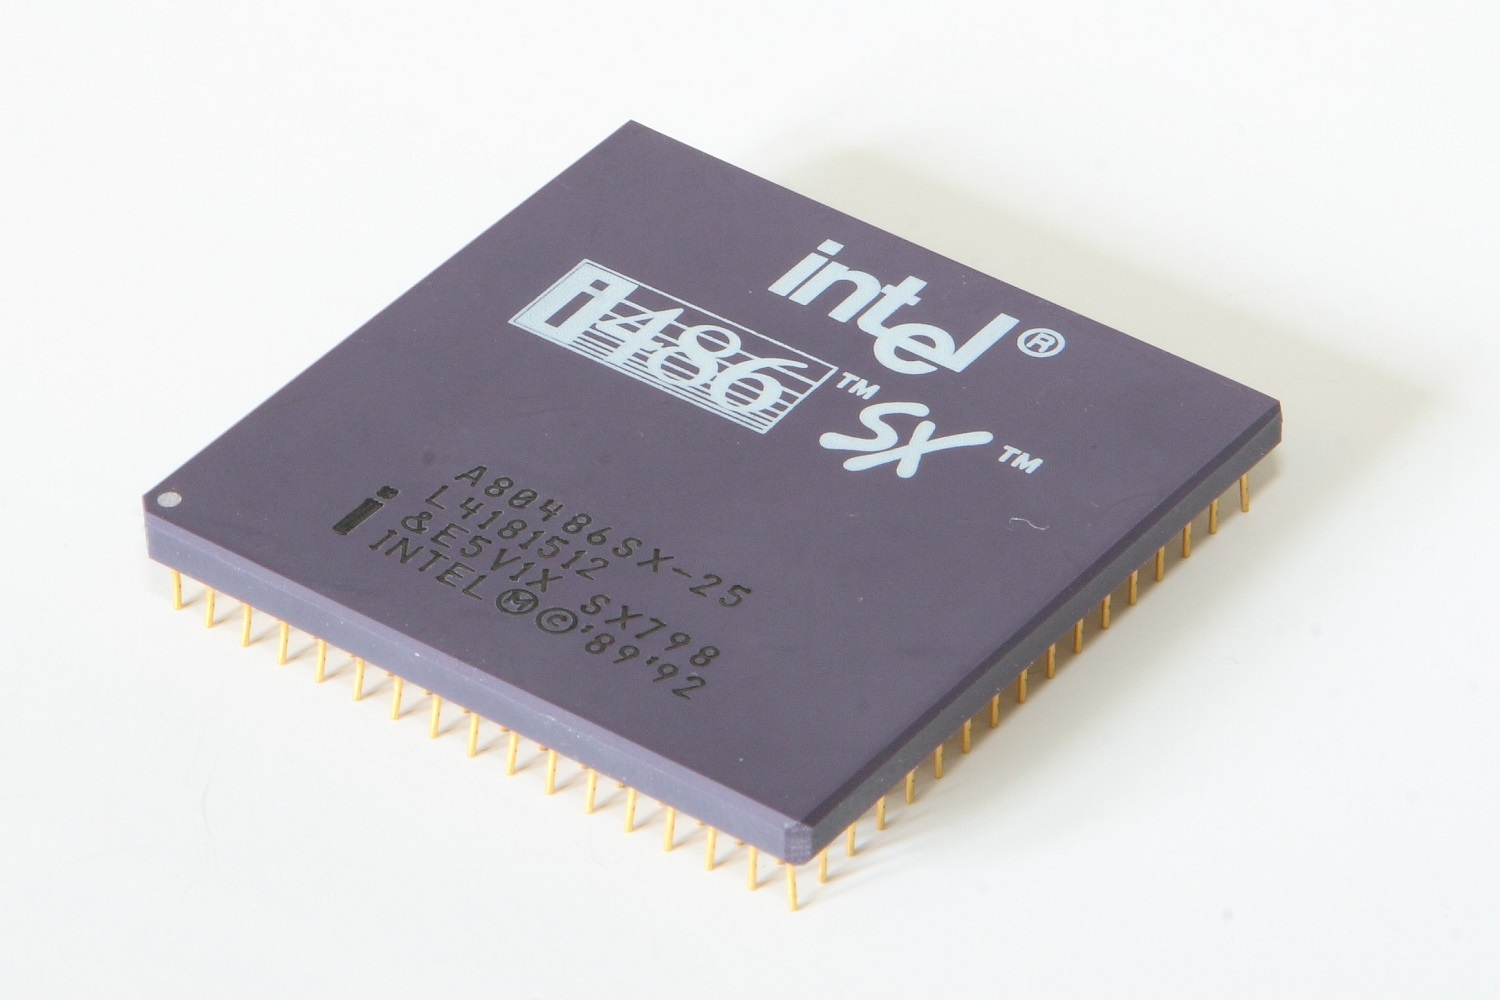
I remember it had a 486 SX-33 CPU. A rather weakly clocked 486 processor, that didn’t even require a heatsink and fan assembly. The 486 SX processors had their FPU (floating point unit) disabled. I imagine this reduced cost and heat output.
This wasn’t exactly a scratch build, but it allowed me to get my feet wet in the world of computer hardware.
Upgrading the CPU
I swapped out the CPU for a 486 DX2-66, a much faster processor, adding a small aluminium heatsink and fan. The fan was powered by a molex power connector.
Memory and Upgrades
Another upgrade on this particular system that I remember was going from 4MB of RAM (SIMM, or single in-line memory module) to 8MB.
I don’t recall if the memory was the 30 or 72 pin type.
Hard Drive Configuration
Among other upgrades, the hard disk drive got swapped out for a slightly larger one. I think the capacity was somewhere around 400MB.
This upgrade had me reading manuals and learning about the importance of jumper placement. The drives connected with an ATA ribbon cable. It was important that the jumper on the back of the hard drive was configured according to the other devices sharing the same cable.
The jumper could be configured to make a drive device 0 or 1 (also known back then as the master or slave device) when sharing the same ATA cable.
The cables themselves were also rated for different transfer speeds. For example 16 or 33 MB/s, and later cables allows Ultra DMA to be used for speeds above 66 MB/s.
Future 486 Systems and Nostalgia
That Acer machine was a good learning experience for me. Soon after that time, I started building and configuring more 486 systems. I had all sorts from 486 DX2-66 to DX4-100 machines.
I started a little side hustle, where I would pick up old components and build fully configured systems, selling them in the local paper’s classifieds section.
Thinking back, this was seriously impressive for a kid my age. By the late 90s (at age 12 or so) I was earning chunks of cash from selling systems that I had built for next to nothing.
Fixing Old CRT Monitors
One of the big wins for me was when I learned from my uncle how to ‘fix’ blurry CRT monitors.
If opened up, all monitors had analog adjustment dials (potentiometers) that could be turned with a screwdriver to control the flyback. One of these would control focus.
I would gather up old CRT monitors that nobody wanted anymore because they had gone ‘blurry over time’. The fix was simply to adjust the focus potentiometer inside while the monitor was on. Of course this was very dangerous as these old monitors contained high voltage capacitors that remained charged up for a while, even after power was disconnected. However, having learned from an adult, I was very careful about this, and the payoff was being able to make cash from selling full systems with monitor included.
This was an amazing time for me as a kid. I learned how to operate DOS, and further operating systems such as Windows 3.1 and further on, Windows 95.
Computer Knowledge Acquired from my ‘486 era’
Here are some random things I learned in the 1990s during my time tinkering with 486 systems. I guess some of the time was also spent with older 386 machines too.
DOS configuration using the CONFIG.SYS and AUTOEXEC.BAT files
Expanded memory manager configuration with EMM386.
Configuring CDROM device drivers in DOS and setting them up on boot.
Writing simple batch (.BAT) scripts.
Simple QBASIC programming.
A little later on, Turbo Pascal programming basics.
Compression and decompression with tools like ARJ.
Manual sound card configuration by selecting specific addresses and channels.
Networking two machines using serial or parallel cables (COM or LPT), and using laplink software to copy files between.
Gaming and PC use in the 1990s
Not all of my computer time as a kid was spent working with computer hardware. I enjoyed playing games just as much.
Some of my most memorable and favourite DOS games that I enjoyed playing on the first 486 system my parents owned, (and later on the 486 systems I built were):
X-Wing and Tie Fighter
UFO – Enemy Unknown
Ultima VIII: Pagan
Master of Orion (MOO)
Wacky Wheels
Death Rally
Screamer
Cannon Fodder
Strike Commander
Wing Commander
I also fondly remember writing science fiction (short stories) in word processing software in DOS and then printing them out on a dot matrix printer. I would take these to school and share with friends (who would also do the same thing).
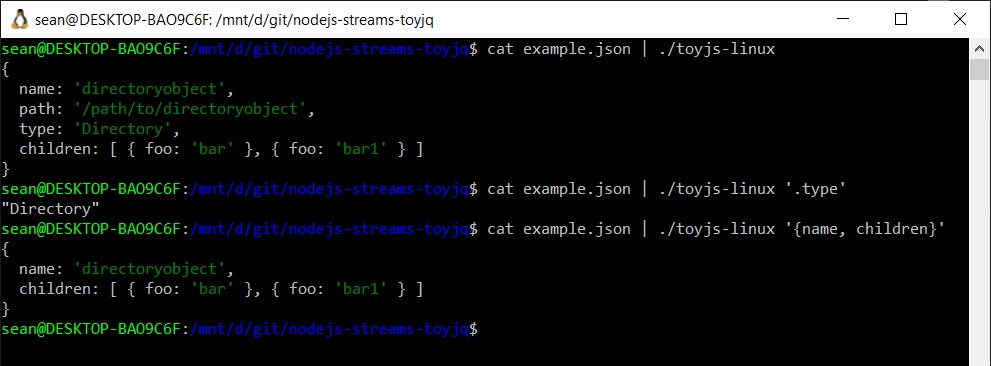
To play around with Node.js streams, I made a simple ‘toy’ version of jq, a handy command line JSON processor.
To be clear, the real jq utility is very lightweight and has a ton of functionality. In this post I’ll be mimicking some of it’s functionality and using Node.js to do so.
This will of course result in a bloated tool with way more bundled in than what we actually need.
That being said, it’ll be a useful exercise to go through to learn a little bit about Node.js streams.
In the github repository, you’ll see how easy it is to hack together a very simple command-line tool to process data streamed in from stdin.
JSON going in to the tool, being filtered, and then converted to an object in PowerShell through the pipeline.
A stream is an abstract interface for working with streaming data in Node.js. The stream module provides an API for implementing the stream interface.
For this example I’ll be jumping straight into the Transform Stream – stream.Transform. This is a duplex stream, where the input would usually be related to the output in some way.
Transforming Input from stdin
The basic use of a Transform stream in Node.js (to process input from stdin) looks like this:
const {Transform} = require('stream')
const TransformStream = new Transform;
TransformStream._transform = (chunk, encoding, callback) => {
    // do something with the chunk
    console.log(chunk.toString().toUpperCase());
    callback();
}

process.stdin.pipe(TransformStream);
Toy jq Utility With Transform Streams
I created a ‘toy’ version of jq using a Node.js Transform stream. It’s a very quickly hacked together example, so don’t expect it to do everything that jq can do. I’m also fully aware that the real jq utility is a very lightweight tool and that doing this in the Node.js runtime adds a lot of unecessary bloat!
This is purely for demonstration purposes.
Packaging up the Node.js app with pkg, we get a platform specific binary called toyjq.
The above examples show how you can easily process data from one input pipeline (stdin in this case) and send it along through the pipeline using Node.js streams.
AWS System Manager Session Manager added the port forwarding feature, announced in this blog post back in 2019. In this post I’ll show you how to leverage SSM and socat port forwarding to access systems in a private subnet that don’t have the SSM agent installed.
You’ll use an SSM agent enabled EC2 instance as an initial target for the ssm port forward session. On this instance, you’ll run socat as a relay for the incoming TCP session to the other instance that does not have the SSM agent.
What is socat?
To quote the official man page, socat (SOcket CAT) is a multipurpose relay. It is a command line tool that establishes two bidirectional byte streams and transfers data between them.
You can use it to connect all sorts of channels. For example:
files
pipes
devices
sockets, such as TCP, UDP, IPv4, etc
SSL sockets
programs
SSM and socat Port Forwarding Example
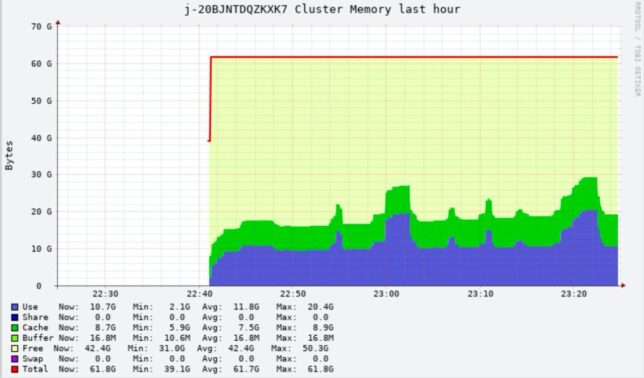
In my example I have an AWS EMR (Elastic Map Reduce) master node running a web dashboard for ganglia in a private VPC subnet.
I don’t want to add a bastion host / jump box or provide SSH access from the public net.
SSM would provide a nice way for me to connect a remote session, or port forward using IAM authentication and negating the need for any ingress security group rules, but only if I had the SSM agent available on this instance.
Seeing as though the EMR master node is not SSM agent enabled, and I can’t use SSM port forwarding directly to this instance, we could use an interim machine with SSM as a jump box.
Example Configuration
Here is how I configured port forwarding in my use case to access ganglia on a private instance EMR node.
The EC2 instance with SSM agent must have an IAM policy attached that allows the relevant ssm access. The blog post linked above has instructions. In a nutshell though, most standard Amazon AMIs include the ssm agent. Your EC2 instance profile should include the required actions too. The AmazonSSMManagedInstanceCore managed policy includes these.
Install socat on the SSM agent enabled interim machine the private subnet. For this I connected an SSM session to get shell access and ran sudo yum install -y socat
Now I needed to open a source channel for the SSM port forward aws cli command to connect, and connect that source to the destination of the EMR master node running ganglia.
The command listens on port 8080, and forwards TCP to the EMR node, 10.0.4.149 on port 80. Importantly, the command uses fork and reuseaddr to allow multiple connections.
Next is to use the AWS CLI ssm start-session command to start a port forwarding session to the interim instance with the SSM agent running. Grab the Instance ID for the EC2 machine and:
If you setup socat correctly to listen on port 8080, then the connection should be opened and accepted.
Now you can simply open a web browser locally and direct it to http://localhost:8089/ganglia to access ganglia on the remote EMR master node.
Accessing EMR cluster memory stats via the remote port forwarded session.
Closing
AWS SSM is a useful tool to get access to instances in a secure, audited fashion without needing to open up risky SSH access or other remote ports to the public internet.
When constrained and needing a jump across to an instance without the SSM agent you can leverage tools to help. Socat is one such tool that can facilitate this within the private network.


