Useful NGINX Ingress Controller Configurations for Kubernetes using Helm

My favourite Ingress Controller for Kubernetes is definitely the official NGINX Ingress Controller. It provides tons of customisation and is under active development with great community support. This post will dive into some of the more useful nginx ingress controller configurations and options available.

If you use the official stable/nginx-ingress chart for Helm, the default values you’ll get with installation are not always the best choices.

This is my collection of useful / common configuration options I tend to change when installing an ingress controller. A few of these options are geared towards AWS deployments, but otherwise the rest of the options are generic enough to apply to any platform you may be running on.

Useful nginx ingress controller options for Kubernetes

AWS only configuration options

  • Use an internal (private) Elastic Load Balancer for Ingress. Annotate with: service.beta.kubernetes.io/aws-load-balancer-internal: 0.0.0.0/0
  • Specify the kind of AWS Load Balancer to use with Ingress Controller. Annotate with: service.beta.kubernetes.io/aws-load-balancer-type: nlb/elb/alb

Common configuration options

  • controller.service.type (default == LoadBalancer) – specifies the type of controller service to create. Useful to open up the Ingress Controller for North/South traffic with differing models of access. E.g. Cluster only with ClusterIP, NodePort for specific host only access, or LoadBalancer to expose with a public or internal facing Load Balancer.
  • controller.scope.enabled (default == disabled / watch all namespaces) – where the controller should look out for ingress rule resources. Useful to limit the namespace(s) that the Ingress Controller works in.
  • controller.scope.namespace – namespace to watch for ingress rules if the controller.scope.enabled option is toggled on.
  • controller.minReadySeconds – how many seconds a pod needs to be ready before killing the next, during update – useful for when updating/upgrading the Ingress Controller deployment.
  • controller.replicaCount (default == 1) – definitely set this higher than 1. You want at least 2 for replicaCount to ensure there is always a controller running when draining nodes or updating your ingress controller.
  • controller.service.loadBalancerSourceRanges (default == []) – Useful to lock your Ingress Controller Load Balancer down. For example, you might not want Ingress open to 0.0.0.0/0 (all internet) and instead assign a value that restricts ingress access to an IP range you own. Using helm, you can specify an array with typical array square brackets e.g. [10.0.0.0/8, 172.0.0.0/8]
  • controller.service.enableHttp (default == true) – Useful to disable insecure HTTP (and leave only HTTPS)
  • controller.stats.enabled (default == false) – Enables controller stats page – Useful for stats and debugging. Not a good idea for production though. The controller stats service can be locked down if required by specific CIDR range.

To deploy the NGINX Ingress Controller helm chart and specify some of the above customisations, you can create a yaml file and populate it with the following example configuration (replace/change as required):

controller:
  replicaCount: 2
  service:
    type: "LoadBalancer"
    loadBalancerSourceRanges: [10.0.0.0/8]
    targetPorts:
      http: http
      https: http
    annotations:
      service.beta.kubernetes.io/aws-load-balancer-internal: 0.0.0.0/0
      service.beta.kubernetes.io/aws-load-balancer-backend-protocol: "http"
      service.beta.kubernetes.io/aws-load-balancer-ssl-ports: "https"
      service.beta.kubernetes.io/aws-load-balancer-connection-idle-timeout: '3600'
  stats:
    enabled: true

Install with helm like so:

helm install -f ingress-custom.yaml stable/nginx-ingress --name nginx-ingress --namespace example

If you’re using an internal elastic load balancer (like the above example yaml configuration), don’t forget to make sure your private subnets are tagged with the following key/value:

key = “kubernetes.io/role/internal-elb”
value = “1”

Enjoy customising your own ingress controller!

Customising your EKS cluster DNS and the CoreDNS vs KubeDNS configuration differences

In the past I’ve used the excellent kops to build out Kubernetes clusters. The standard builds always made use of the kube-dns cluster addon. With EKS and CoreDNS things are a little different.

With kube-dns, I got used to using configMaps to customise DNS upstream servers and stub domains using the standard kube-dns configuration format which looks something like this:

apiVersion: v1
kind: ConfigMap
metadata:
  name: kube-dns
  namespace: kube-system
data:
  stubDomains: |
    {"ec2.internal": ["10.0.0.2"], "shogan.co.uk": ["10.20.0.200"]}
  upstreamNameservers: |
    ["8.8.8.8", "8.8.4.4"]

Amazon EKS and CoreDNS

However recently I’ve started doing a fair bit of Kubernetes cluster setups and configurations using Amazon EKS. I found that EKS and CoreDNS is now the standard and requires a different kind of configuration format which looks something like this:

apiVersion: v1
data:
  Corefile: |
    .:53 {
        errors
        health
        kubernetes cluster.local in-addr.arpa ip6.arpa {
          pods insecure
          upstream
          fallthrough in-addr.arpa ip6.arpa
        }
        prometheus :9153
        proxy . /etc/resolv.conf
        cache 30
        loop
        reload
        loadbalance
    }
    shogan.co.uk:53 {
        errors
        cache 30
        forward . 10.20.0.200
    }
    ec2.internal:53 {
        errors
        cache 30
        forward . 10.0.0.2
    }
kind: ConfigMap
metadata:
  labels:
    eks.amazonaws.com/component: coredns
    k8s-app: kube-dns
  name: coredns
  namespace: kube-system

To add your own custom stub domain nameservers with CoreDNS, the task becomes a case of editing the CoreDNS ConfigMap called coredns in the kube-system namespace.

Add your stub domain configuration blocks after the default .:53 section, with the forward property pointing to your custom DNS nameserver.

Once you’re done adding the new configuration, restart your CoreDNS containers. You can do this gracefully by executing the following in your CoreDNS containers:

kubectl exec -n kube-system coredns-pod-name-x -- kill -SIGUSR1 1

Alternatively, roll your CoreDNS pods one at a time.

Last of all, you’ll want to test the name resolution in a test container using a tool like dig. Your container /etc/resolv.conf files should usually be pointing at the IP address of your CoreDNS Cluster Service. So they’ll talk to the CoreDNS service for their usual look up queries, and CoreDNS should now be able to resolve your custom stub domain records but referring to your custom forwarded nameservers.

Apart from the different configuration format, there seem to be some fairly significant differences between CoreDNS and kube-dns. In my opinion, it would seem that overall CoreDNS is the better, more modern choice. Some of the benefits it enjoys over kube-dns are:

  • CoreDNS has multi-threaded design (leveraging Go)
  • CoreDNS uses negative caching whereas kube-dns does not (this means CoreDNS can cache failed DNS queries as well as successful ones, which overall should equal better speed in name resolution). It also helps with external lookups.
  • CoreDNS has a lower memory requirement, which is great for clusters with smaller worker nodes

Hopefully this helps when it comes to configuring EKS and CoreDNS. For more information, there is a great article that goes into the details of the differences of CoreDNS and kube-dns here.

Troubleshooting Amazon EKS Worker Nodes not joining the cluster

mechanic underneath car fixing things

I’ve recently been doing a fair bit of automation work on bringing up AWS managed Kubernetes clusters using Terraform (with Packer for building out the worker group nodes). Read on for some handy tips on troubleshooting EKS worker nodes.

Some of my colleagues have not worked with EKS (or Kubernetes) much before and so I’ve also been sharing knowledge and helping others get up to speed. A colleague was having trouble with their newly provisioned personal test EKS cluster found that the kube-system / control plane related pods were not starting.  I assisted with the troubleshooting process and found the following…

Upon diving into the logs of the kube-system related pods (dns, aws CNI, etc…) it was obvious that the pods were not being scheduled on the brand new cluster. The next obvious command to run was kubectl get nodes -o wide to take a look at the general state of the worker nodes.

Unsurprisingly there were no nodes in the cluster.

Troubleshooting worker nodes not joining the cluster

The first thing that comes to mind when you have worker nodes that are not joining the cluster on startup is to check the bootstrapping / startup scripts. In EKS’ case (and more specifically EC2) the worker nodes should be joining the cluster by running a couple of commands in the userdata script that the EC2 machines run on launch.

If you’re customising your worker nodes with your own custom AMI(s) then you’ll most likely be handling this userdata script logic yourself, and this is the first place to check.

The easiest way of checking userdata script failures on an EC2 instance is to simply get the cloud-init logs direct from the instance. Locate the EC2 machine in the console (or the instance-id inspect the logs for failures on the section that logs execution of your userdata script.

  • In the EC2 console: Right-click your EC2 instance -> Instance Settings -> Get System Log.
  • On the instance itself:
    • cat /var/log/cloud-init.log | more
    • cat /var/log/cloud-init-output.log | more

Upon finding the error you can then check (using intuition around the specific error message you found):

  • Have any changes been introduced lately that might have caused the breakage?
  • Has the base AMI that you’re building on top of changed?
  • Have any resources that you might be pulling into the base image builds been modified in any way?

These are the questions to ask and investigate first. You should be storing base image build scripts (packer for example) in version control / git, so check the recent git commits and image build logs first.

How to setup a basic Kubernetes cluster and add an NGINX Ingress Controller on DigitalOcean

Most of the steps in this how to post can be applied to any Kubernetes cluster to get an NGINX Ingress Controller deployed, so you don’t necessarily have to be running Kubernetes in DigitalOcean. With that said, let’s go through the process of setting up a Kubernetes cluster with NGINX Ingress Controller on DigitalOcean.

DigitalOcean have just officially announced their own Kubernetes offering so this guide covers initial deployment of a basic worker node pool on DigitalOcean, and then moves on to deploying an Ingress Controller setup.

If you’re thinking of signing up on DigitalOcean, consider using my referral link below. It’ll net you $100 of credit to spend over 60 days, and if you stick with them I’ll get a small $25 credit to my own account. Win win!

My Referral link to sign up with DigitalOcean

Note: If you already have a Kubernetes cluster setup and configured, then you can skip the initial cluster and node pool provisioning step below and move on to the Helm setup part.

Deploy a Kubernetes node pool on DigitalOcean

You could simply do this with the Web UI console (which makes things really simple), but here I’ll be providing the doctl commands to do this via the command line.

First of all, if you don’t have it already download and setup the latest doctl release. Make sure it’s available in your PATH.

Initialise / authenticate doctl. Provide your own API key when prompted.

doctl auth init

Right now, the help documentation in doctl version 1.12.2 does not display the kubernetes related commands arguments, but they’re available and do work.

Create a new Kubernetes cluster with just a single node of the smallest size (you can adjust this to your liking of course). I want a nice cheap cluster with a single node for now.

doctl k8s cluster create example-cluster --count=1 --size=s-1vcpu-2gb

The command above will provision a new cluster with a default node pool in the NYC region and wait for the process to finish before completing. It’ll also update your kubeconfig file if it detects one on your system.

output of the doctl k8s cluster create command

Once it completes, it’ll return and you’ll see the ID of your new cluster along with some other details output to the screen.

Viewing the Kubernetes console in your browser should also show it ready to go. You can download the config from the web console too if you wish.

Kubeconfig setup

If you’re new to configuring kubectl to manage Kubernetes, follow the guide here to use your kube config file that DigitalOcean provides you with.

the load balancer that will front your Ingress Controller on DigitalOcean Kubernetes

Handling different cluster contexts

With kubectl configured, test that it works. Make sure you’re in your new cluster’s context.

kubectl config use-context do-nyc1-example-cluster

If you’re on a Windows machine and use PowerShell and have multiple Kubernetes clusters, here is a simple set of functions I usually add to my PowerShell profile – one for each cluster context that allows easy switching of contexts without having to type out the full kubectl command each time:

Open your PowerShell profile with:

notepad $profile

Add the following (one for each context you want) – make sure you replace the context names with your own cluster names:

function kubecontext-minikube { kubectl config use-context minikube }
function kubecontext-seank8s { kubectl config use-context sean.k8s.local }
function kubecontext-digitalocean { kubectl config use-context do-nyc1-example-cluster }

Simply enter the function name and hit enter in your PS session to switch contexts.

If you didn’t have any prior clusters setup in your kubeconfig file, you should just have your new DigitalOcean cluster context selected already by default.

Deploy Helm to your cluster

Time to setup Helm. Follow this guide to install and configure helm using kubectl.

helm logo

Deploy the Helm nginx-ingress chart to enable an Ingress Controller on DigitalOcean in your Kubernetes cluster

Now that you have helm setup, you can easily deploy an Ingress Controller to your cluster using the nginx helm chart (package).

helm install --name nginx-ingress stable/nginx-ingress --set service.type=LoadBalancer --namespace default

When you specify the service.type of “LoadBalancer”, DigitalOcean will provision a LoadBalancer that fronts this Kubernetes service on your cluster. After a few moments the Helm deployment should complete (it’ll run async in the background).

You can monitor the progress of the service setup in your cluster with the following command:

kubectl --namespace default get services -o wide -w nginx-ingress-controller

Open the Web console, go to Networking, and then look for Load Balancers.

You should see your new NGINX load balancer. This will direct any traffic through to your worker pool node(s) and into the Kubernetes Service resource that fronts the pods running NGINX Ingress.

view of the digitalocean load balancer

At this point you should be able to hit the IP Address in your web browser and get the default nginx backend for ingress (with a 404 response). E.g.

Great! This means it’s all working so far.

Create a couple of basic web deployments inside your cluster

Next up you’ll create a couple of very simple web server Deployments running in single pods in your cluster’s node pool.

Issue the following kubectl command to create two simple web deployments using Google’s official GCR hello-app image. You’ll end up with two deployments and two pods running separately hosted “hello-app” web apps.

kubectl run web-example1 --image=gcr.io/google-samples/hello-app:2.0 --port=8080
kubectl run web-example2 --image=gcr.io/google-samples/hello-app:2.0 --port=8080

Confirm they’re up and running wth 1 pod each:

kubectl get deployments
NAME                            DESIRED   CURRENT   UP-TO-DATE   AVAILABLE   AGE
web-example1                    1         1         1            1           12m
web-example2                    1         1         1            1           23m

Now you need a service to back the new deployment’s pods. Expose each deployment with a simple NodePort service on port 8080:

kubectl expose deployment/web-example1 --type="NodePort" --port 8080
kubectl expose deployment/web-example2 --type="NodePort" --port 8080

A NodePort service will effectively assign a port number from your cluster’s service node port range (default between 30000 and 32767) and each node in your cluster will proxy that specific port into your Service on the port you specify. Nodes are not available externally by default and so creating a NodePort service does not expose your service externally either.

Check the services are up and running and have node ports assigned:

kubectl get services
NAME                            TYPE           CLUSTER-IP       EXTERNAL-IP      PORT(S)                      AGE
web-example1                    NodePort       10.245.125.151   <none>           8080:30697/TCP               13m
web-example2                    NodePort       10.245.198.91    <none>           8080:31812/TCP               24m

DNS pointing to your Load Balancer

Next you’ll want to set up a DNS record to point to your NGINX Ingress Controller Load Balancer IP address. Grab the IP address from the new Kubernetes provisioned Load Balancer for Ingress from the DigitalOcean web console.

Create an A record to point to this IP address.

Create your Ingress Rules

With DNS setup, create a new YAML file called fanout.yaml:

This specification will create an Kubernetes Ingress Resource which your Ingress Controller will use to determine how to route incoming HTTP requests to your Ingress Controller Load Balancer.

apiVersion: extensions/v1beta1
kind: Ingress
metadata:
  name: simple-fanout-example
  annotations:
    nginx.ingress.kubernetes.io/rewrite-target: /
spec:
  rules:
  - host: example-ingress.yourfancydomainnamehere.com
    http:
      paths:
      - path: /*
        backend:
          serviceName: web-example1
          servicePort: 8080
      - path: /web2/*
        backend:
          serviceName: web-example2
          servicePort: 8080

Make sure you update the host value under the first rule to point to your new DNS record (that fronts your Ingress Controller Load Balancer). i.e. the “example-ingress.yourfancydomainnamehere.com” bit needs to change to your own host / A record you created that points to your own Load Balancer IP address.

The configuration above is a typical “fanout” ingress setup. It provides two rules for two different paths on the host DNS you setup and allows you to route HTTP traffic to different services based on the hostname/path.

This is super useful as you can front multiple different services with a single Load Balancer.

  • example-ingress.yourfancydomainnamehere.com/* -> points to your simple web deployment backed by the web-example1 service you exposed it on. Any request that does not match any other rule will be directed to this service (*).
  • example-ingress.yourfancydomainnamehere.com/web2/* -> points to your web-example2 service. If you hit your hostname with the path /web2/* the request will go to this service.

Testing

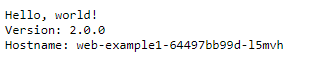
Try browse to the first hostname using your own DNS record and try different combinations that match the rules you defined in your ingress rule on HTTP. You should get the web-example1 “hello-app” being served from your web-example1 pod for any request that does not match /web2/*. E.g. /foo.

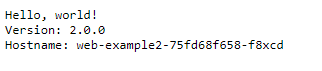
For /web2/* you should get the web-example2 “hello-app” default web page. It’ll also display the name of the pod it was served from (in my case web-example2-75fd68f658-f8xcd).

Conclusion

Congratulations! You now have a single Load Balancer fronting an NGINX Ingress Controller on DigitalOcean Kubernetes.

You can now expose multiple Kubernetes run services / deployments from a single Ingress and avoid the need to have multiple Load Balancers running (and costing you money!)

Streamlining your Kubernetes development process with Draft (and Helm)

Draft is a tool built for developers who do their dev work against a Kubernetes environment (whether it be a live cluster of a Minikube instance).

It really helps speed up development time by helping out with the code -> build -> run -> test dev cycle. It does this by scaffolding out a Dockerfile and Helm Chart template pack customised for your app with a single command and then by building and deploying your application image to your Kubernetes environment with a second.

Setting up Draft and a basic .NET Core Web API project

First off, make sure you have already set up your kubectl configuration to be able to talk to your Kubernetes cluster, and have also setup and configured Helm.

Set the Draft binary up in a known system path on your machine after downloading it from the Draft Releases page.

Run draft init to initialise Draft. It’ll drop it’s configuration in a subdirectory of your user profile directory called .draft.

Create a new .NET Core 2.1 ASP.net project and select Web API as the type.

Open a shell and navigate over to the root project directory of your new .NET Core 2.1 app. E.g. cd solution\projectname

Run draft create to setup Draft with your new project. This is where the Draft magic happens. Essentially, Draft will:

  • Detect your application code language. (In this case csharp)
  • Create a Dockerfile for your app
  • Set up a Helm chart and necessary template structure to easily deploy your app into Kubernetes direct from your development machine

You should see output similar to this:

PS C:\git\draftdotnetcorewebapi\draftdotnetcorewebapi> draft create
--> Draft detected JSON (97.746232%)
--> Could not find a pack for JSON. Trying to find the next likely language match...
--> Draft detected XML (1.288026%)
--> Could not find a pack for XML. Trying to find the next likely language match...
--> Draft detected csharp (0.914658%)
--> Ready to sail

At this point you could run draft up and if you have a container registry setup for Draft on your machine already, it would build and push your Docker image and then deploy your app into Kubernetes. However, if you don’t yet have a container registry setup for Draft you’ll need to do that first.

draft config set registry docker.io/yourusernamehere

PS, just make sure your local development machine has credentials setup for your container registry. E.g. Docker Hub.

Run your app with Draft (and help from Helm)

Now run draft up

PS C:\git\draftdotnetcorewebapi\draftdotnetcorewebapi> draft up
Draft Up Started: 'draftdotnetcorewebapi': 01CH1KFSSJWDJJGYBEB3AZAB01
draftdotnetcorewebapi: Building Docker Image: SUCCESS ⚓  (45.0376s)
draftdotnetcorewebapi: Pushing Docker Image: SUCCESS ⚓  (10.0875s)
draftdotnetcorewebapi: Releasing Application: SUCCESS ⚓  (3.3175s)
Inspect the logs with `draft logs 01CH1KFSSJWDJJGYBEB3AZAB01`

Awesome. Draft built your application into a Docker image, pushed that image up to your container registry and then released your application using the Helm Chart it scaffolded for you when you initially ran draft create.

Take a look at Kubernetes. Your application is running.

kubectl get deployments

PS C:\git\draftdotnetcorewebapi\draftdotnetcorewebapi> kubectl get deployments
NAME                           DESIRED   CURRENT   UP-TO-DATE   AVAILABLE   AGE
draftdotnetcorewebapi-csharp   1         1         1            1           7m

Iterating on your application

So your app is up and running in Kubernetes, now what?

Let’s make some changes to the Helm chart to get it deploying using a LoadBalancer (or NodePort if you’re using Minikube). Let’s also add a new Api Controller called NamesController that simply returns a JSON array of static names with a GET request.

using Microsoft.AspNetCore.Mvc;

namespace draftdotnetcorewebapi.Controllers
{
    [Route("api/[controller]")]
    [ApiController]
    public class NamesController : ControllerBase
    {
        [HttpGet]
        public ActionResult<IEnumerable> Get()
        {
            return new string[] { "Wesley", "Jean-Luc", "Damar", "Guinan" };
        }
    }
}

Change your charts/csharp/values.yaml file to look like this (use NodePort if you’re trying this out with Minikube):

using Microsoft.AspNetCore.Mvc;
# Default values for c#.
# This is a YAML-formatted file.
# Declare variables to be passed into your templates.
replicaCount: 1
image:
  pullPolicy: IfNotPresent
service:
  name: dotnetcore
  type: LoadBalancer
  externalPort: 8080
  internalPort: 80
resources:
  limits:
    cpu: 1
    memory: 256Mi
  requests:
    cpu: 250m
    memory: 256Mi
ingress:
  enabled: false

Run draft up again. Your app will get built and released again. This time you’ll have a LoadBalancer service exposed and your updated application with the new API endpoint will be available within seconds.

This time however Draft was clever enough to know that it didn’t need a new Helm release. Using Helm, it determined that an existing release was already in place and instead did a helm upgrade underneath the covers. Test it for yourself with a helm list

PS C:\git\draftdotnetcorewebapi\draftdotnetcorewebapi> helm list
NAME                            REVISION        UPDATED                         STATUS          CHART                           NAMESPACE
draftdotnetcorewebapi           2               Wed Jun 27 23:10:11 2018        DEPLOYED        csharp-v0.1.0                   default

Check the service’s External IP / URL and try it out by tacking on /api/names on the end to try out the new Names API endpoint.

PS C:\git\draftdotnetcorewebapi\draftdotnetcorewebapi>PS C:\git\draftdotnetcorewebapi\draftdotnetcorewebapi> kubectl get service draftdotnetcorewebapi-csharp -o wide
NAME                           TYPE           CLUSTER-IP     EXTERNAL-IP                                                               PORT(S)          AGE       SELECTOR
draftdotnetcorewebapi-csharp   LoadBalancer   100.66.92.87   aezzzzzzzzzzzzzzzzzzzzzzzzzzzzzzzzzzzzzzzzz.us-east-2.elb.amazonaws.com   8080:31381/TCP   32m       app=draftdotnetcorewebapi-csharp

Draft clean up

To take your app down and delete the Helm release, simply issue a draft delete on the command line.

PS C:\git\draftdotnetcorewebapi\draftdotnetcorewebapi> helm list
NAME                            REVISION        UPDATED                         STATUS          CHART                           NAMESPACE
draftdotnetcorewebapi           2               Wed Jun 27 23:10:11 2018        DEPLOYED        csharp-v0.1.0                   default

Check the service’s External IP / URL and try it out by tacking on /api/names on the end to try out the new Names API endpoint.

PS C:\git\draftdotnetcorewebapi\draftdotnetcorewebapi> draft delete
app 'draftdotnetcorewebapi' deleted

That’s all there is to it.

Draft really helps ease the monotony and pain of setting up a new project and getting it all working with Docker and Kuberenetes. It vastly improves your development cycle times too. Check it out and start using it to save time!