Using placeholder templates with xargs gives you a lot more power than simply using xargs to append args onto the end of a command.
I previously blogged about how to use xargs to append arguments to another command in the pipeline. This post goes into a bit more detail and shows you a more powerful way of using xargs.
Basic Xargs Example
With a typical, simple xargs command, you might append one argument onto the end of an existing command in the pipeline like this:
echo "this is a basic xargs example" | xargs echo "you said:"
The above command results in the output:
you said: this is a basic xargs example
Placeholder Templates With Xargs Example
Now, here is a simple example of using a placeholder, or template in your command, and passing your argument into that.
echo "this is a basic xargs example" | xargs -I {} echo "you said: {}"
The output is exactly the same as with the basic example. However, you can now use the curly braces placeholder to move the argument placement to anywhere in your command.
You’re no longer constrained to it being on the end of the echo (or whichever command you’re using). You can also do multiple placements of the argument in your command.
For example:
echo "FOO" | xargs -I {} echo "you said: {}. Here is another usage of your sample argument: {}. And here is yet another: {}"
A Slightly More Practical Example
Enough of the simple echo examples though. How about using this for a more practical, real world example?
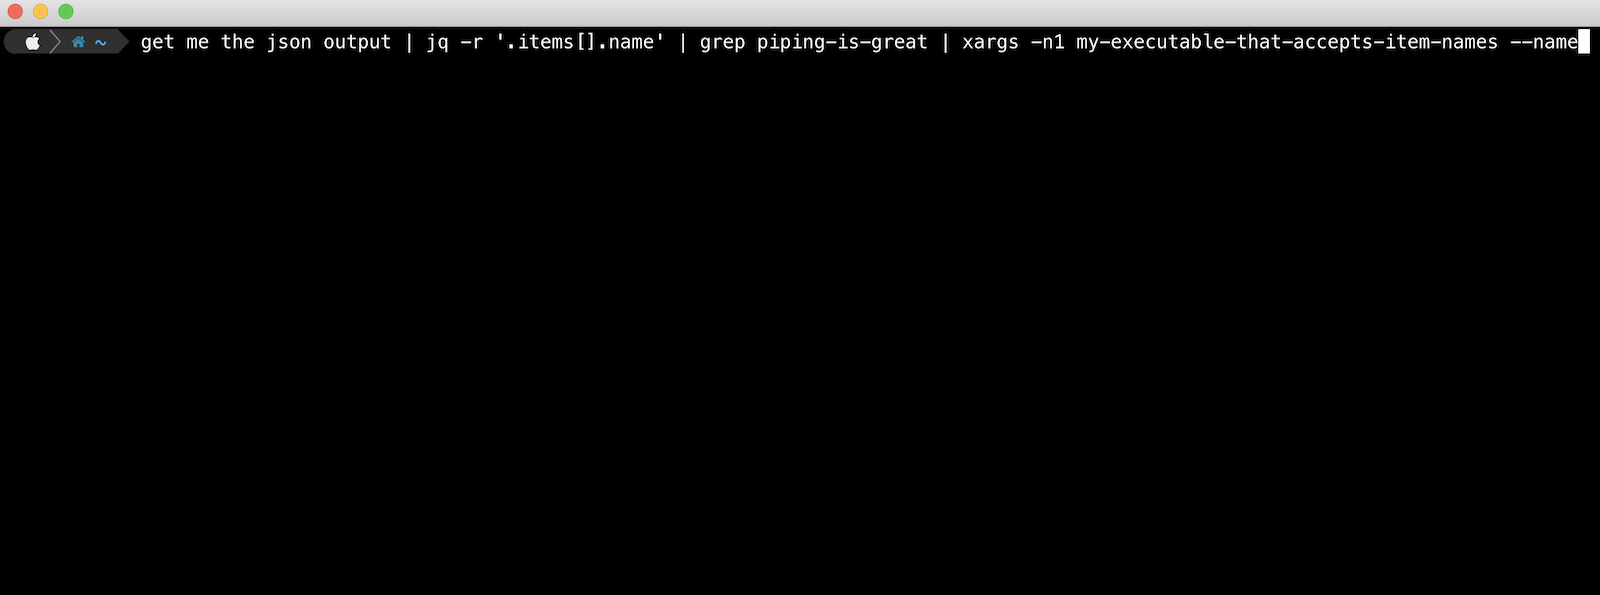
In the following example, we want to list a bunch of AWS S3 buckets, and then do a summary output of their total size in GiB. We cut out the bucket name using cut from the initial listing that is returned with aws s3 ls.
aws s3 ls | cut -d' ' -f3 | xargs -n1 aws s3 ls --summarize --human-readable --recursive s3://
Using xargs to append the bucket name from the pipeline looks like it would work, as we only need it right at the end of the aws s3 ls command. There is an issue though, xargs would add a space, and we want the bucket name appended to s3:// without a space.
Using The Template or Placeholder
This is where using a placeholder or template with xargs can come in handy.
aws s3 ls | cut -d' ' -f3 | xargs -n1 -I {} aws s3 ls --summarize --human-readable --recursive s3://{}
It’s also worth noting that you can change your template or placeholder token with the -I parameter. It doesn’t have to be {} as in the examples above.
In summary, your usage of xargs can be levelled up by using the -I parameter to leverage placeholder or template tokens.