A while ago I posted my home storage server build which at the time was setup to run FreeNAS. Things have moved on in that space and FreeNAS has been replaced with TrueNAS Core. I thought I would post my FreeNAS to TrueNAS upgrade experience.
First off the recommendation is to ensure you’re on the latest FreeNAS version (the last official release, which was FreeNAS 11.3-U5). I had already been running this version for a while so I was set there.
FreeNAS to TrueNAS Upgrade Process
I started off by creating a full, manual backup of all my storage pools to an external disk. I verified a bunch of files in various locations on the backup disk to be extra sure they looked good.
Next was to switch release trains to TrueNAS-12.0-STABLE. At the time of posting, the current release is TrueNAS-12.0-U8.
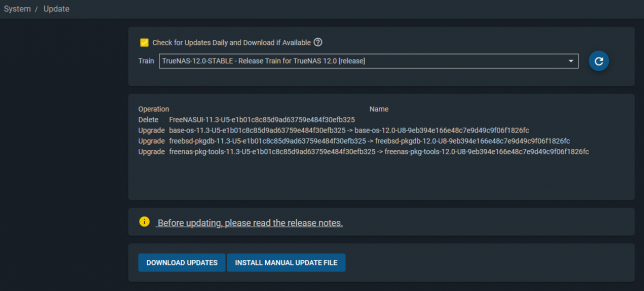
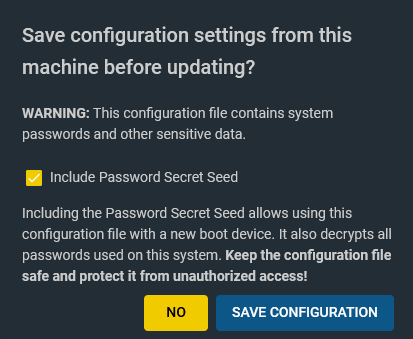
Clicking Download Updates started the download and upgrade process. Before starting you’re offered the chance to download your configuration backup. Definitely do this. It contains all your configuration as well as an optional password secret seed. This is important if you need to re-install the OS or change to a new boot device.
Once the upgrade completes the UI should reconnect after reboot, showing off the shiny new dashboard.

Updating ZFS Feature Flags
After verifying I could still access my SMB shares and that my NFS provisioner for my Kubernetes cluster was still working as expected I decided to lock in TrueNAS 12.0 by updating my ZFS pool feature flags across all zpools.
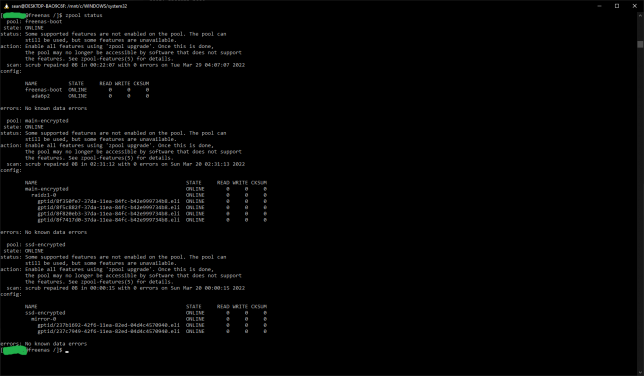
In a shell, I ran zpool status to take a look. Each pool is listed and should shows that some new features are not yet enabled. By leaving them as is, you retain the ability to roll back to your old FreeNAS version. Updating them locks you into the ZFS version that they were introduced with.
Updating to use the latest feature flags is something you should personally decide on. Do you need the newer feature flags?
According to this post, TrueNAS 12.0 supports the Feature Flags listed below. (Bold are read-only backwards compatible, and italicized flags are very easy to return to the enabled state):
- Allocation Classes
- Bookmarks v2
- Bookmark written
- Sequential Rebuilds [device_rebuild]
- Encryption
- Large dnodes
- Livelist
- Log Spacemap
- Project Quota
- Redacted datasets
- Redaction bookmarks
- Resilver defer
- Userobj accounting
- zstd compression
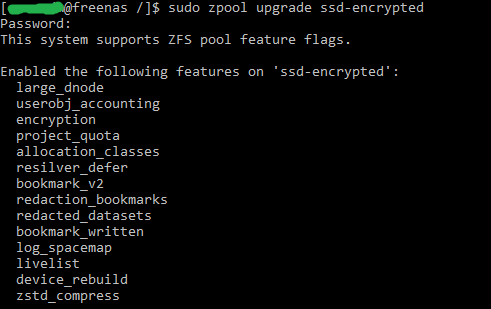
Updating ZFS feature flags is then as simple as running the zpool upgrade command.
E.g. sudo zpool upgrade my-pool
The last step is to upgrade any jails you might be running. Use the iocage upgrade command to get going with.
iocage upgrade -r 12.0-RELEASE your_jail_name