Cheap Minecraft Server in AWS with Docker and Traefik

minecraft-like figure on the grass

According to the Minecraft Realms plan pricing page, you can get a realms server at around £5.59 per month. You get some nice conveniences there but… I refuse to pay much at all when I can throw some infrastructure together myself in the cloud to create the ultimate cheap Minecraft server.

Considering my Docker instance running Traefik hosts another 3 or 4 of my personal services along with a Minecraft server, then this solution only costs me around £1.50 a month.

I chose to go with a single AWS EC2 instance that runs Docker. Minecraft runs in a container and sits alongside other personal websites and services that I host there too.

I use Traefik to route traffic coming in to this single host for various TCP ports as well as HTTP(s) on different hostnames. This essentially levels up the cost savings even further as I don’t need multiple EC2 instances (one for each service), and I don’t even need to pay for something like an application or network load balancer, as Traefik does this for me.

A Quick Review of Alternatives

There are other alternatives to consider if you’re looking for a cheap Minecraft server, so don’t take this as being the only option. Here is what I’ve used in the past before settling on my current solution:

  • Minecraft on a dedicated cloud VM. If you just want a dedicated Minecraft VM in the cloud, then DigitalOcean is a good, cheap option. You can also get fairly cheap instances Vultr.
  • Running Minecraft on my own personal Raspberry Pi Kubernetes Cluster. I was even able to expose it over the internet for friends to play on by leveraging a Pi device as a dedicated router. I then used port forwarding to get it working through my double NAT setup. The ARM container was a little slow as a server for more than 2 or 3 players on Raspberry Pi hardware though.
  • Minecraft Server on a home PC / Workstation, with port forwarding to allow other players to connect. This is not ideal, especially on Windows machines or systems that you don’t want to leave running 24/7 as you would for a dedicated server.
  • Various other Minecraft-as-a-service providers. These are decent options in some cases. However for me price and control are important, and I much prefer to self host in this case.

Cheap Minecraft Server in AWS EC2 with Traefik

I used my Cheap Traefik EC2 Docker Hosting solution as the base. You can read that article to get access to the CDK resources required to deploy it yourself.

The cost benefits to using this particular recipe are:

  • EC2 Graviton2 ARM based processor – slightly cheaper to run than Intel and AMD. The downside is more limited software choices. You need to make sure you use ARM compatible packages or Docker images.
  • Spot instance – this has massive savings over a normal lifecycle EC2 instance. The downside is that it can be terminated at any time with only a couple of minutes of notice. When using these you need to make sure you have good data persistence that is not local to the EC2 instance. I personally use a mounted EFS volume. It is re-attached to a new instance from the autoscaling group if the old instance is terminated.

If you don’t use the CDK solution I mentioned above, then alternatively deploy yourself an EC2 instance. Give it an elastic IP address, set up the Security Group ingress rules accordingly, and get shell access. First thing you’ll want to install is Docker, then you’re pretty much good to go.

Minecraft Docker Image

I found a great Minecraft Docker image that is well maintained and has the correct ARM image builds for use on Graviton2 hardware. Check out itzg/minecraft-server. There are other arch builds there that’ll run on just about any other platform.

Docker Compose Service

If you use docker-compose, then here is the simple service definition to get things running.

version: "3"

networks:
  web:
    external: true
  internal:
    external: false

services:
  mc:
    image: itzg/minecraft-server:2021.1.0-multiarch-latest
    environment:
      EULA: "TRUE"
      VERSION: "1.16.5"
      ENABLE_AUTOPAUSE: "TRUE"
      OVERRIDE_SERVER_PROPERTIES: "TRUE"
      MAX_TICK_TIME: "-1"
      TYPE: "BUKKIT"
    labels:
      - traefik.tcp.routers.mc.rule=HostSNI(`*`)
      - traefik.port=25565
    networks:
      - web
    volumes:
      - /data/mc:/data

The docker-compose definition will run a Docker container using the latest multiarch image (which will run on ARM devices). When starting, the container will prepare and run a Minecraft 1.16.5 server. It will also use Bukkit and enable auto pause. The game server does not tick over when there are no players connected.

Traefik Configuration

In the docker-compose definition above, you might have noticed the container labels. The labels prefixed with traefik are used to inform Traefik of how to route network traffic.
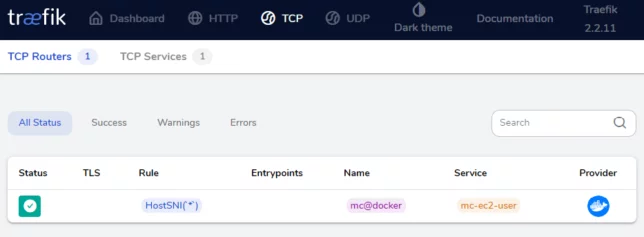
the cheap minecraft server uses a Traefik TCP router with HostSNI *
The TCP router using HostSNI on *

In our case, TCP connections are required on port 25565 and HostSNI is used to route those coming in for * (all hosts). The TCP connections on port 25565 go to Traefik, and based on this rule, directed to the Minecraft container.

There is one limitation to be aware of here, and that is that you can only use HostSNI with * for connections that do not use TLS. This is because Server Name Indication (SNI) is an extension of the TLS protocol.

I don’t believe Minecraft supports TLS in any case though. It just means that you won’t be able to have more than one Minecraft server container using the same port running on the single Docker host.

Finishing Off Configuration

Lastly, you might want to point a convenient Host record (A record) to your AWS EC2 Elastic IP address. For example: yourmcserver.example.com -> 1.2.3.4.

All being well, you should now be able to find and connect to your server.
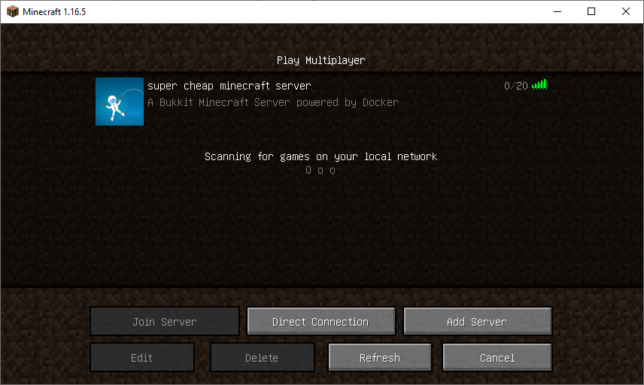
minecraft server listing

Multipurpose FreeNAS Server Build

multipurpose freenas server build

There is something magical about building your own infrastructure from scratch. And when I say scratch, I mean using bare metal. This is a run through of my multipurpose FreeNAS server build process.

After scratching the itch recently with my Raspberry Pi Kubernetes Cluster, I got a hankering to do it again, and this build was soon in the works.

Part of my motivation came from my desire to reduce our reliance on cloud technology at home. Don’t get me wrong, I am an advocate for using the cloud where it makes sense. My day job revolves around designing and managing various clients’ cloud infrastructure.

At home, this was more about taking control of our own data.

I’ll skip to the juicy specifications part if you would like to know what hardware I used right away.

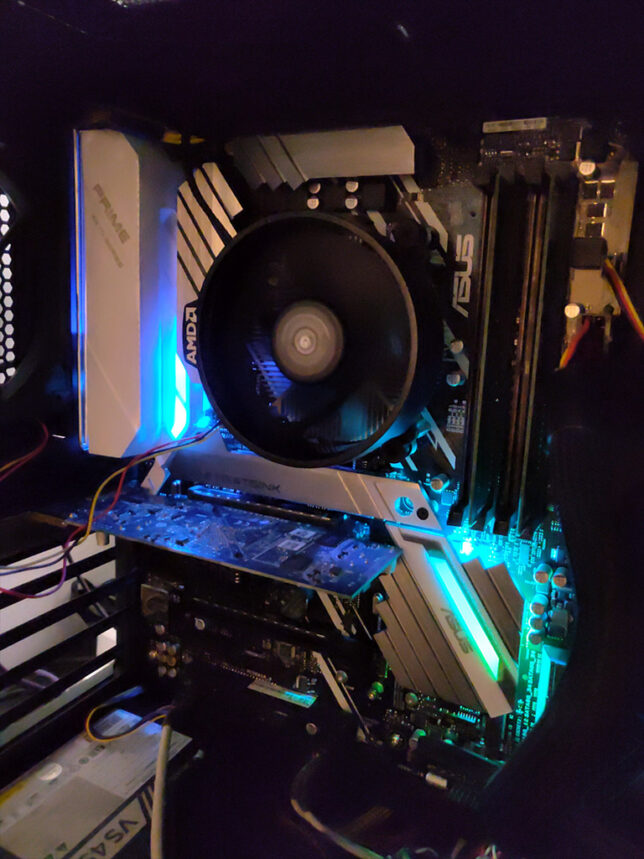
The intial hardware
Note: I got this Gigabyte B450 motherboard, but soon found out it did not support ECC.

Final specifications:

These are the final specifications I decided on. Scroll down to see the details about each area.

The Goals

The final home server build would need to meet many requirements:

  • It should provide a resilient, large shared storage pool for network file storage across multiple Windows PCs at home.
  • Support NFS storage for sharing persistent volumes to my Raspberry Pi Kubernetes Cluster.
  • It should be able to run Plex for home and remote media streaming.
  • It must be able to run Nextcloud for home and remote mobile file storage.
  • Run services in Virtual Machines, Jails, or Docker containers. For example, I like to run Pi-hole as a DNS server for all my home equipment and devices.

The Decision Process

I started out my search looking at two products. Unraid and FreeNAS.

I have had experience running FreeNAS in the past for home lab setups. I never really used it seriously with the goal of making it reliable though.

This time around, all my files would be at stake, so I did a fair bit of research into the features and offerings of both products.

Unraid performed quite well for me. But, what pushed me away from it was the fact that it is a paid for, closed source, commercial product.

Unraid does make it super easy to bundle storage together and expand that storage in future if need be. However FreeNAS’ use of ZFS and it’s various other features were what won me over.

The Build Details

Having settled on FreeNAS, I went about researching which hardware I would need. My goal here was to not spend too much money, but at the same time not cheap out and compromise on reliability.

CPU, Motherboard, RAM

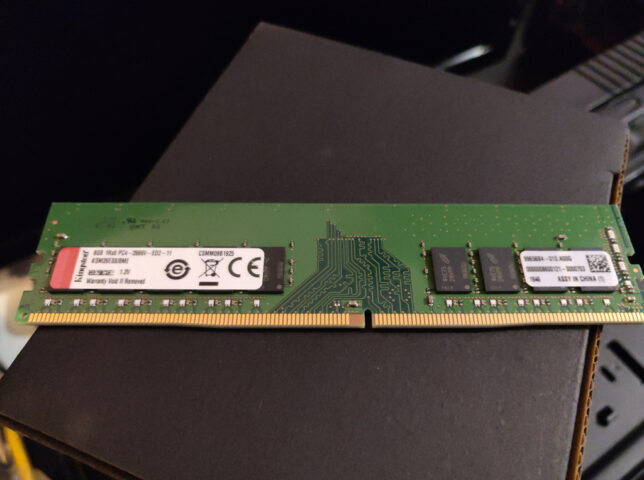
ECC (Error Checking and Correction) RAM is very important for ZFS, so this is basically what my build hinged on.

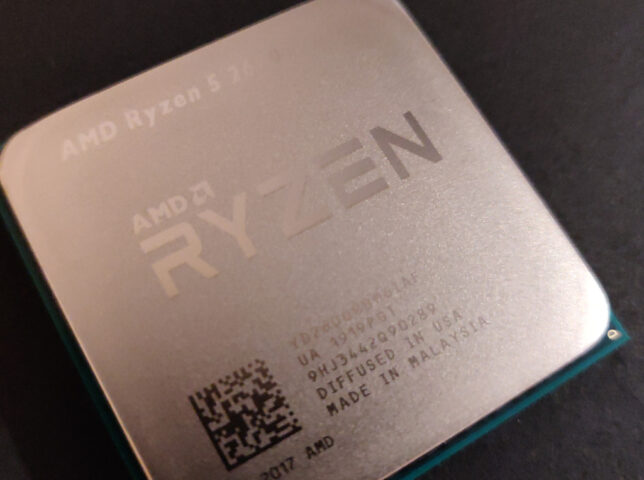
I found that AMD Ryzen CPUs support ECC, and so do most Ryzen compatible motherboards.

Importantly, in my research I found that Ryzen APU CPUs do not support ECC. Make sure you do not get an APU if ECC is important to you.

Additionally, many others report much better stability running FreeNAS on AMD Ryzen Generation 2 chips and above. With this in mind, I decided I would use at least an AMD Ryzen 2xxx CPU.

On the ECC topic, I only found evidence of single bit error correction working on AMD Ryzen systems.

I also made an initial mistake here in my build buying a Gigabyte B450M DS3H motherboard. The product specs seem to indicate that it supports ECC, and so did a review I found on Anandtech. In reality the Gigabyte board does not support the ECC feature. Rather it ‘supports’ ECC memory by allowing the system to boot with ECC RAM installed, but you don’t get the actual error checking and correction!

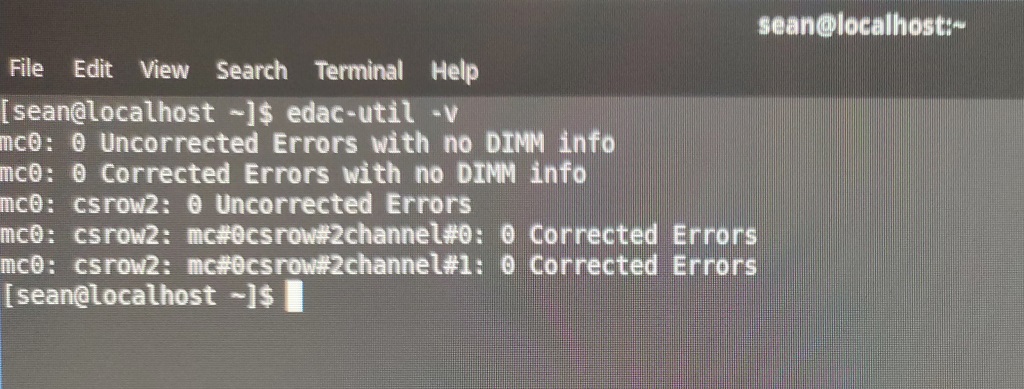
I figured this out after booting it up with Fedora Rawhide as well as a couple of uBuntu Server distributions and running the edac-utils package. In all cases edac-utils failed to find ECC support / or any memory controller.

checking ECC support with edac-utils
Checking ECC support with edac-utils

The Asus board I settled on supports ECC and edac-utils confirmed this.

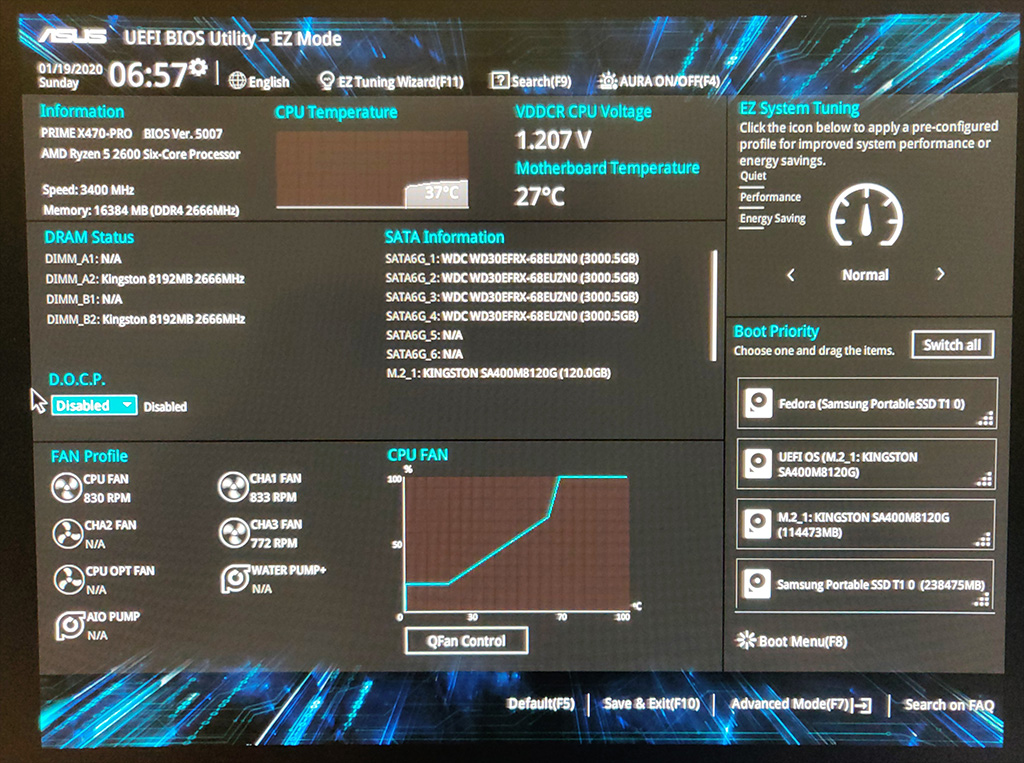
The motherboard also has an excellent EFI BIOS. I found it easy to get to the ECC and Virtualization settings.

the Asus Prime X470-Pro EFI BIOS

Storage

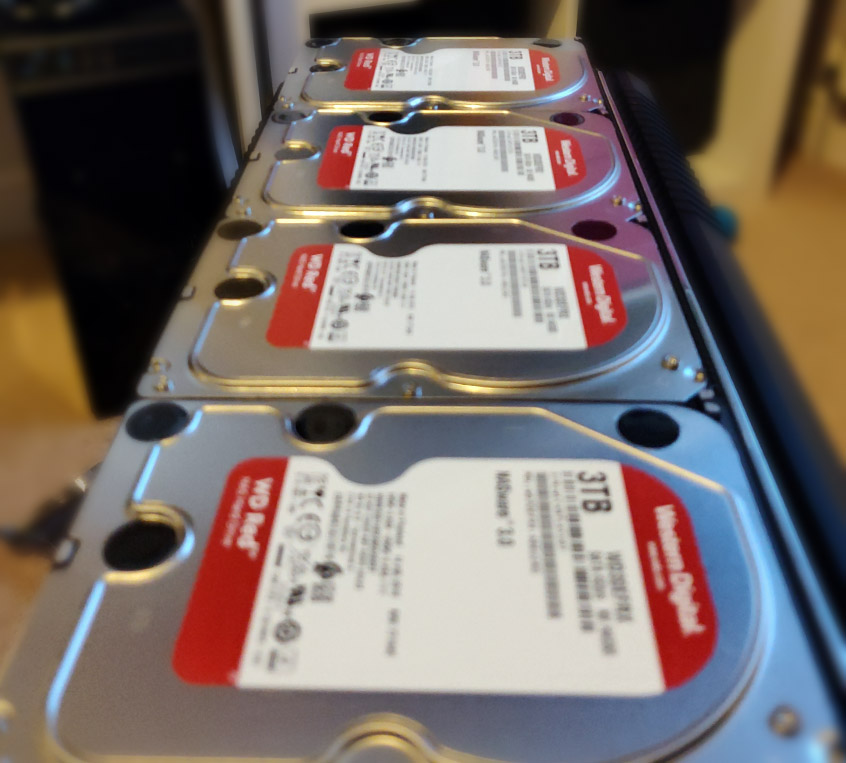
I used 4 x Western Digital 3TB Red hard drives for the RAIDZ1 main storage pool.

Western Digital 3TB Red hard drives

The SSD storage pool consists of 2 x Crucial MX500 250GB SSD SATA drives in a mirror configuration. This configuration is for running Virtual Machines and the NFS storage for my Kubernetes cluster.

Graphics Card

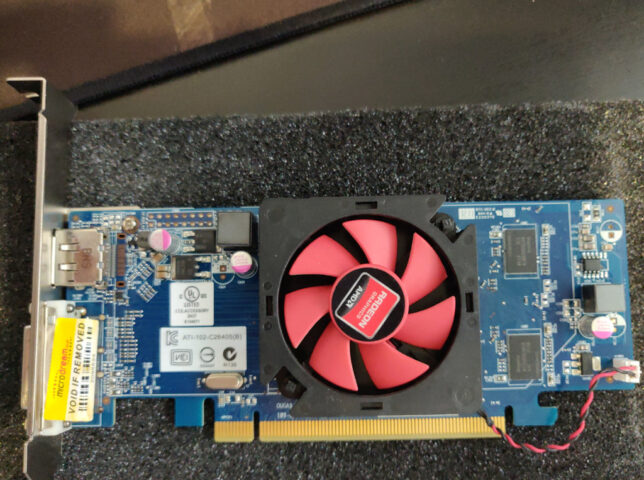
The crossing out of APUs also meant I would need a discrete graphic card for console / direct access, and to install the OS initially. I settled on a cheap PCI Express Graphics card off Ebay for this.

A cheap AMD Radeon HD 6450 1GB DVI DisplayPort PCI-Express Graphics Card I used for the FreeNAS build.

Having chosen a beefy six core Ryzen 2600 CPU, I decided I didn’t need to get a fancy graphics card for live media encoding. (Plex does much better with this). If media encoding speed and efficiency is important to you, then consider something like an nVIDIA or AMD card.

For me, the six core CPU does a fine job at encoding media for home and remote streaming over Plex.

Network

I wanted to use this system to server file storage for my home PCs and equipment. Besides this, I also wanted to export and share storage to my Raspberry Pi Kubernetes cluster, which runs on it’s own, dedicated network.

The simple solution for me here was multihoming the server onto the two networks. So I would need two network interface cards, with at least 1Gbit/s capability.

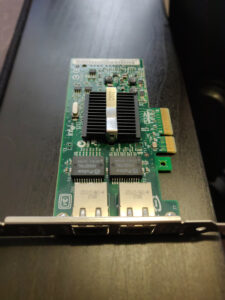
The motherboard already has an Intel NIC onboard, so I added two more ports with an Intel Pro Dual Port Gigabit PCI Express x4 card.

Intel dual port NIC

Configuration Highlights

I’ll detail the highlights of my configuration for each service the multipurpose FreeNAS Server build hosts.

Main System Setup

The boot device is the 120GB M.2 nVME SSD. I installed FreeNAS 11.3 using a bootable USB drive.

FreeNAS Configuration

I created two Storage Pools. Both are encrypted. Besides the obvious protection encryption provides, this also makes it easier to recycle drives later on if I need to.

FreeNAS storage pool configuration
  • Storage Pool 1
    • 4 x Western Digital Red 3TB drives, configured with RAIDZ1. (1 disk’s worth of storage is effectively lost for parity, giving roughly 8-9 TB of usable space).
    • Deduplication turned off
    • Compression enabled
  • Storage Pool 2
    • 2 x Crucial MX500 250GB SSD drives, configured in a Mirror (1 disk mirrors the other, providing a backup if one fails).
    • Deduplication turned off
    • Compression enabled

The network is set to use the onboard NIC to connect to my main home LAN. One of the ports on the Intel dual port NIC connects to my Raspberry Pi Kubernetes Cluster network and assigned a static IP address on that network.

Windows Shares

My home network’s storage shares are simple Windows SMB Shares.

I created a dedicated user in FreeNAS which I configured in the SMB share configuration ACLs to give access.

Windows machines then simply mount the network location / path as mapped drives.

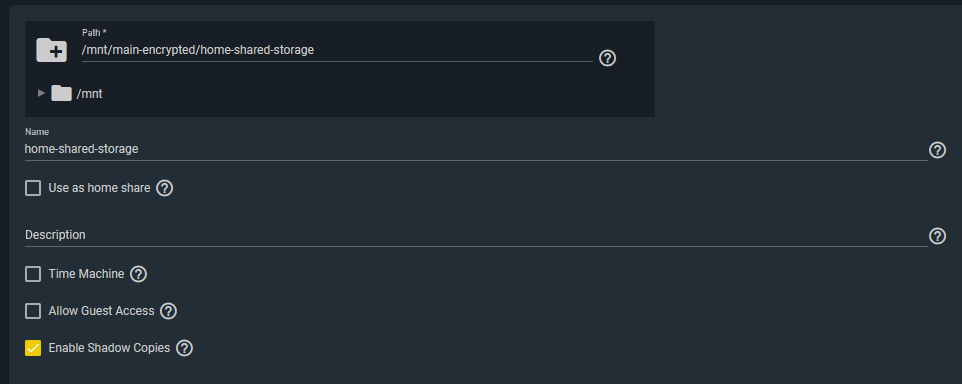
I also enabled Shadow Copies. FreeNAS supports this to enable Windows to use Shadow Copies.

FreeNAS Windows SMB share

Pi-hole Configuration

I setup a dedicated uBuntu Server 18.04 LTS Virtual Machine using FreeNAS’ built-in VM support (bhyve). Before doing this, I enabled virtualization support in the motherboard BIOS settings. (SVM Mode = Enabled).

I used the standard installation method for Pi-Hole. I made sure the VM was using a static IP address and was bridged to my home network. Then I reconfigured my home DHCP server to dish out the Pi-hole’s IP address as the primary DNS server to all clients.

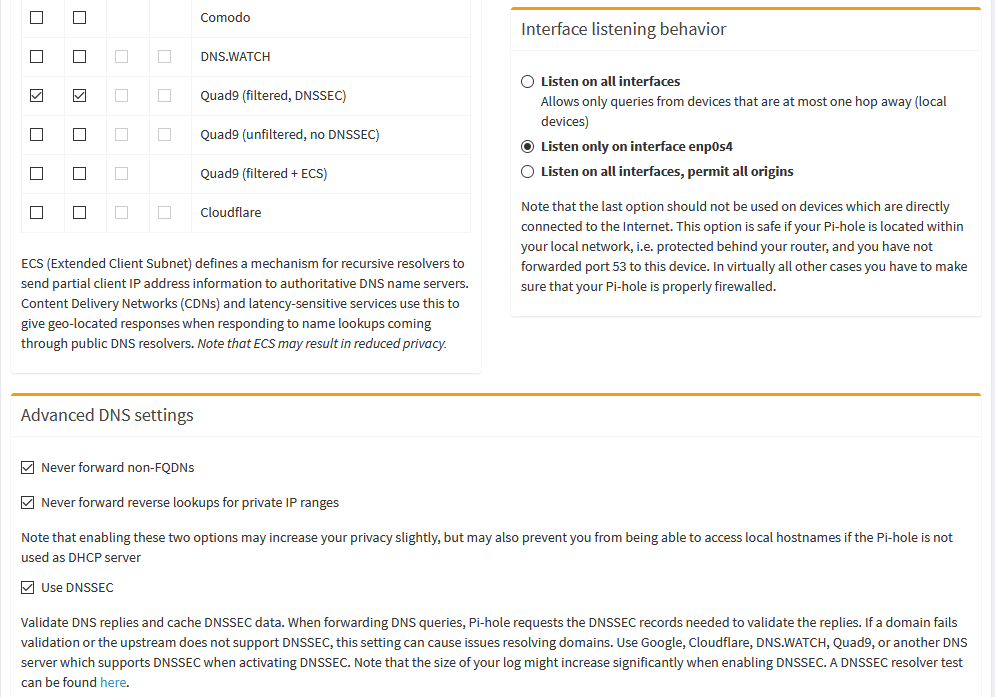
For the DNS upstream servers that Pi-hole uses, I chose to use the Quad9 (filtered, DNSSEC) ones, and enabled DNSSEC.

pi-hole upstream DNS configuration with DNSSEC

NextCloud

NextCloud has a readily available plugin for FreeNAS. However, out of the box you get no SSL. You’ll need to setup your networking at home to allow remote access. Additionally, you’ll need to get an SSL certificate. I used Let’s Encrypt.

I detailed my full process in this blog post.

Plex

Plex was a simple setup. Simply install the Plex FreeNAS plugin from the main Plugins page and follow the wizard. It will install and configure a jail to run Plex.

To mount your media, you need to stop the Plex jail and edit it to add your media location on your storage. Here is an example of my mount point. It basically mounts the media directory I use to keep all my media into the Plex Jail’s filesystem.

Plex jail mount point

NFS Storage for Kubernetes

Lastly, I setup an NFS share / export for my Raspberry Pi Kubernetes Cluster to use for Persistent Volumes to attach to pods.

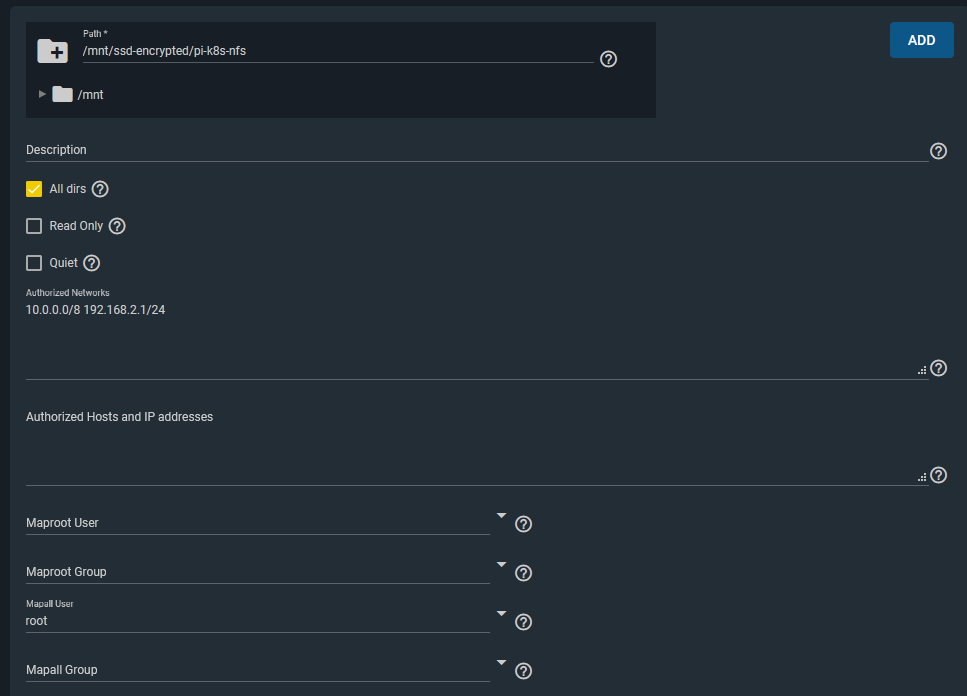
NFS shares for Kubernetes in FreeNAS

The key points here were that I allowed the two network ranges I wanted to have access to this storage from. (10.0.0.0/8 is my Kubernetes cluster network). I also configured a Mapall user of ‘root’, which allows the storage to be writeable when mounted by pods/containers in Kubernetes. (Or any other clients that mount this storage).

I was happy with this level of access for this particular NFS storage share from these two networks.

Next, I installed the NFS External-storage provisioner for Kubernetes on my Pi Cluster. I needed to use the ARM specific deployment manifest as Pi’s of course have ARM CPUs.

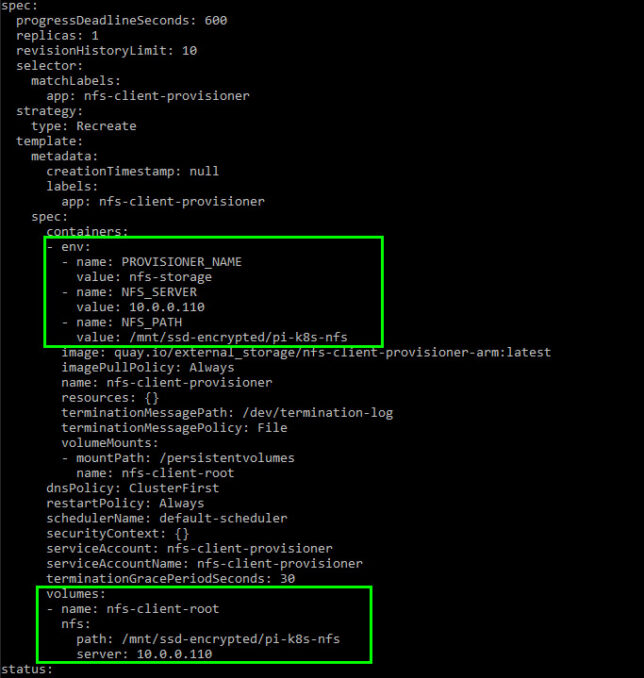
I modified the deployment manifest to point it to my FreeNAS machine’s IP address and NFS share path.

The kubernetes nfs client provisioner manifest configured for NFS storage provisioning.

With that done, pods can now request persistent storage with a Persistent Volume Claim (PVC). The NFS client provisioner will create a directory for the pod (named after the pod itself) on the NFS mount and mount that to your pod.

Final Thoughts

So far the multipurpose FreeNAS server build has been very stable. It has been happily serving our home media streaming, storage, and shared storage needs.

It’s also providing persistent storage for my Kubernetes lab environment which is great, as I prefer not to use the not-so-durable microSD cards on the Raspberry Pi’s themselves for storage.

The disk configuration size seems fine for our needs. At the moment we’re only using ~20% of the total storage, so there is plenty of room to grow.

I’m also happy with the ability to run custom VMs or Jails for additional services, though I might need to add another 16GB of ECC RAM in the future to support more as ZFS does well with plenty of memory.

Securing your Microsoft Exchange 2010 Server / services with an SSL Certificate

Exchange 2010 has definitely simplified the process of applying SSL certificates to your mail services such as Outlook Web Access/App and Exchange ActiveSync. No more muddling about with IIS is required and you can do everything via the Exchange Management Console (GUI) too. I’ll also list a cmdlet at the end for generating a CSR if you wish to go the Exchange Management Shell way.

Exchange Management Console steps:


  • Open the Management Console and from the summary / home tab click on “Manage databases”. Now on the list in the left of the Management Console, select “Server Configuration”, then in the list of Actions on the right look for “New Exchange Certificate” and select this.


  • A wizard will popup and you can begin setting up your new Certificate Signing Request (CSR). Fill in a Common / Friendly name for the certificate. I used the same name as would be used for the actual certificate itself so that I can easily identify it.


  • Continue the wizard. I won’t be using a wildcard certificate so I will leave the “Enable Wildcard Certificate” selection unchecked.


  • The next section allows you to select the services you want to use with your SSL / describe the Exchange configuration for the CSR that we are going to generate. Expand out the sections and you’ll see that some are pre-populated for you. Check over this information and tick any services that you want to use. I want this SSL certificate for Outlook Web App and Exchange ActiveSync for mobile devices, so I checked the options for “Outlook Web App is on the Internet” and “Exchange Active Sync is enabled”. In each of those cases, I entered the A name record for the services (The external name used to connect to the services) – i.e. mail.shogan.co.uk – this is important and it is what your SSL certificate will be securing, so double check that it is correct.


  • Continue by entering some administrative / contact details for your company, choosing a location to the save the CSR request file, then finishing the wizard off. Now, go to your SSL provider’s site and purchase a new SSL certificate. I am using a basic SSL123 certificate in this case from Thawte.


  • Go through the steps of purchasing the certificate, and you’ll get to a point where they ask you for the CSR – paste the exact text of your CSR generated in Exchange’s Management Console into the CSR text box on the website and get your certificate ordered. When it is approved and emailed back to you, save the .cer certificate file on your Exchange server.


  • Go back to the management console, select “Server Configuration”, select the certificate under the “Exchange Certificates” tab and in the Actions view on the side, select “Complete Pending Request”. Browse for the completed SSL certificate your certificate issuer sent you and finish by completing this wizard.


  • You now just need to highlight the certificate under “Exchange Certificates” once again, and under the “Actions” panel, click “Assign Services to Certificate”. In this wizard, select your relevant Exchange server name, then click next. On the next screen, select “Internet Information Services”, then “Next”. Check the summary page looks correct then finish the wizard.


Your SSL certificate should now be configured and ready for use. Browse to the URL of your Outlook Web App service via https. You should find that you don’t get a certificate warning, and clicking the security icon in your web browser to view the site certificate should show that it is valid and providing encryption.


Generate a CSR using the Exchange Management Shell.


You can also generate a CSR using the cmdlet below. Just substitute the relevant values with your own. Be sure you aren’t putting any incorrect values in when using this though as you don’t have a nice GUI to explain things to you as you do with the Exchange Management Shell.


Set-Content -path “C:\mail_shogan_co_uk” -Value (New-ExchangeCertificate -GenerateRequest -KeySize 2048 -SubjectName “c=gb, s=London, l=London, o=Shogan.tech, ou=IT, cn=mail.shogan.co.uk”  -PrivateKeyExportable $True)


The above cmdlet will save the CSR file to C:\mail_shogan_co_uk. You would then copy and paste the text of that file into your SSL certificate provider’s site as part of your SSL purchase process. The cmdlet uses some values that will need to be unique to your organisation – here are the value explanations of parts of the above cmdlet:


c = country code
s = city
l = province/state
o = organisation name
ou = organisational unit
cn = common name the SSL certificate is to be provided for

The cmdlet won’t give you any output if it works correctly, but you’ll be able to see the CSR in the Exchange Management Console if you refresh it at this stage.

That is basically it – the steps above should help you secure some Exchange services such as OWA or ActiveSync with an SSL certificate from a trusted authority.


SQL Server 2008 – Change Tracking

I have recently started studying for some Microsoft SQL Server exams (in particular 70-432). In order to reinforce some of the information, I thought it would be a good idea to blog about some of the features of SQL Server 2008 I learn about. This post will be on the built in mechanism for Change Tracking.

Change tracking is a relatively lightweight functionality that associates a version with each row in a table which has had CHANGE_TRACKING enabled on it.

By using this mechanism, it should be easy to read the version number when data is read from the database, and when it comes to writing data back, this version number can be checked to see if it has changed or not, allowing your application to determine whether it is safe to write data back or not, depending on how you handle the situation.

Once the CHANGE_TRACKING option has been enabled for a database, you can choose which tables in the database change tracking information is kept for.

Two other options can also be used. Namely CHANGE_RETENTION, which allows you to specify how long change tracking information should be captured for, and AUTO_CLEANUP, which allows change tracking information to automatically be cleaned up.

If anyone has any extra information or can clarify any of the above points, then please feel free to add a comment 🙂

Manage VMware Server 2.0 with Virtual Infrastructure Client instead of the Web UI

I personally find the Web UI a little slow for managing VMware Server 2.0 on my home lab and also prefer to use an interface more like the one I use at work when managing our vCenter and ESX hosts. So here is how to use the VMware Infrastructure Client to manage VMware Server 2.0. For this to work, ensure you use an older version of the Infrastructure Client. The one that comes with ESX 3.0 / 3.5 hosts seems to work well. The newer vSphere Client doesn’t work and gives you an error message when you try to login.

1. Grab a copy of the Virtual Infrastructure client and install it on the machine you are accessing your VMware Server Host from. I had trouble finding a download link, so I needed to pull it off an old ESX 3.5 host.

2. Install the client, then run it. At the login prompt enter the full web UI address of your VMware Server Host in the IP Address / Name section. So if you were trying locally on your host, you could enter https://localhost:8333 or from a remote machine use the IP address in the format https://x.x.x.x:8333

3. Enter your user name and password and hit “Login”. This should load up your VMware Server 2.0 server in the infrastructure client. Enjoy!